Creating a Bulletin Widget in Wavity
- Widgets in Wavity are interactive components or visual elements within a user interface (UI) that provide users with specific functionalities, data visualizations, or quick access to information and actions.
- Widgets can be added/edited to interfaces/dashboards in Wavity platform. This feature allows you to customize dashboards based on your requirements. For more details on creation of dashboards, please refer the following link: How To Create Role-Based Interface/Dashboards/Layouts | Wavity
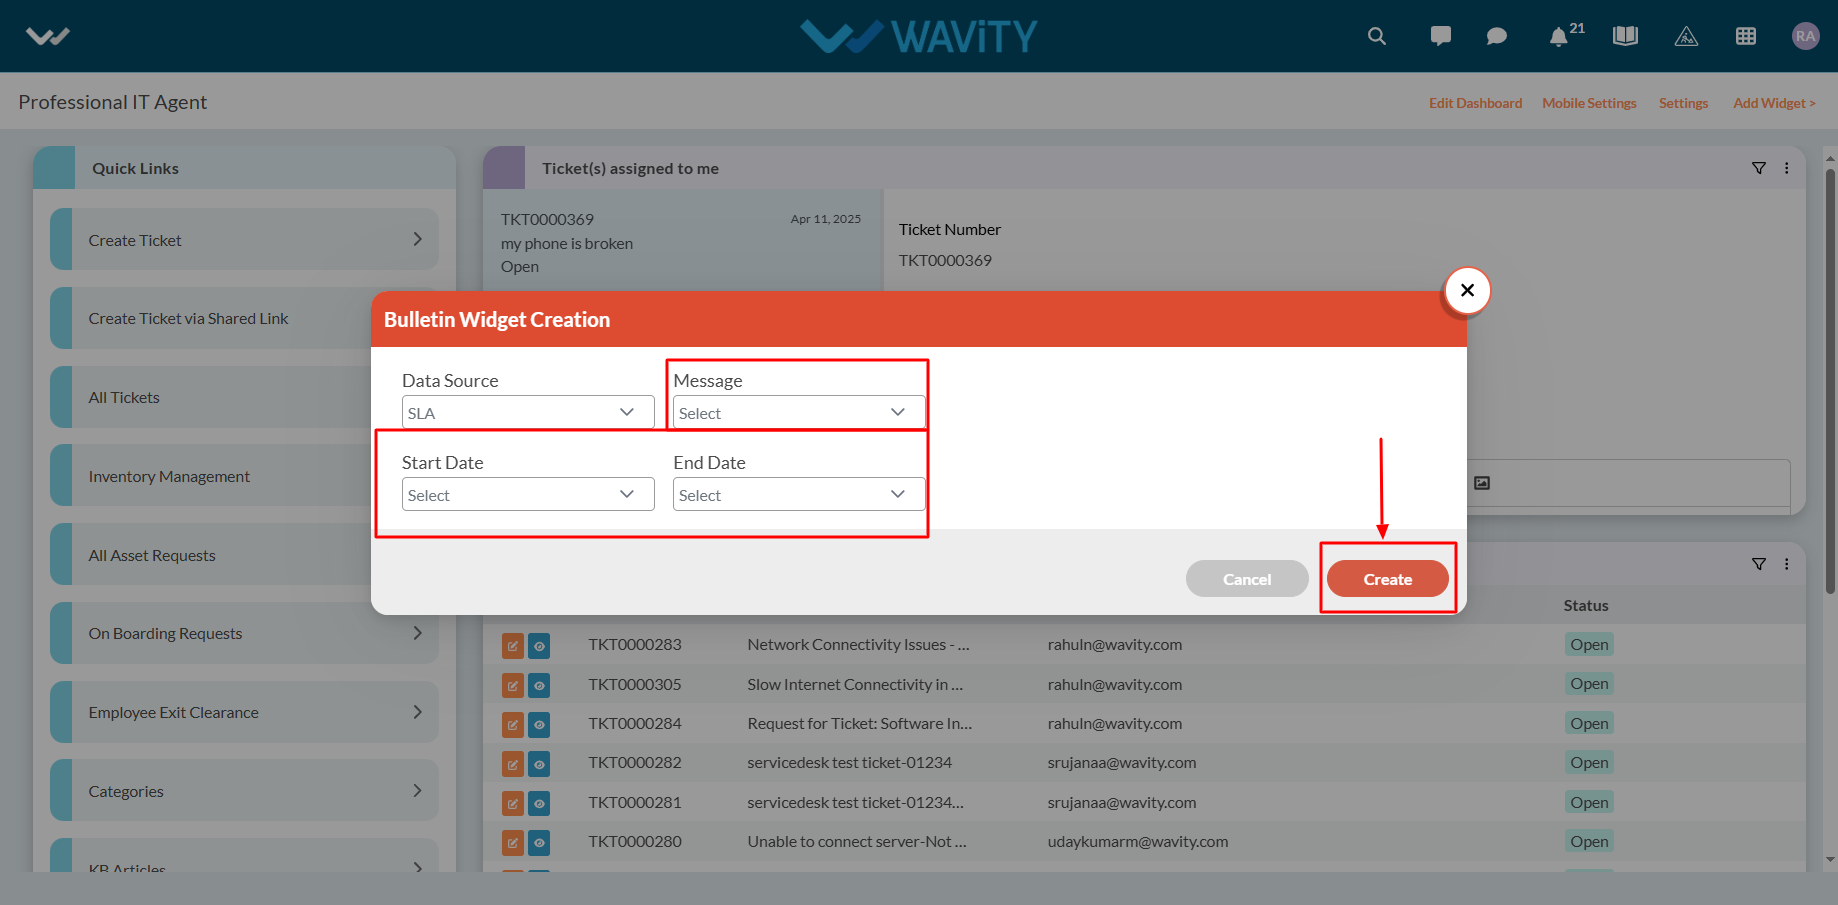
- A Bulletin Widget displays time-bound messages—similar to announcements—within the interface. These messages scroll across the top of the screen and are shown based on their configured start and end dates. It’s an ideal tool for sharing important updates or alerts with users.
- Only an Admin of your organization has the access to create or update widgets in Wavity.
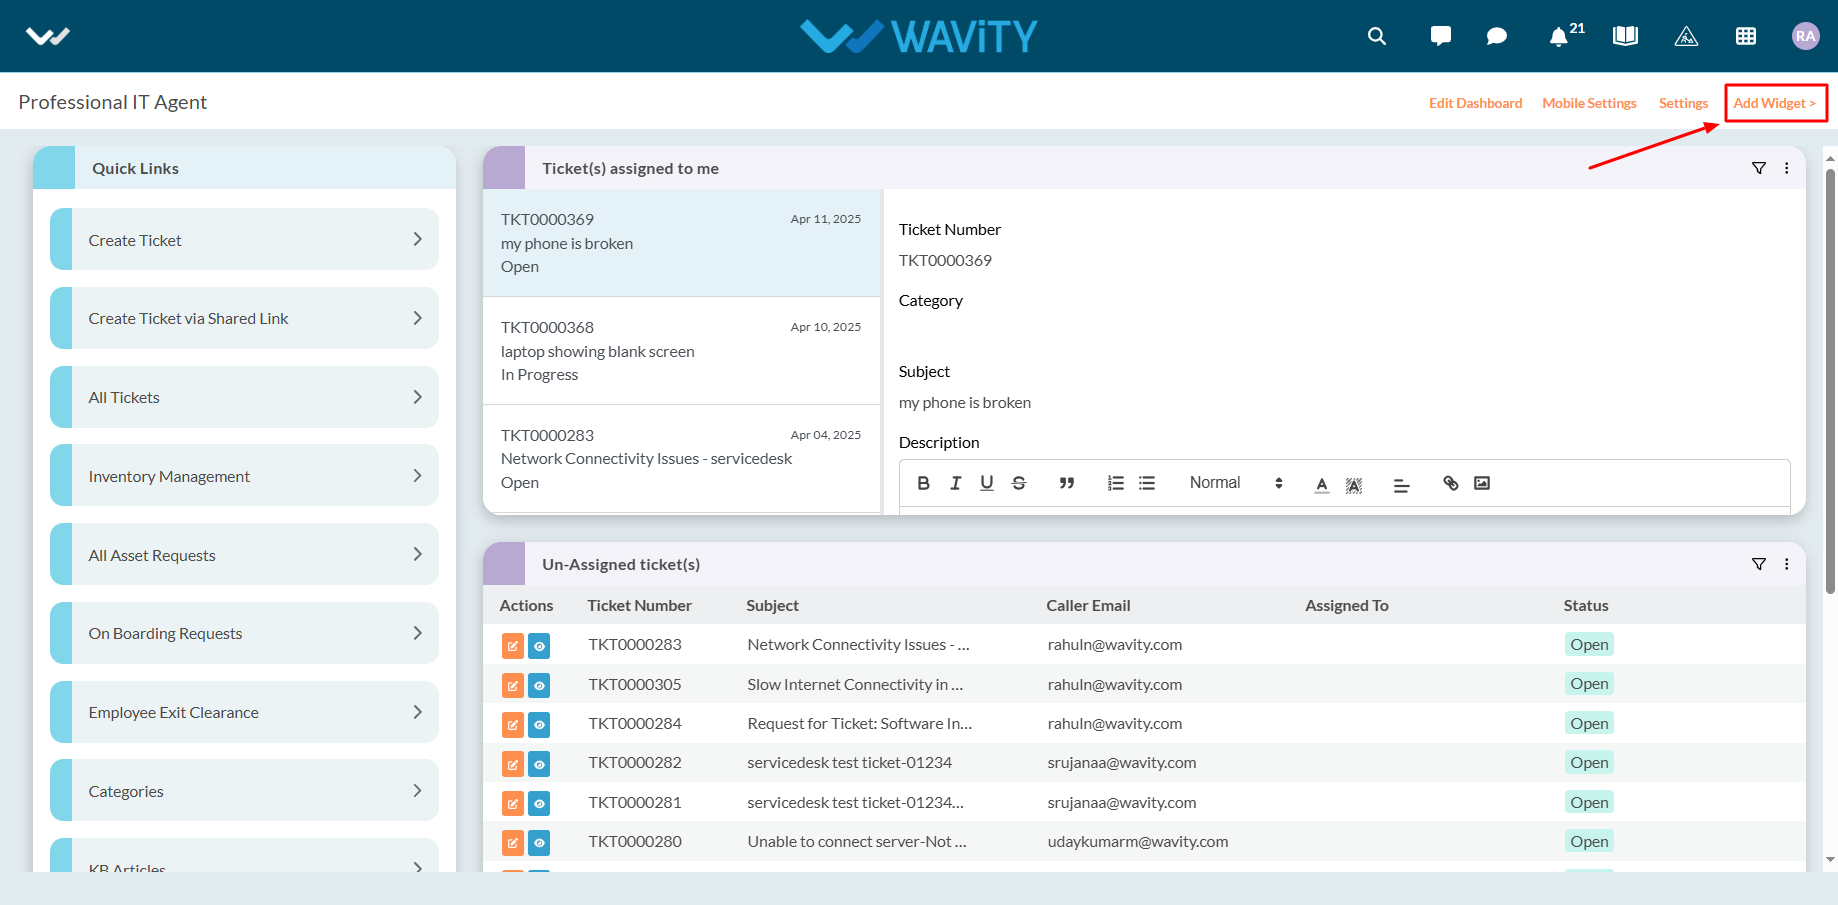
- In your interface, click “Add Widget”.
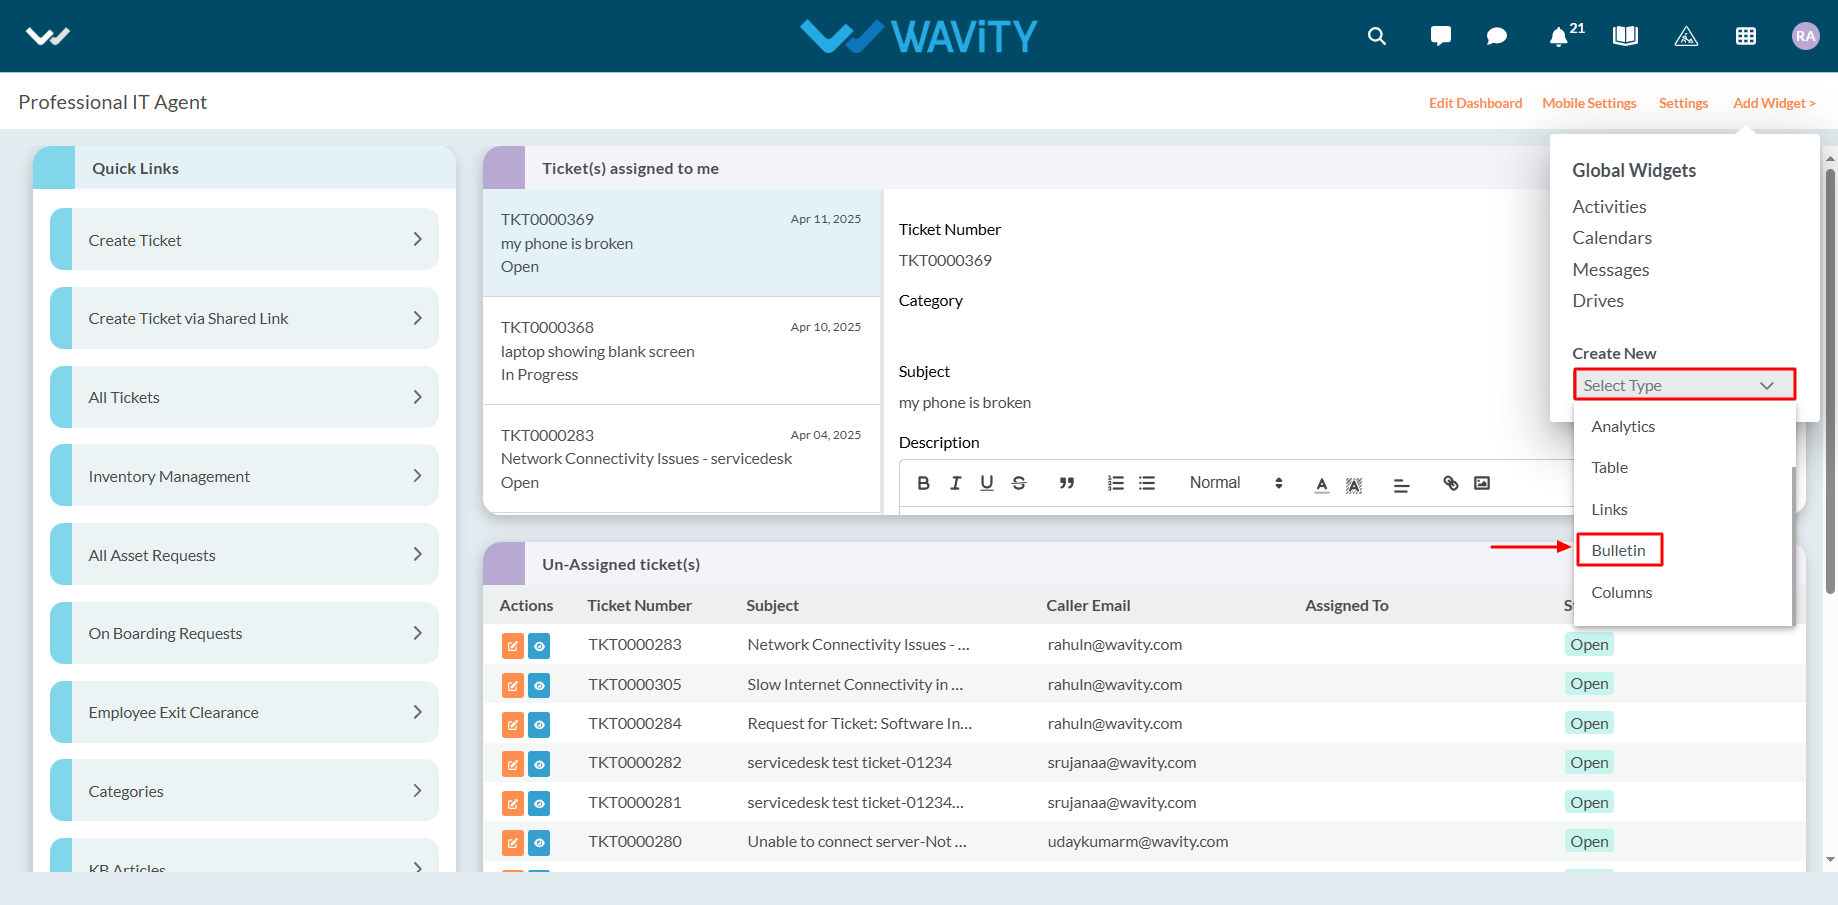
- From the Create New dropdown, select “Bulletin”.
- Choose the Application that contains the bulletin messages. These messages must include a Start Date and End Date to define the display period.

- These messages must include a Start Date and End Date to define the display period.
- Once all configurations are set: Click Create to generate a new Bulletin Widget or Click Save to update an existing one.
- After saving, the Bulletin Widget will scroll the selected messages at the top of the interface during the specified time frame—just like a news ticker or announcement bar.