Standard Process – ITSM (Ticketing/Helpdesk) Solution
Description: Wavity offers a platform solution that can be used to resolve tickets quickly with major features such as Modern interface, Role based Dashboards, SLA Management, Built In collaboration, Mobile friendly, Automated workflows, Change & Problem management, Activity logging, On demand analytics & reports, RPA Powered Application etc.
Dashboards: Wavity provides 2 Role based dashboards as part of standard solution for ITSM (Ticketing/Helpdesk) Solution. The 2 Dashboards are 1) End Users, 2) Agent/IT Admin.

Add User and Groups:
- In the general settings, Add users with details like name, email address and in the groups add users into their respective groups.
- Dashboards can be created by using groups.
- Access levels in the applications can be provided by giving the group names in the different sections.
- Please refer below link: Getting Started Archives – Wavity
End Users:
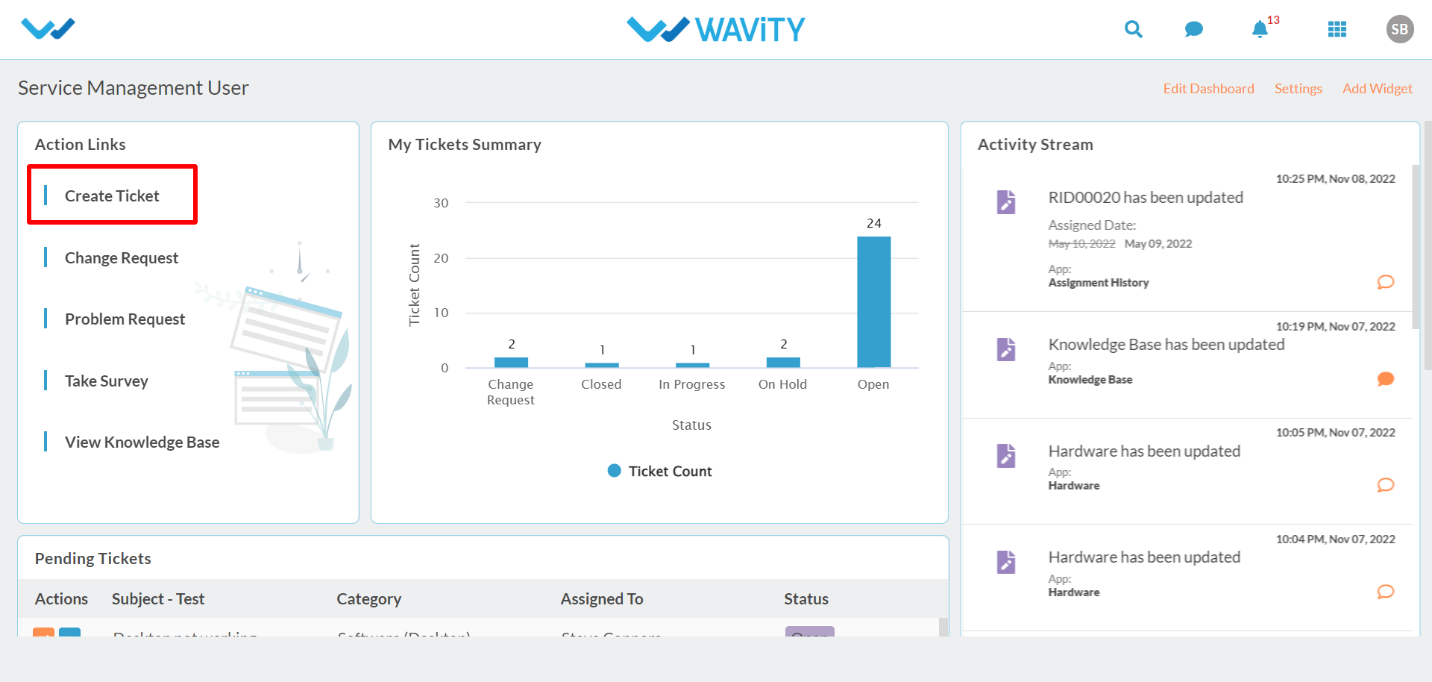
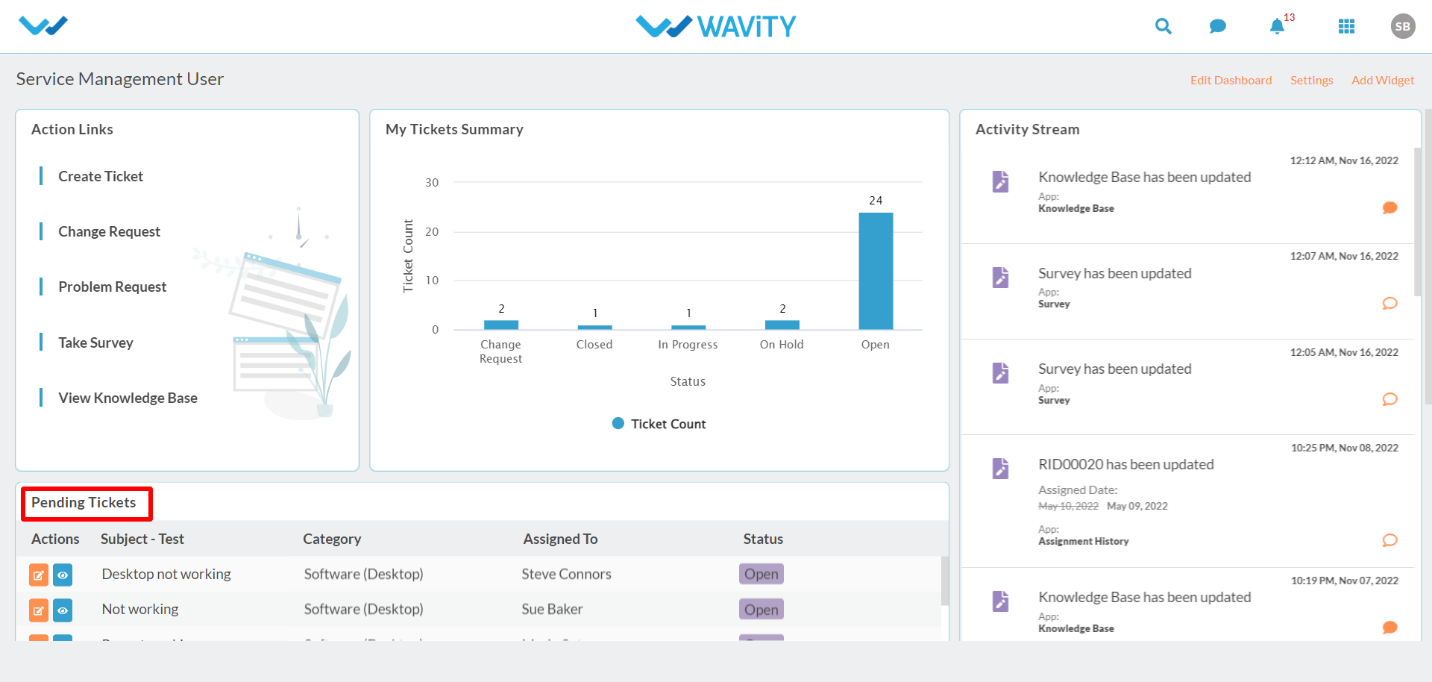
- Login to your Wavity account. After logging in, User dashboard will be displayed as shown below. Dashboard can be edited by clicking on ‘Edit Dashboard’. User dashboard contains the following major functions:
- Quick/Action Links: Quick Links helps to navigate through the platform.
- Analytics & Reports: Analytics and reports based on role and data in the platform.
- Activity Stream: It will display all the activities carried out in the platform.
- End user can create tickets in Wavity platform in 3 ways: 1) PC version, 2) ‘Wavity’ mobile app, & 3) Create Tickets through email.
- To create a ticket, End user can click on “Create Ticket’ from User dashboard as shown below.
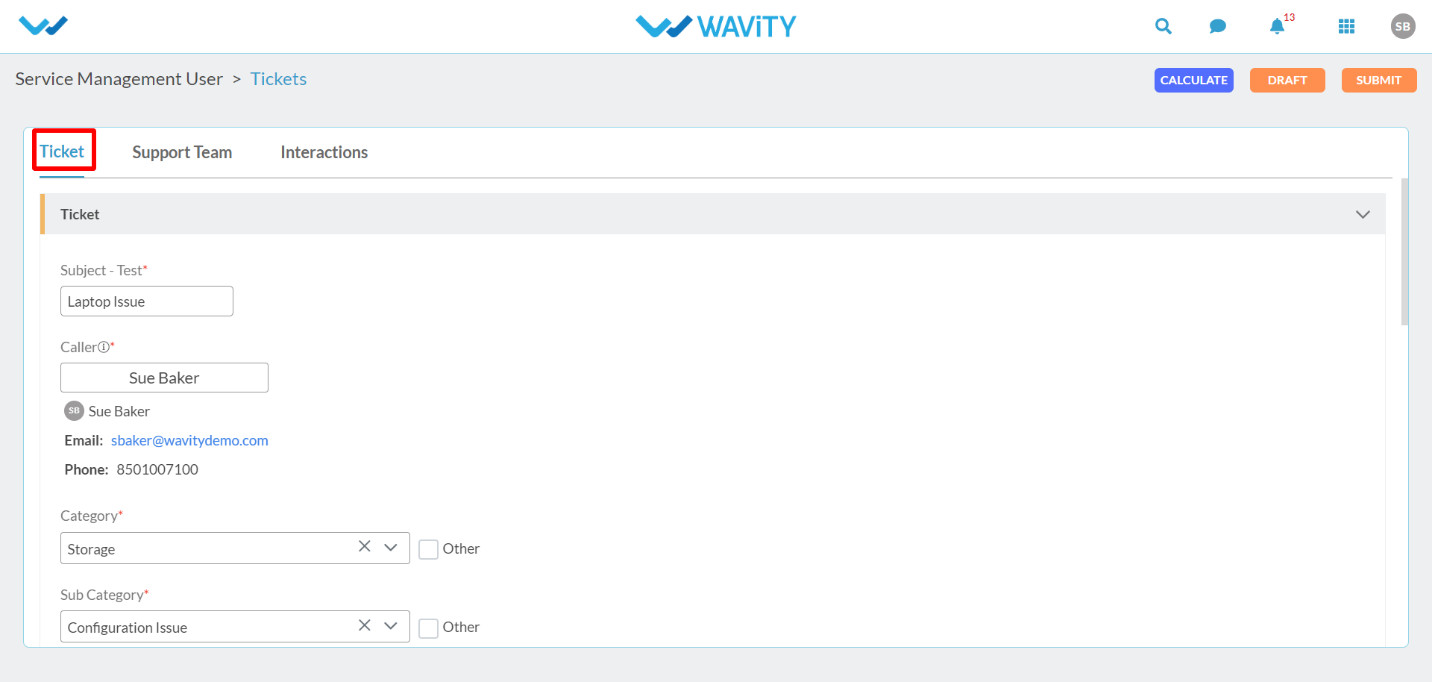
- User can mention the Subject of the issue. Category can be mentioned whether it is software, storage, server related, printing, security etc. Sub-Category will contain the value based on category that user has selected.
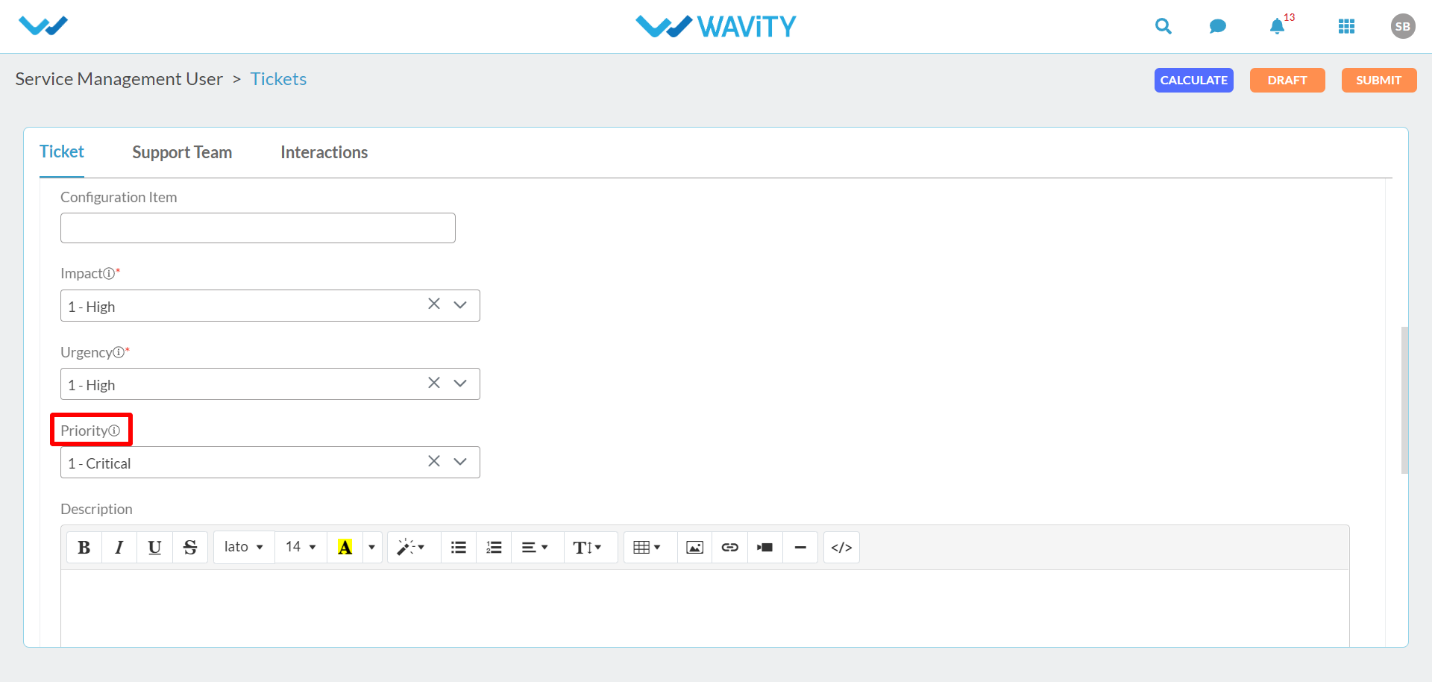
- User can mention the Impact and Urgency level of the Issue. Based on the values of Impact and Urgency, System will auto generate the priority level of the issue.
- In Description text box, User can mention the issue in detail. User can attach pictures, link or videos in the description box.
- User can link a previously raised similar ticket for reference of the IT Agent. Click on the below link.
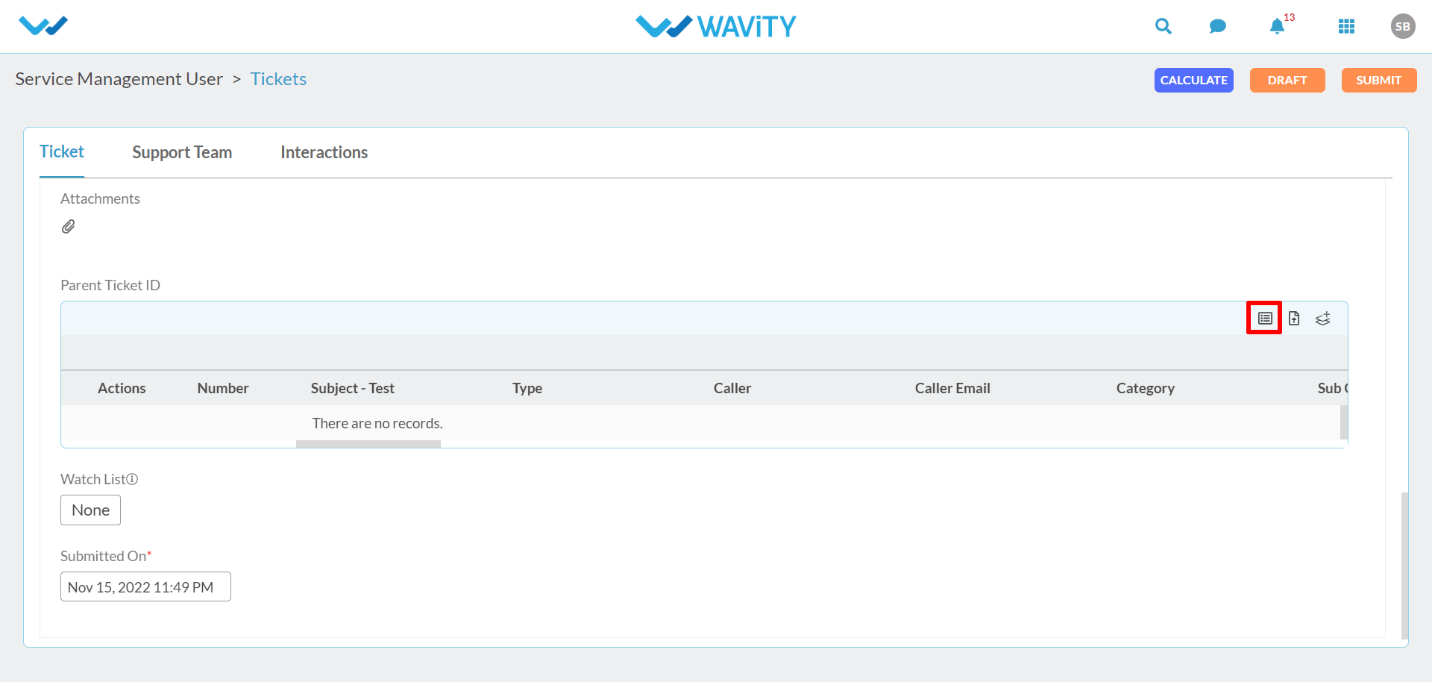
- Click on the ‘Checkbox’ to refer a parent ticket.

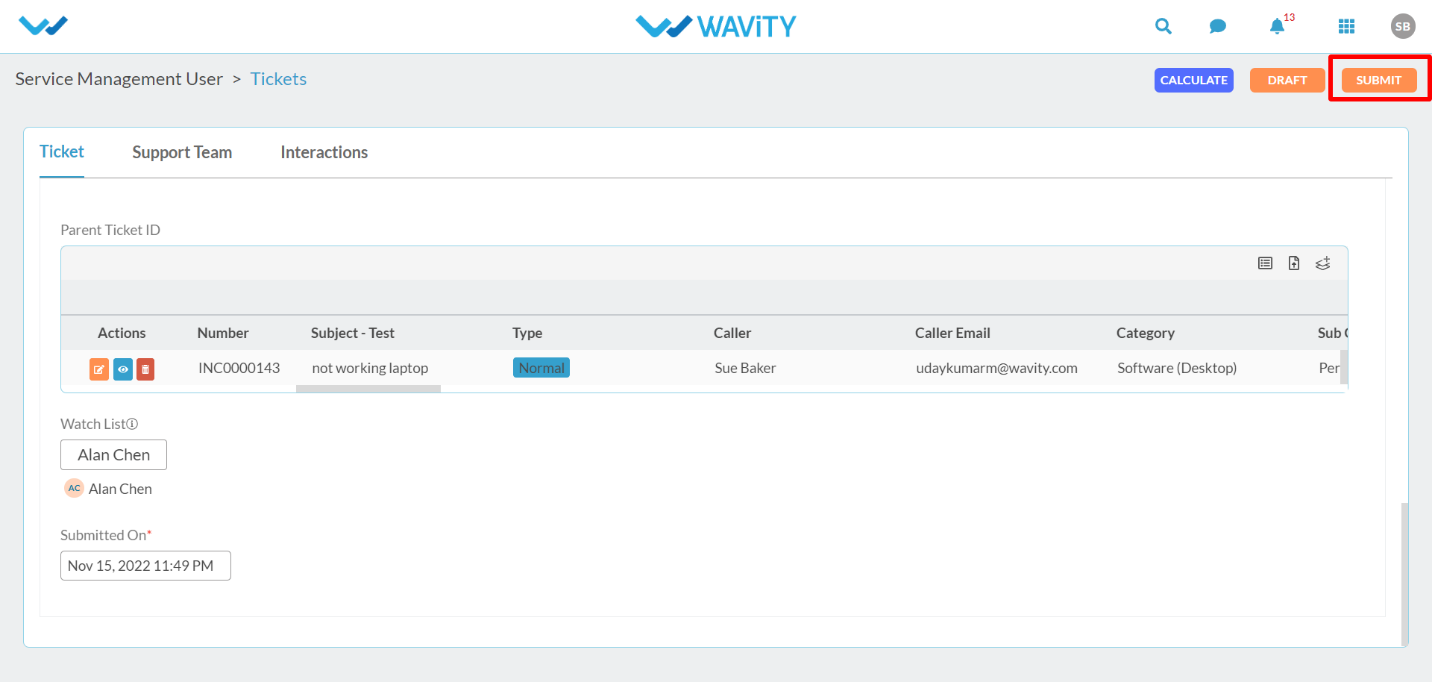
- User can mention any other users in the platform to be in the Watch List. All the users added in the Watch list will be also notified upon any updates related to the ticket.
- After filling all details, User can click on “Submit” button as shown below to create a Ticket request.
- Upon Ticket creation, An agent will be assigned to resolve the ticket. Agent shall be assigned based on round robin method, category-based method or any other methods. Both User and Agent will be notified on creation of the ticket.
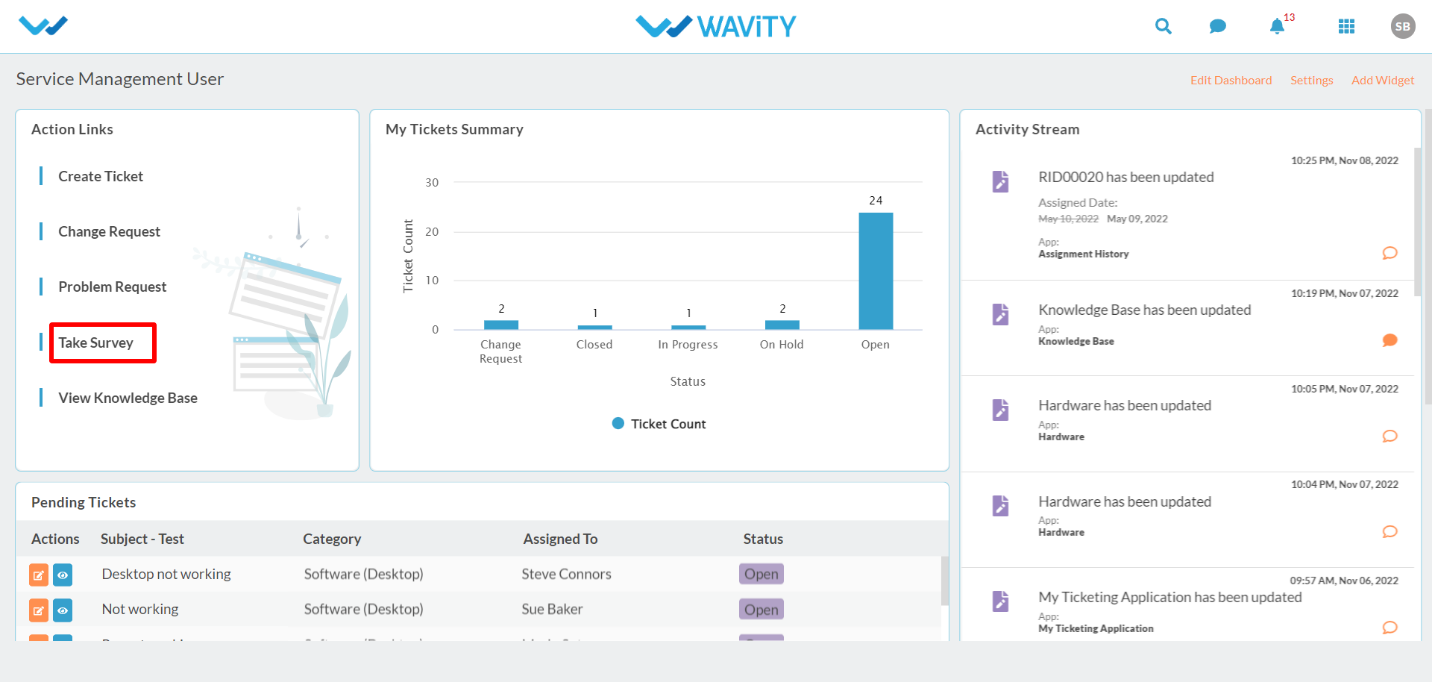
- User can also rate and give feedback once the ticket is resolved. Click on “Take Survey” from User dashboard.
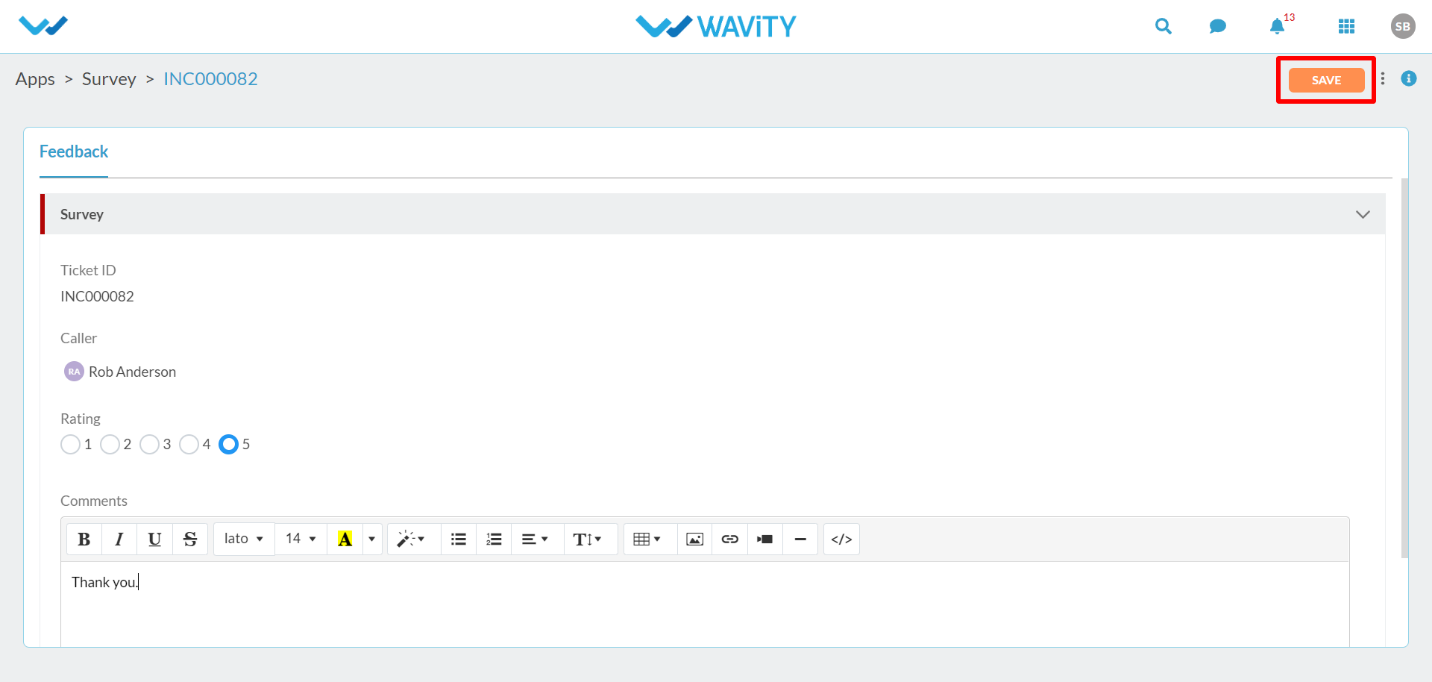
- Click on “Blue Icon” as shown below to give rating for a ticket.

- After filling in all the information, User can click on “Save” button to record the rating on an individual ticket.
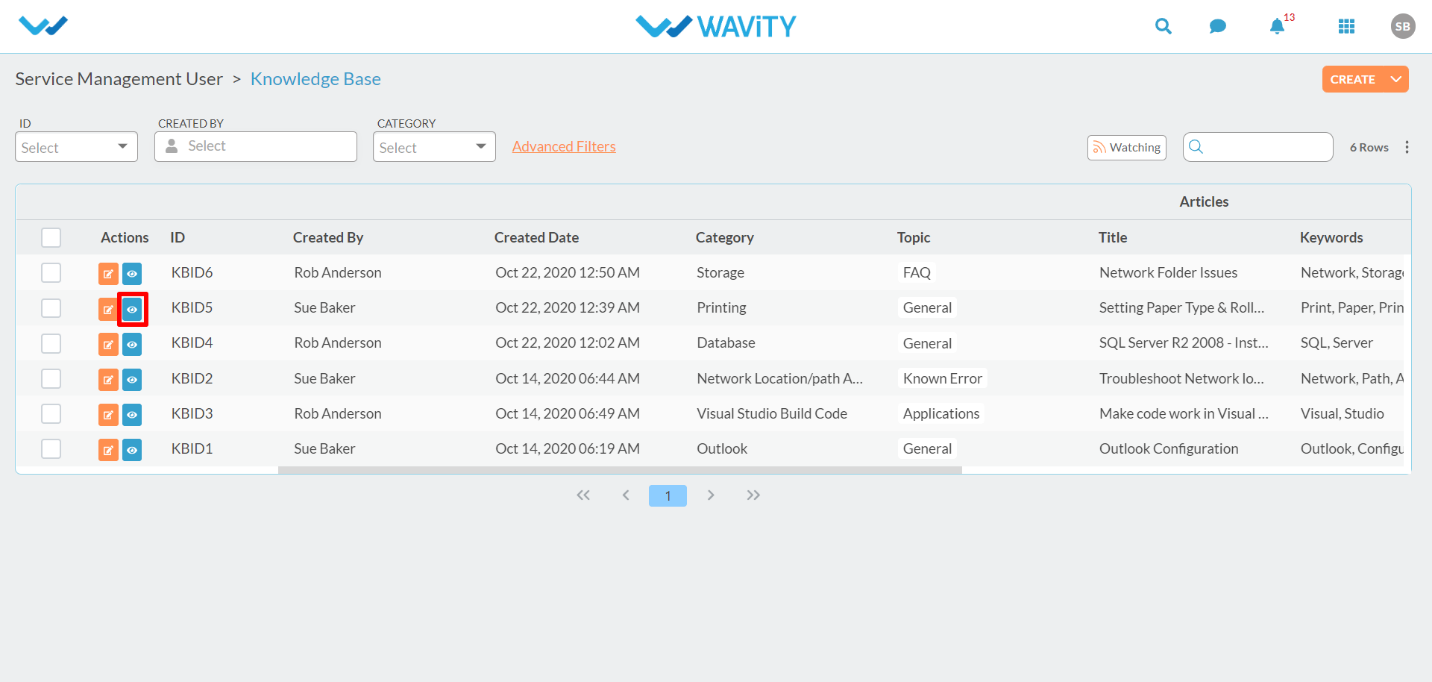
- User will also be able to view all the Articles from the Knowledge base. Click on “View Knowledge Base” from User dashboard.

- Click on “Blue Icon” to view the details.
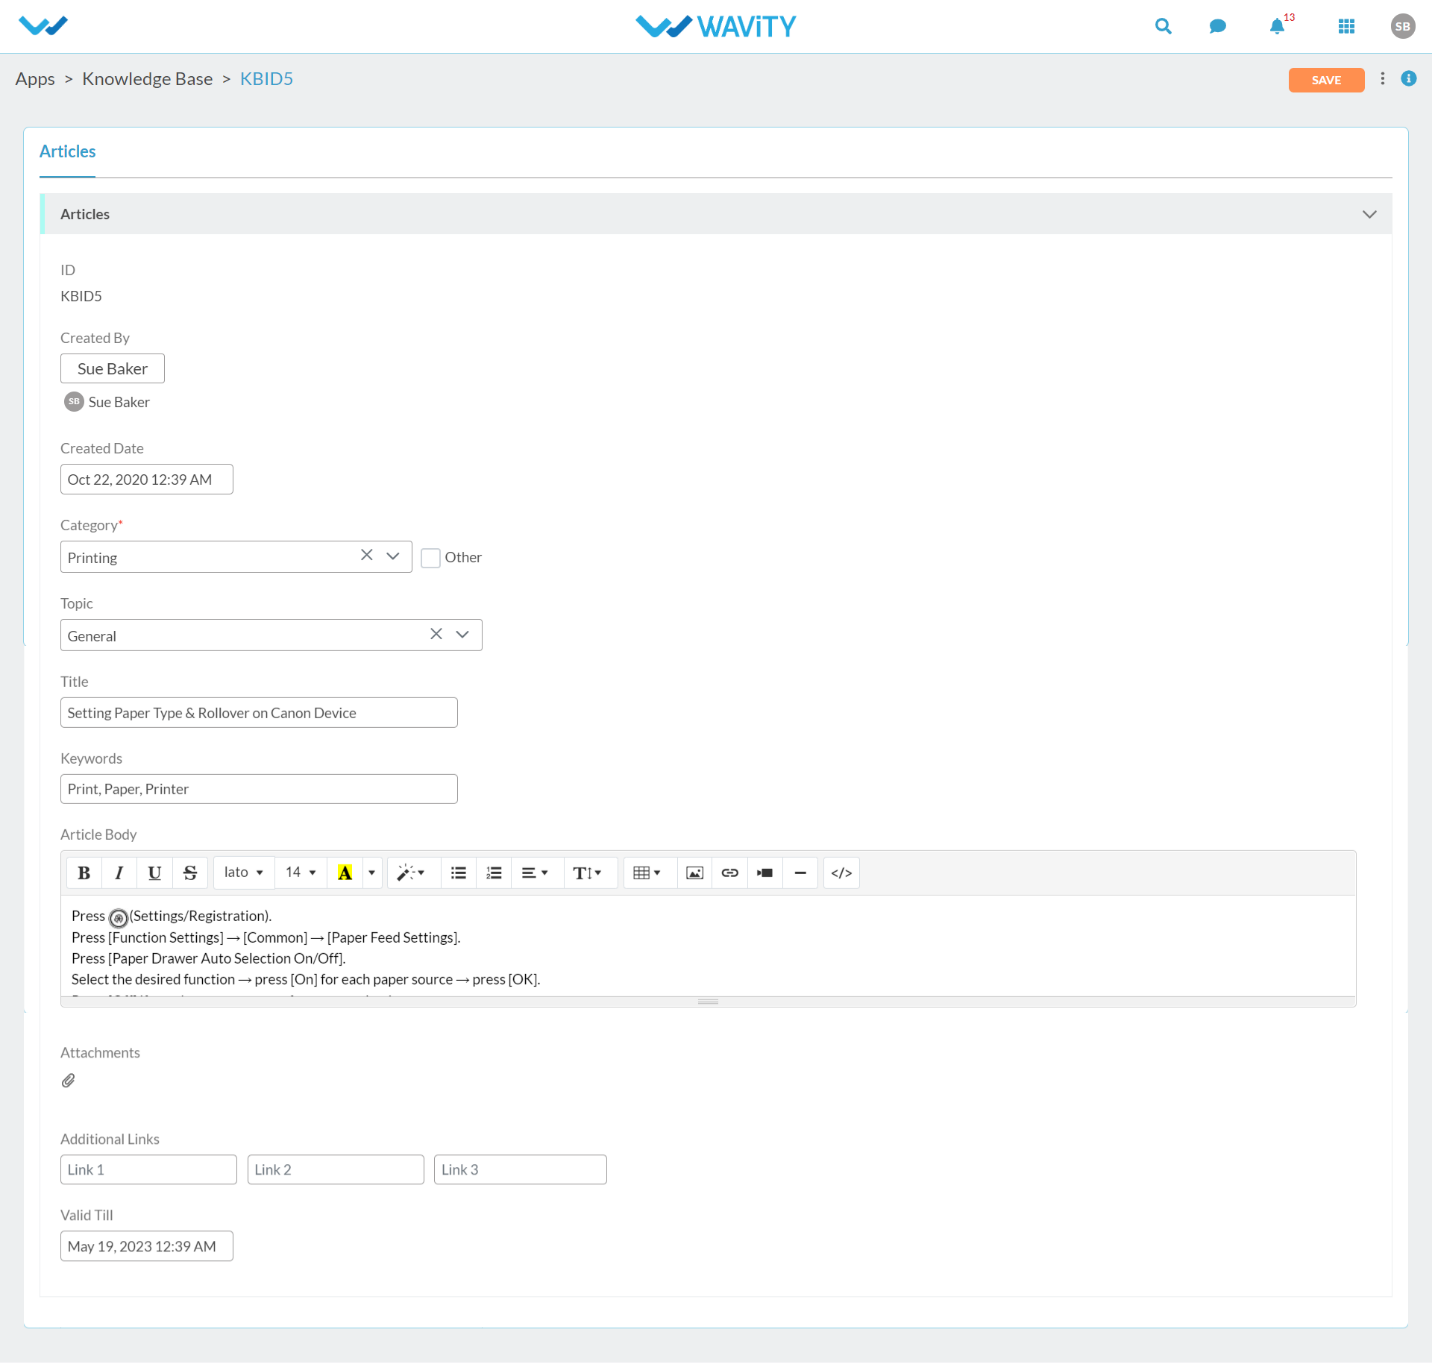
- User will be able to view all the details related to the Articles such as Category, Topic, Title, Keywords, Description and Validity date as shown below.
- User can also email, convert to pdf formats the complete articles. Click on 3 dots as shown below.

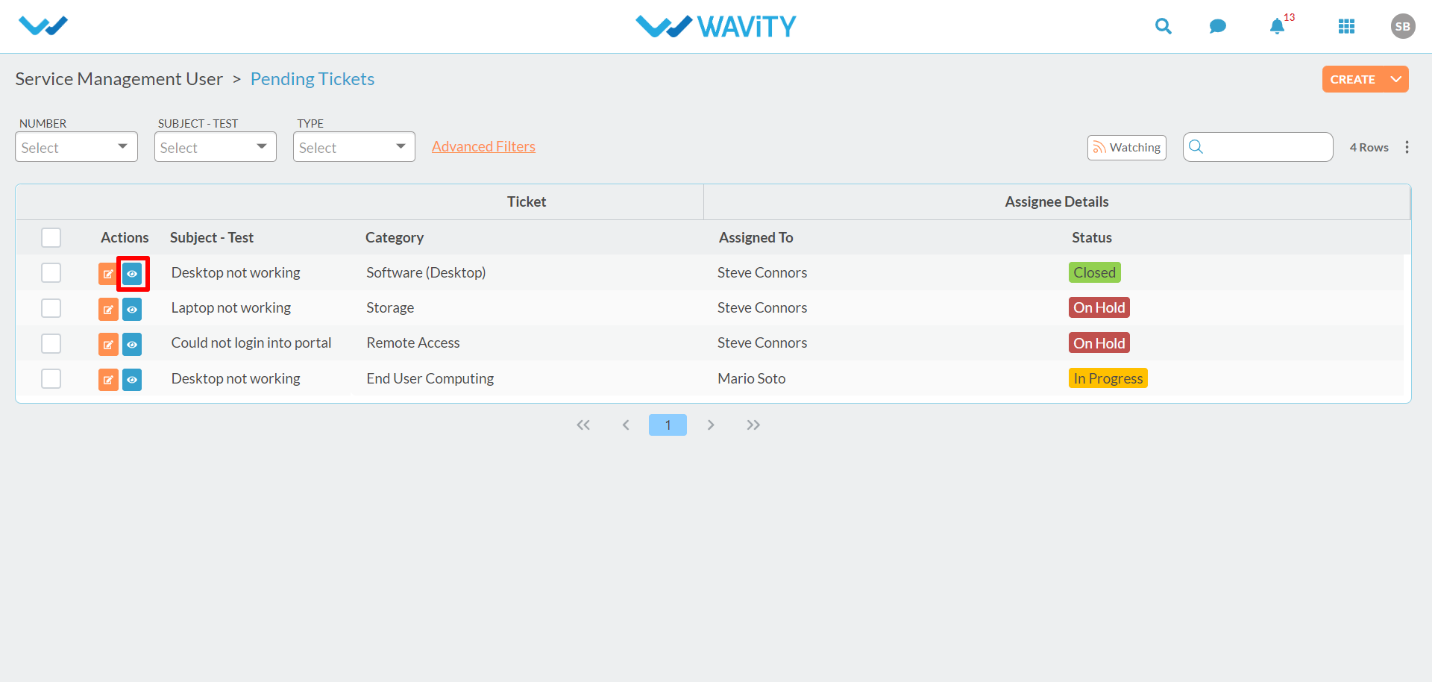
- Click on “Pending Tickets” to view all the pending tickets raised by user.
- Click on “Blue Icon” to view the current status of the ticket raised by the user.
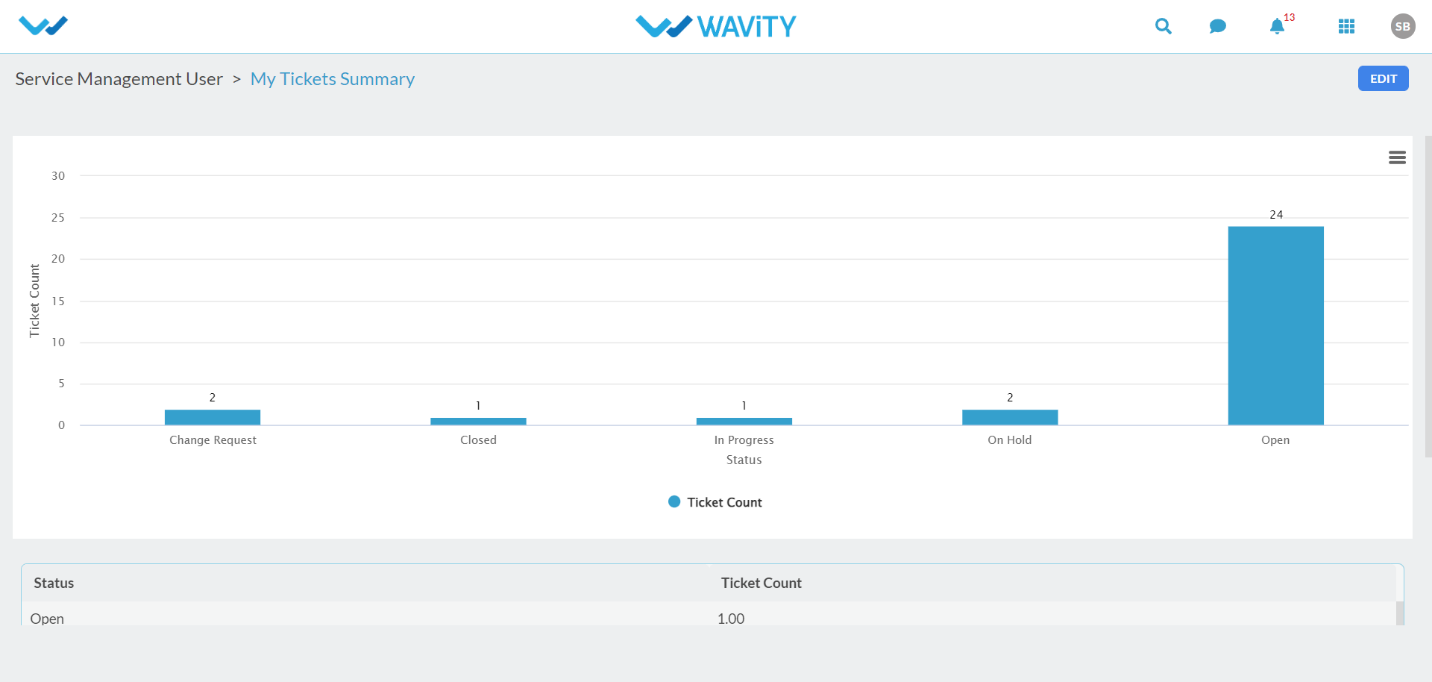
- For Analytics, User can Click on “My Tickets Summary” from User dashboard.

- It will display all tickets based on status of tickets as shown below.
Agents/IT Admin:
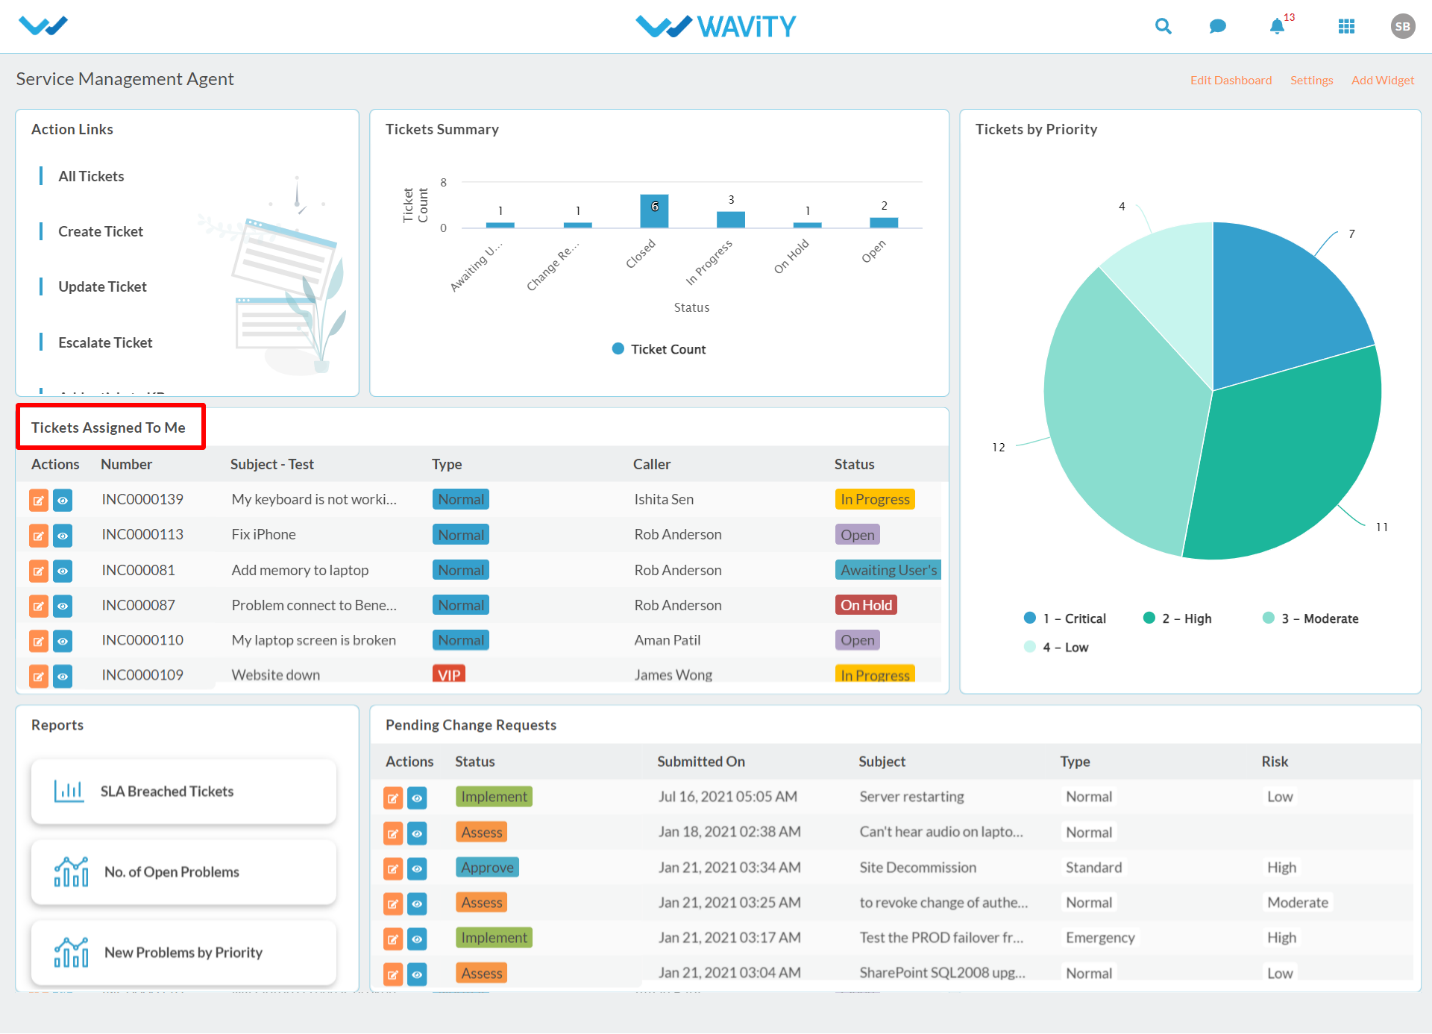
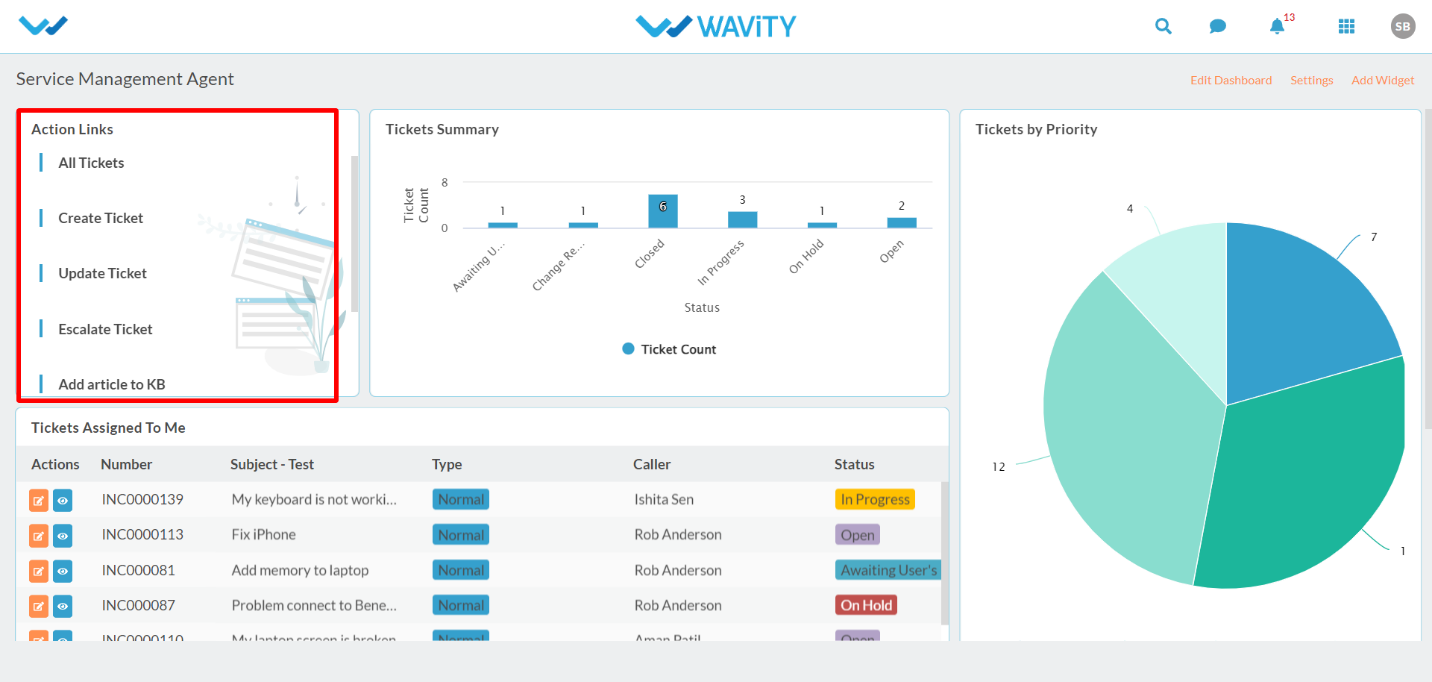
- Login to your Wavity account. After logging in, Agent dashboard will be displayed as shown below. Dashboard can be edited by clicking on ‘Edit Dashboard’. Agent dashboard contains the following major functions:
- Quick/Action Links: Quick Links to navigate through the platform.
- Analytics & Reports: Analytics and reports based on role and data in the platform.
- Activity Stream: It will display all the activities carried out in the platform.
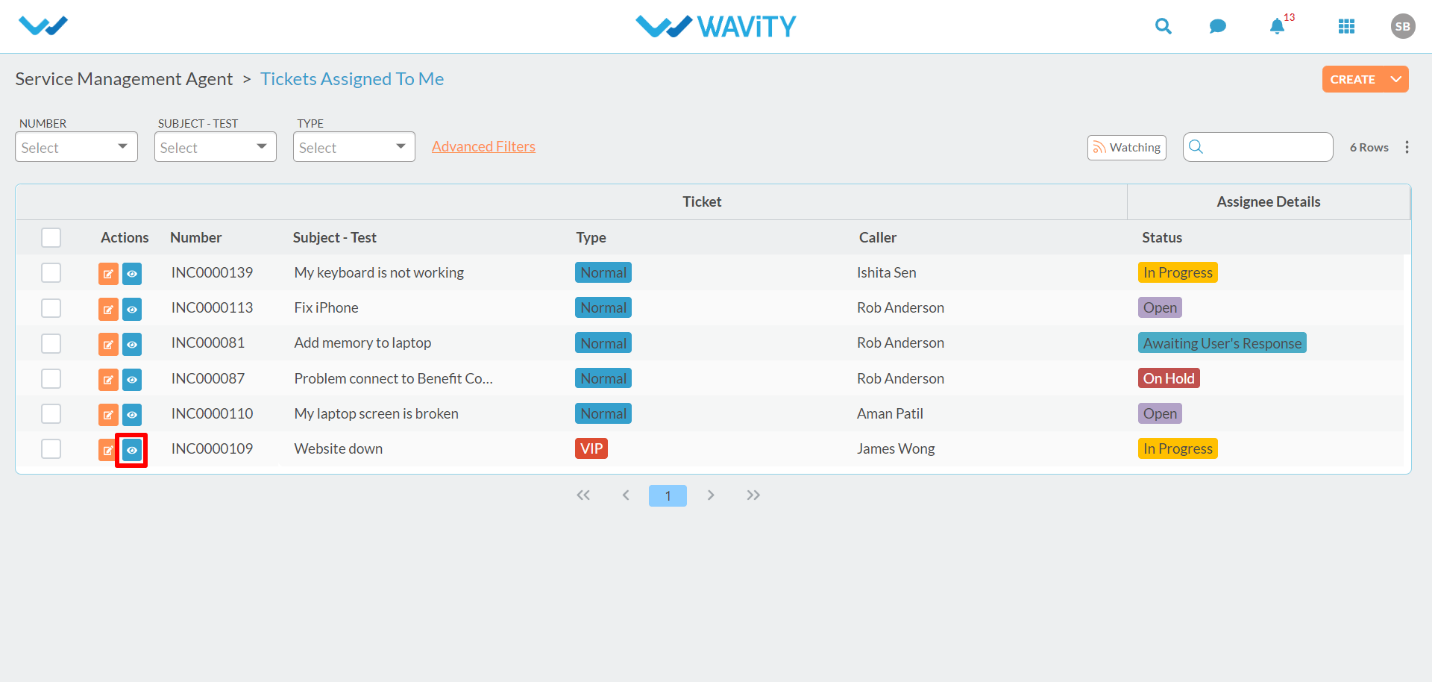
- Click on “Tickets Assigned to Me” for agent to view all the pending Tickets assigned to him/her.
- Click on ‘Blue Icon’ to view/edit the details.
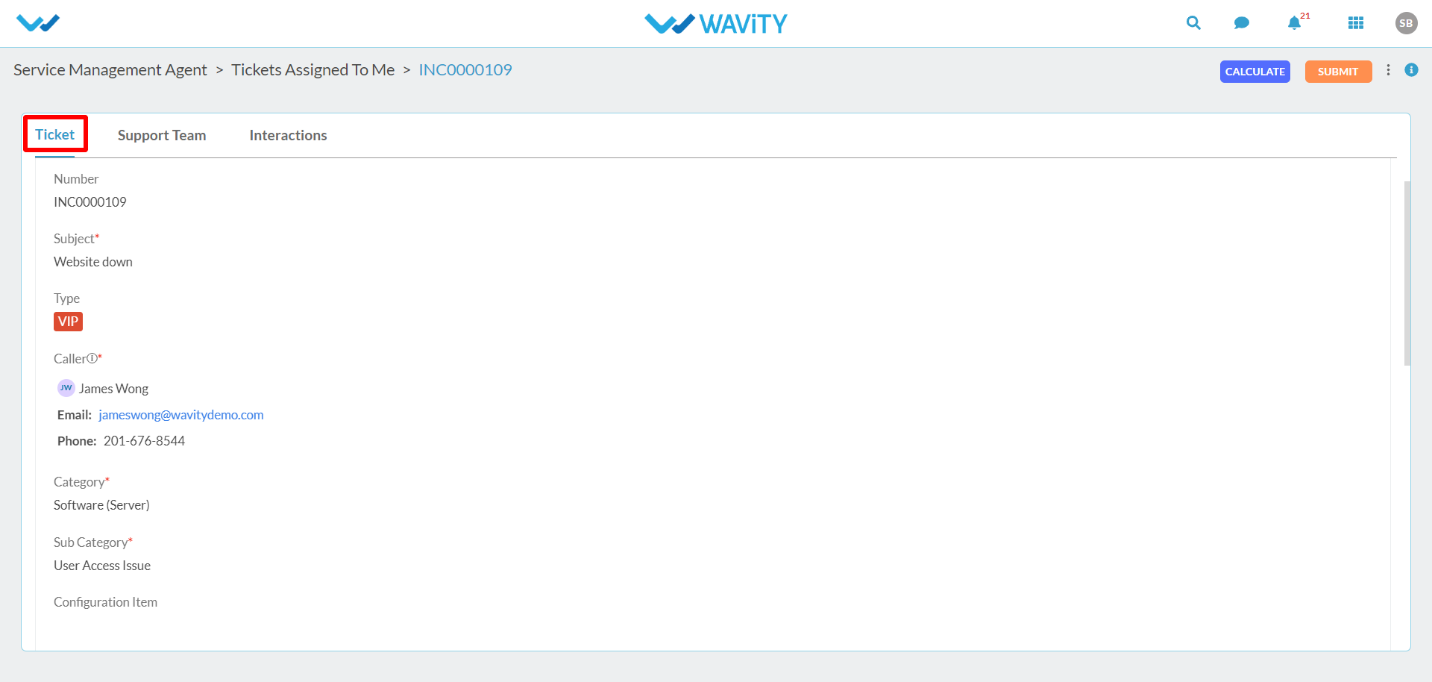
- Agent will be able to view all the details filled by the user in ‘Ticket’ section as shown below.
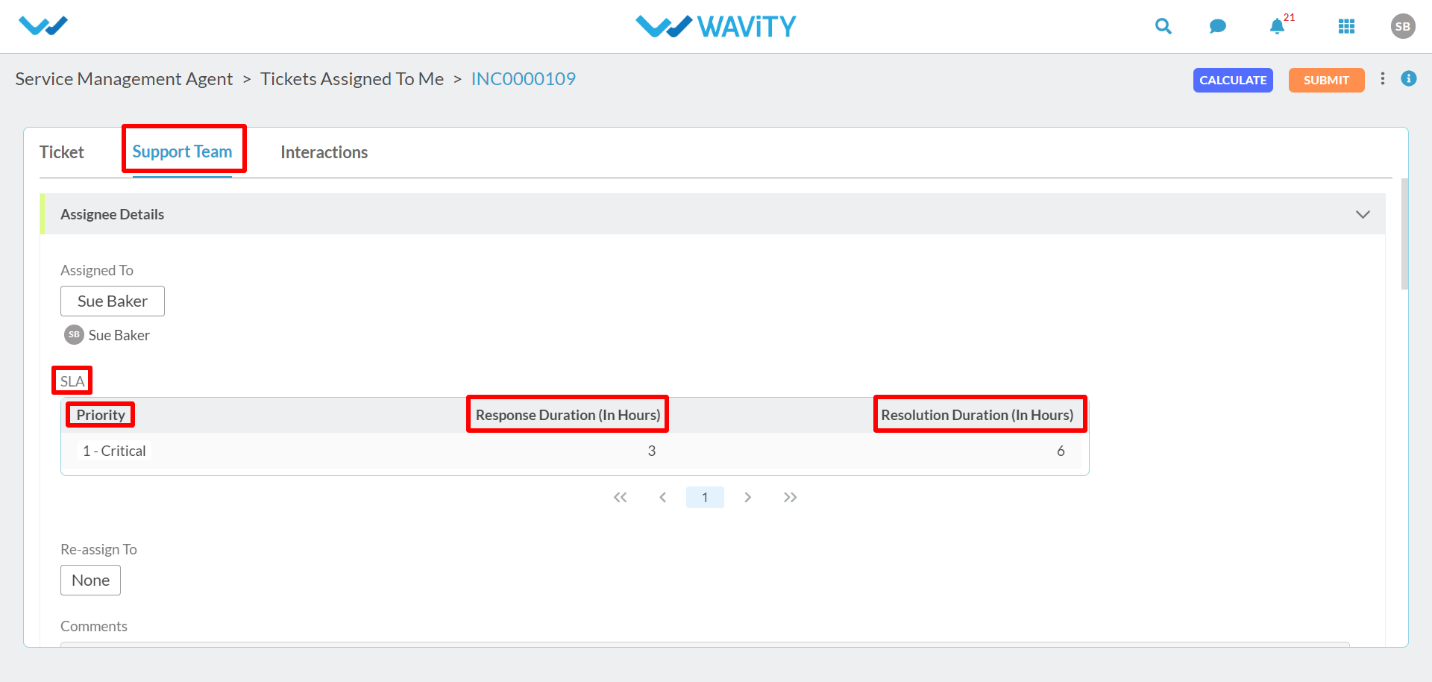
- Click on ‘Support team’ section as shown below to update the status of the ticket.
- ‘Assigned to’ will indicate the current agent assigned for the ticket.
- Under ‘SLA’ section, It will indicate the priority level of the ticket raised by the user. Based on the priority level, Response duration and resolution duration is auto generated by the platform. Both response duration and resolution duration is customizable.
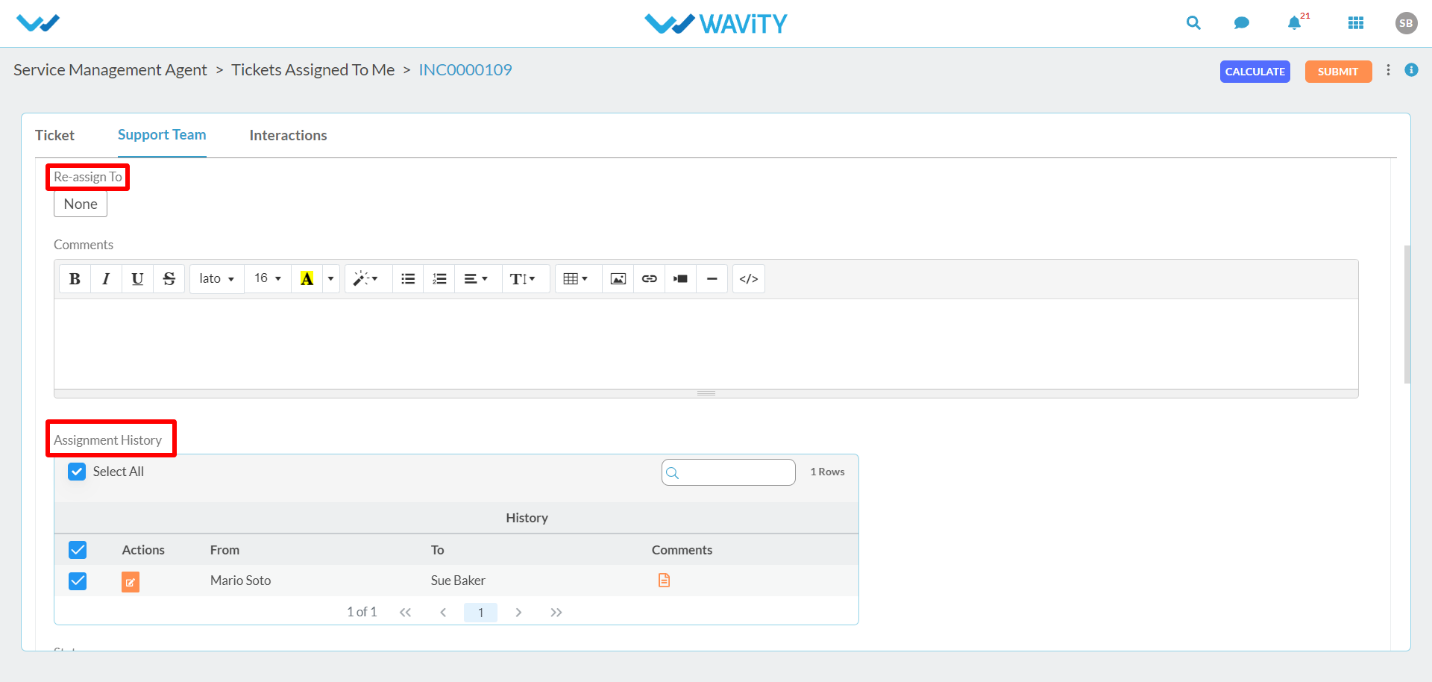
- Agent can re-assign the ticket to another agent. Once re-assigned to another agent in the platform, It will showcase the re-assignment history as shown below.
- Agent can update the status of the ticket whether it is under progress, closed, awaiting user’s response, on hold etc. as shown below. After Agent updates the ticket status as closed, Agent needs to mention the closed status of whether it is solved permanently or through work around.
- Click on the icon as shown below to attach any articles from knowledge base for user’s reference.
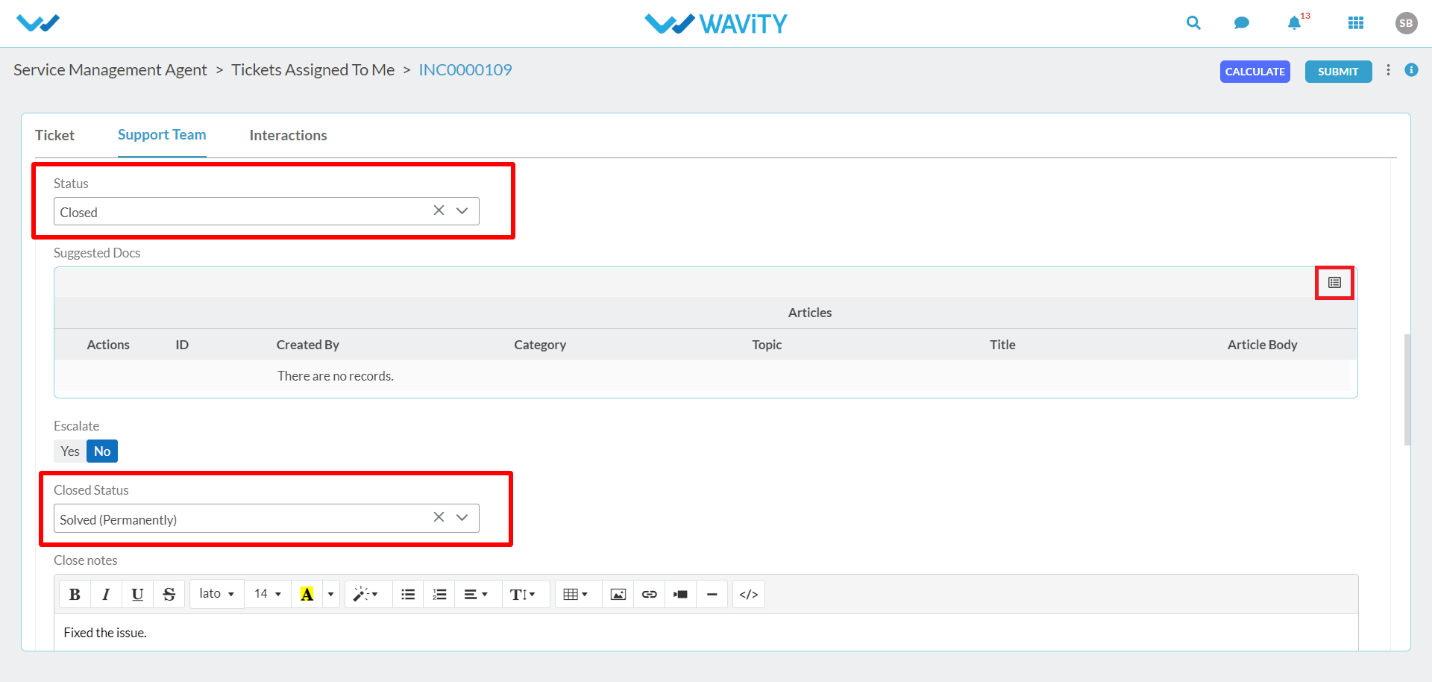
- ‘Check’ on an article which acts as a suggested document for reference.

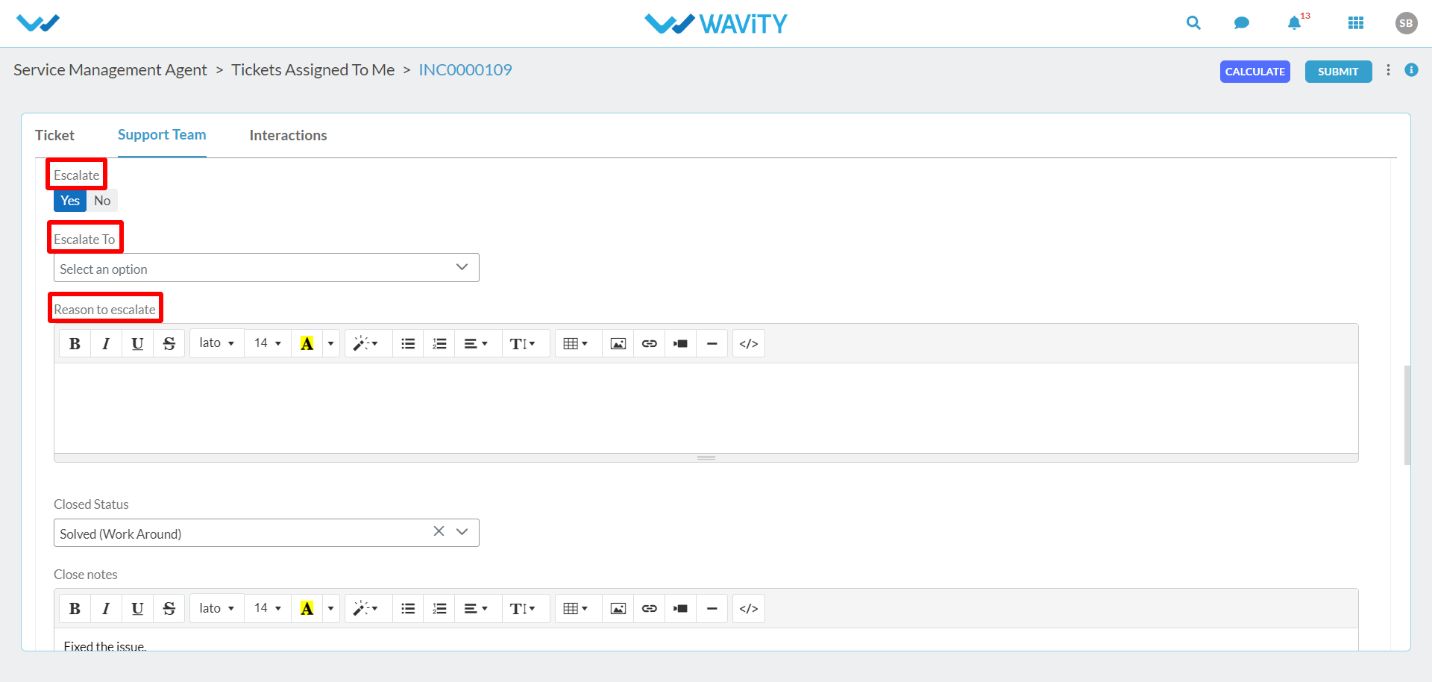
- Agents can also escalate the ticket to multiple level in the organization by enabling the ‘Yes’ button as shown below.
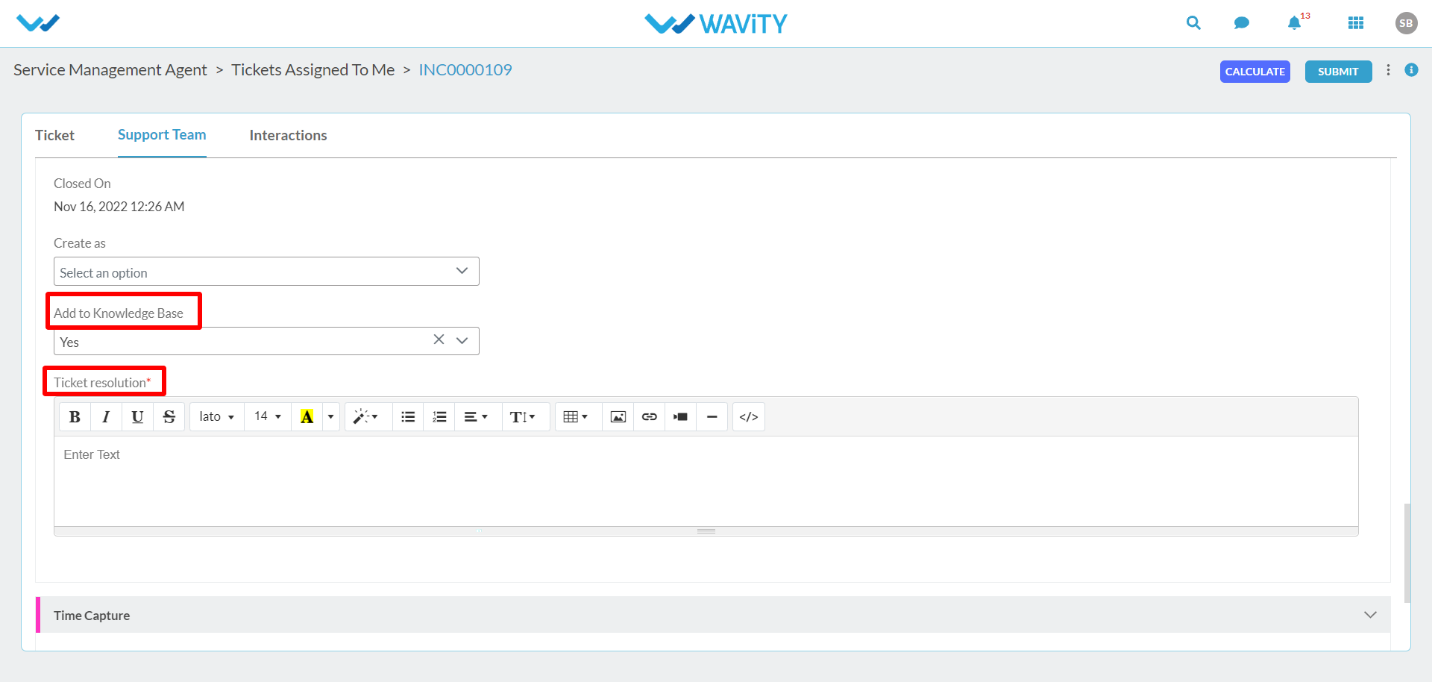
- Once the ticket status is updated to closed, Agent can add the ticket to Knowledge base for future reference. After selecting ‘Yes’ as shown below, Agent needs to add the Ticket resolution notes in detail.
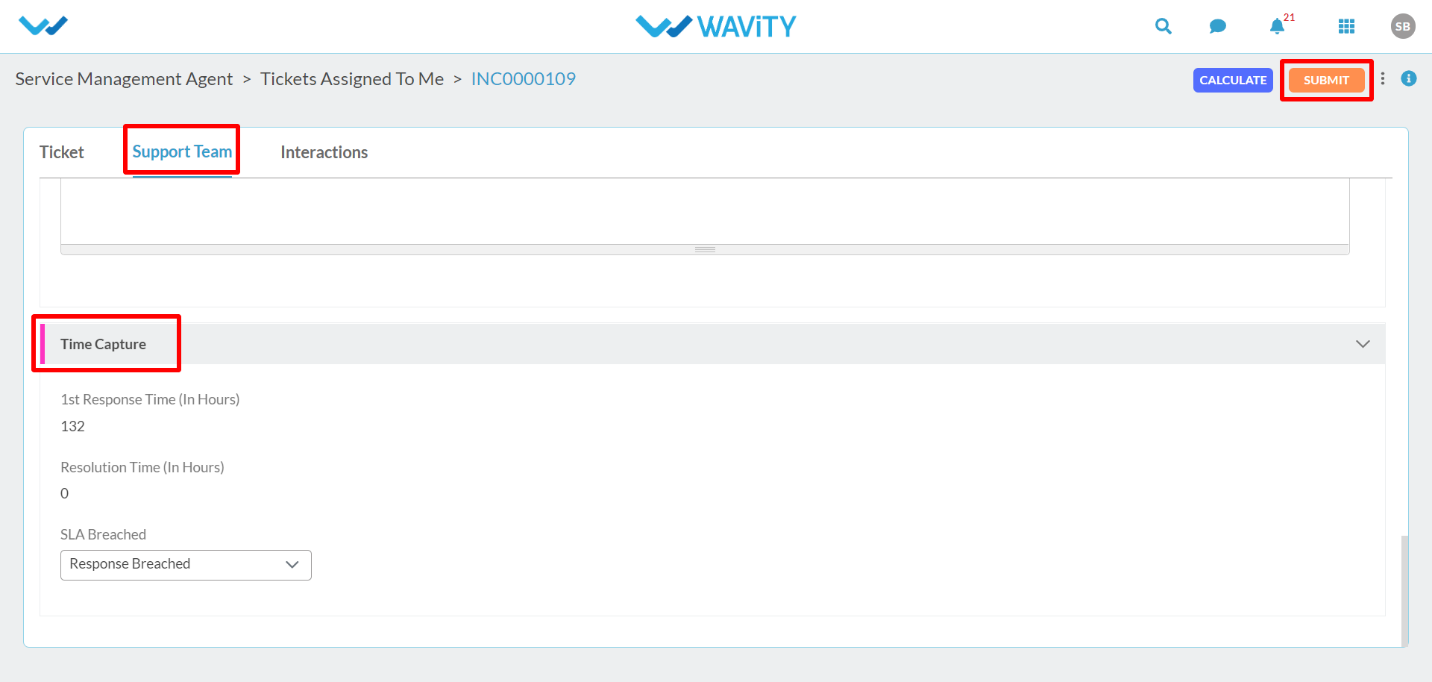
- After filling all the information, Agent can click on ‘Submit’ button. Time capture with details such as 1st response time, resolution time and SLA response will be auto generated by the platform.
- Agents and Users can interact with each other multiple times in the platform by using the ‘Interactions’ section as shown below.

- Click on ‘3 dots’ as shown below. Then click on ‘Show comments & activity’.
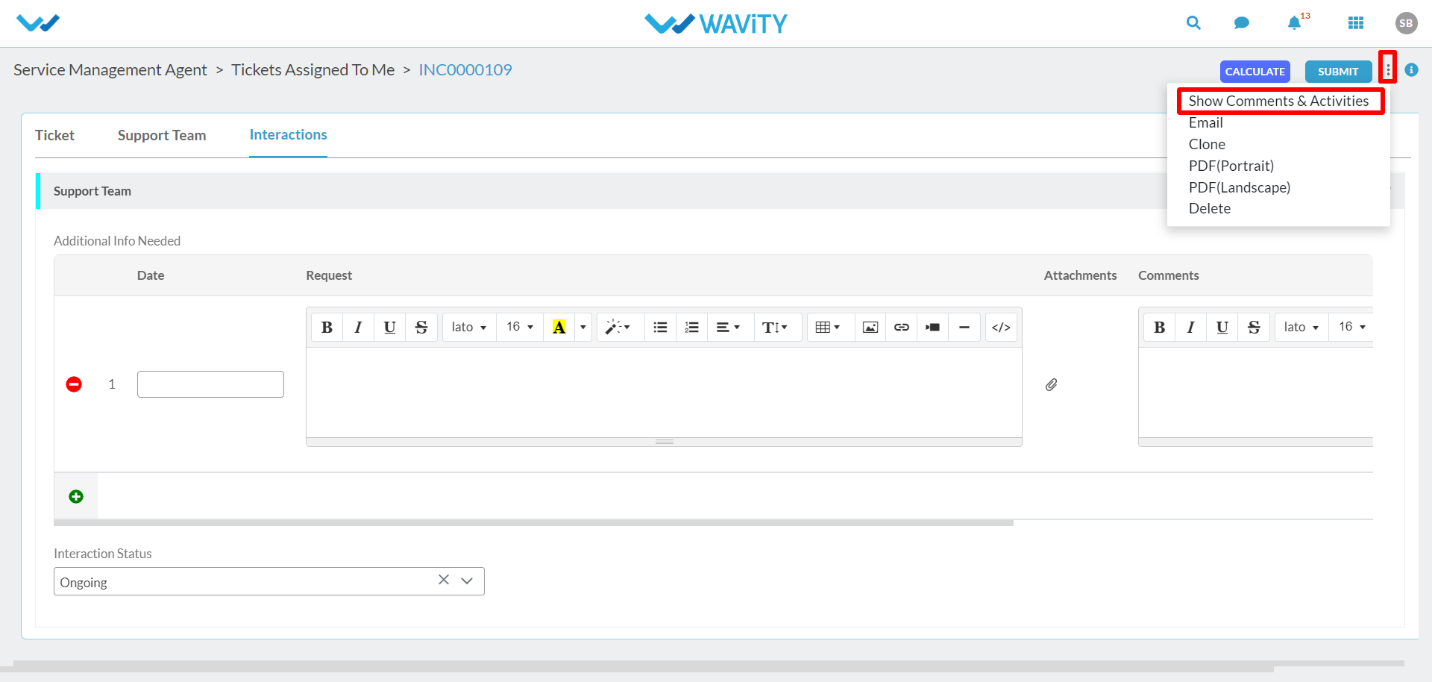
- This is another way of communication between agents and users in the platform using the comments box.

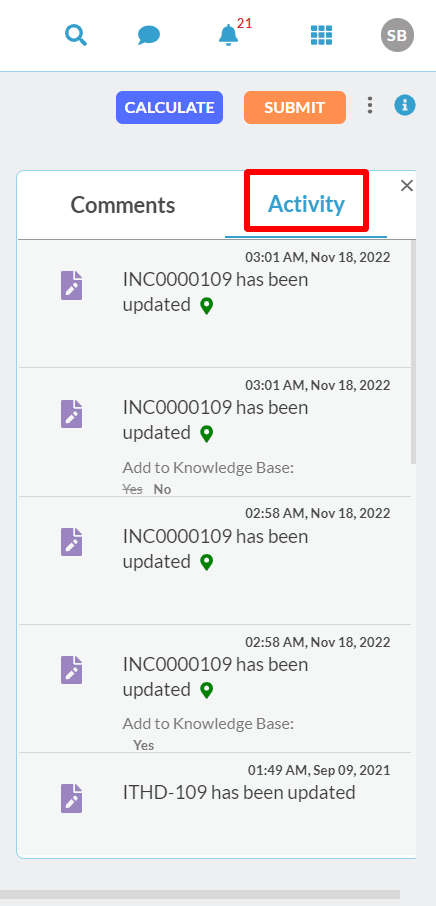
- Under the ‘Activity’ tab, All the timeline related to an individual ticket is showcased as a record.
- Agent dashboard has the following action links as shown below for easy navigation in the platform.
- All Tickets: By Clicking on “All tickets” will allow agents to view all the tickets in the platform including closed tickets
- Create Ticket: By Clicking on “Create Ticket” will allow agents to create tickets in the platform on behalf of users.
- Update Ticket: By Clicking on “Update ticket” will allow agents to update status of any individual ticket in the platform.
- Escalate Ticket: By clicking on “Escalate Ticket” will allow agents to escalate an individual ticket in the platform.
- Add article to KB: By click on “Add article to KB” will allow agents to add articles into the knowledge base for future reference.
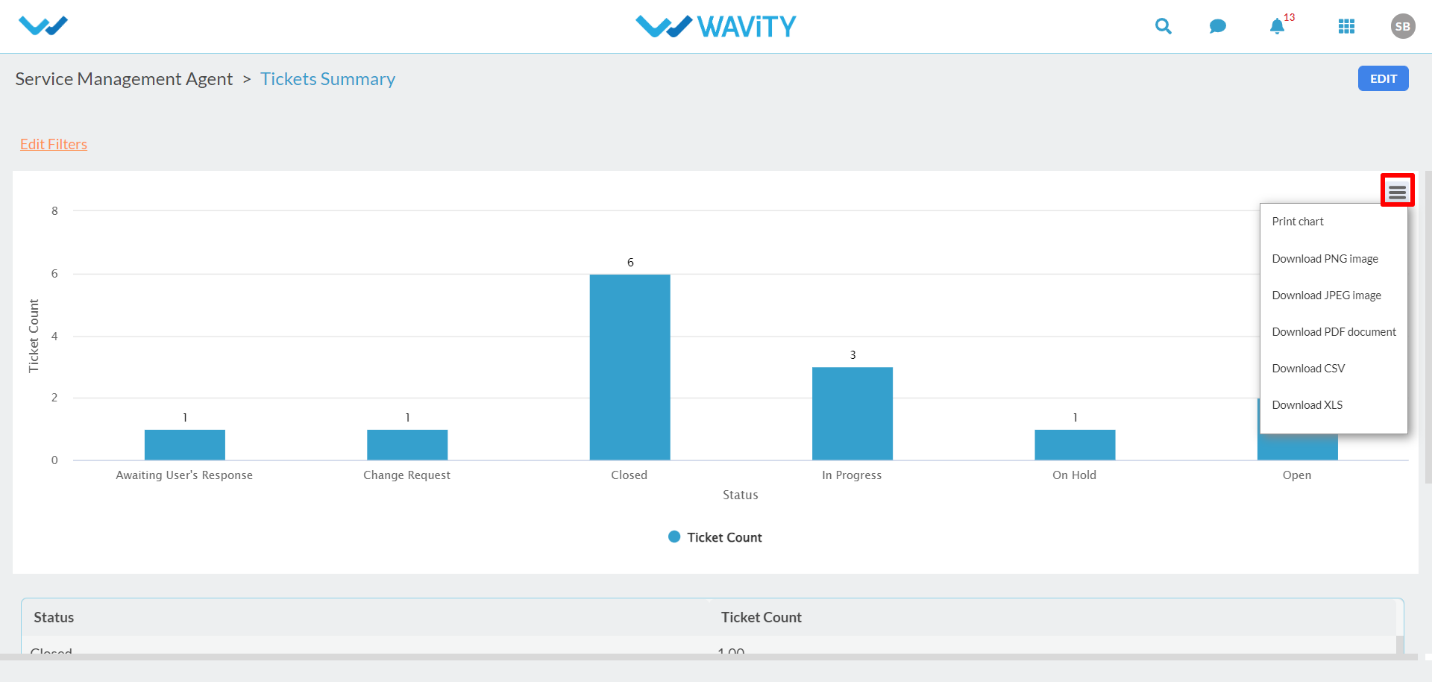
- Click on “Tickets Summary” analytics widget from Agent dashboard as shown below.

- It will display count of ticket based on status. All the Analytics widget can be printed and downloaded in different formats as shown below. Similar Analytics widget can be configured based on weekly or monthly categorization.
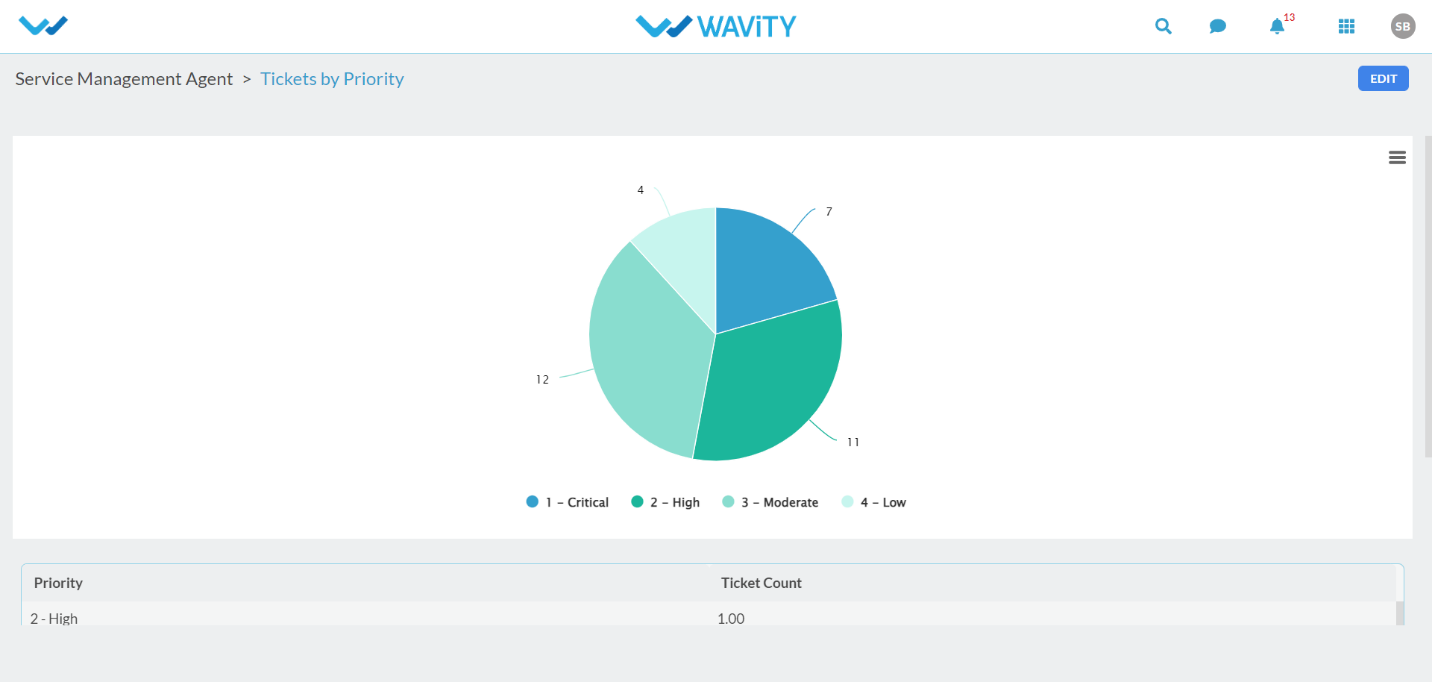
- Click on “Tickets by Priority” analytics widget from Agent dashboard as shown below.
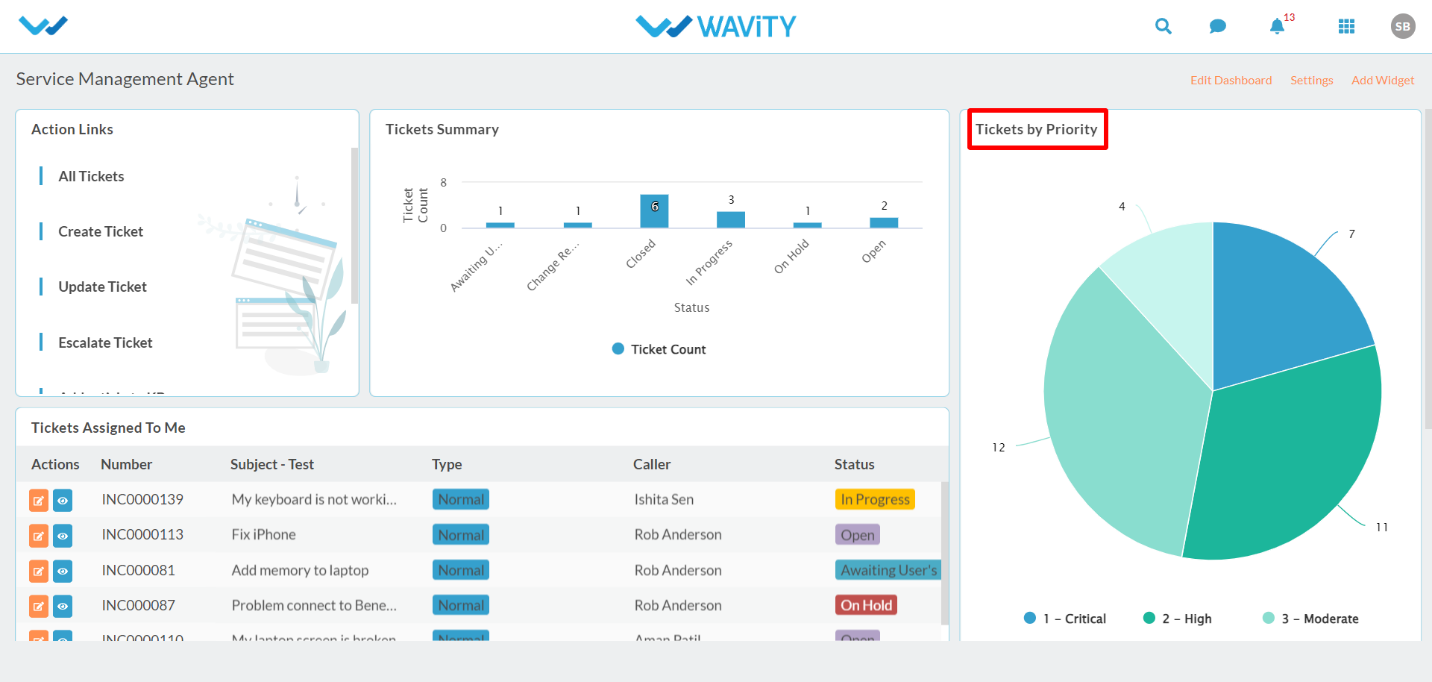
- It will display count of tickets based on priority level in pie chart format.
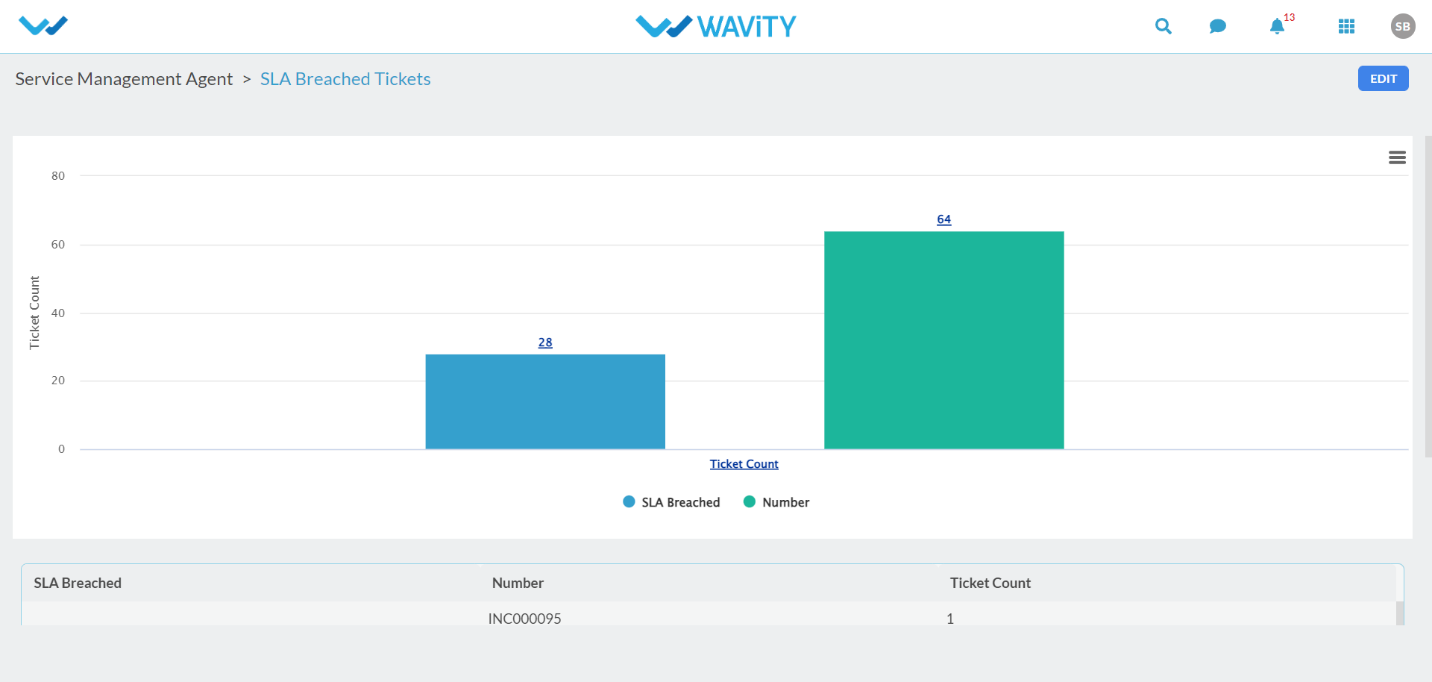
- Click on “SLA Breached Tickets” under ‘Reports’ from Agent dashboard as shown below.
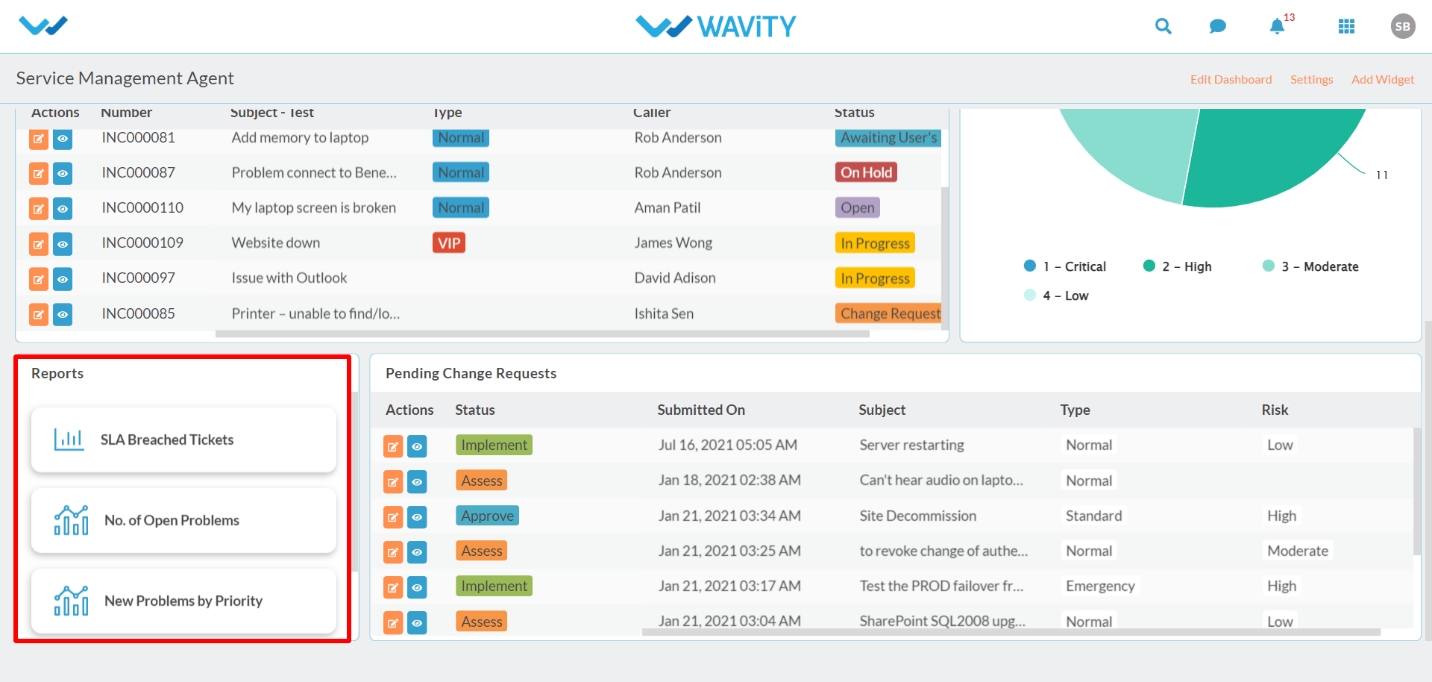
- It will display ‘total number of tickets’ vs ‘number of SLA breached tickets’ in bar format.