- To set up Single Sign-On you must be a Tenant Admin to enter the appropriate configuration in ‘Integrations’ settings.
- In ‘Integrations’, select the SAML option to begin the setup process.

- Click on ‘Enable SAML checkbox’’ & this will open up below options
- You will need the Service Provider information with Single Sign-On URL and Service Provider Entity ID while Integrating Wavity with Okta. Use the provided Single Sign-On URL link and Service Provider Entity ID link while setting up Okta App.
- Next step is to fill Identity provider information and map the Assertion Attributes in Wavity Platform using Okta. (Refer next page)

- Enter the information in the appropriate fields from the Okta App and click on Save.
Steps to set up SSO in Okta
- Login to Okta portal with your Username & Password.
- Click on application (Left side of your browser)

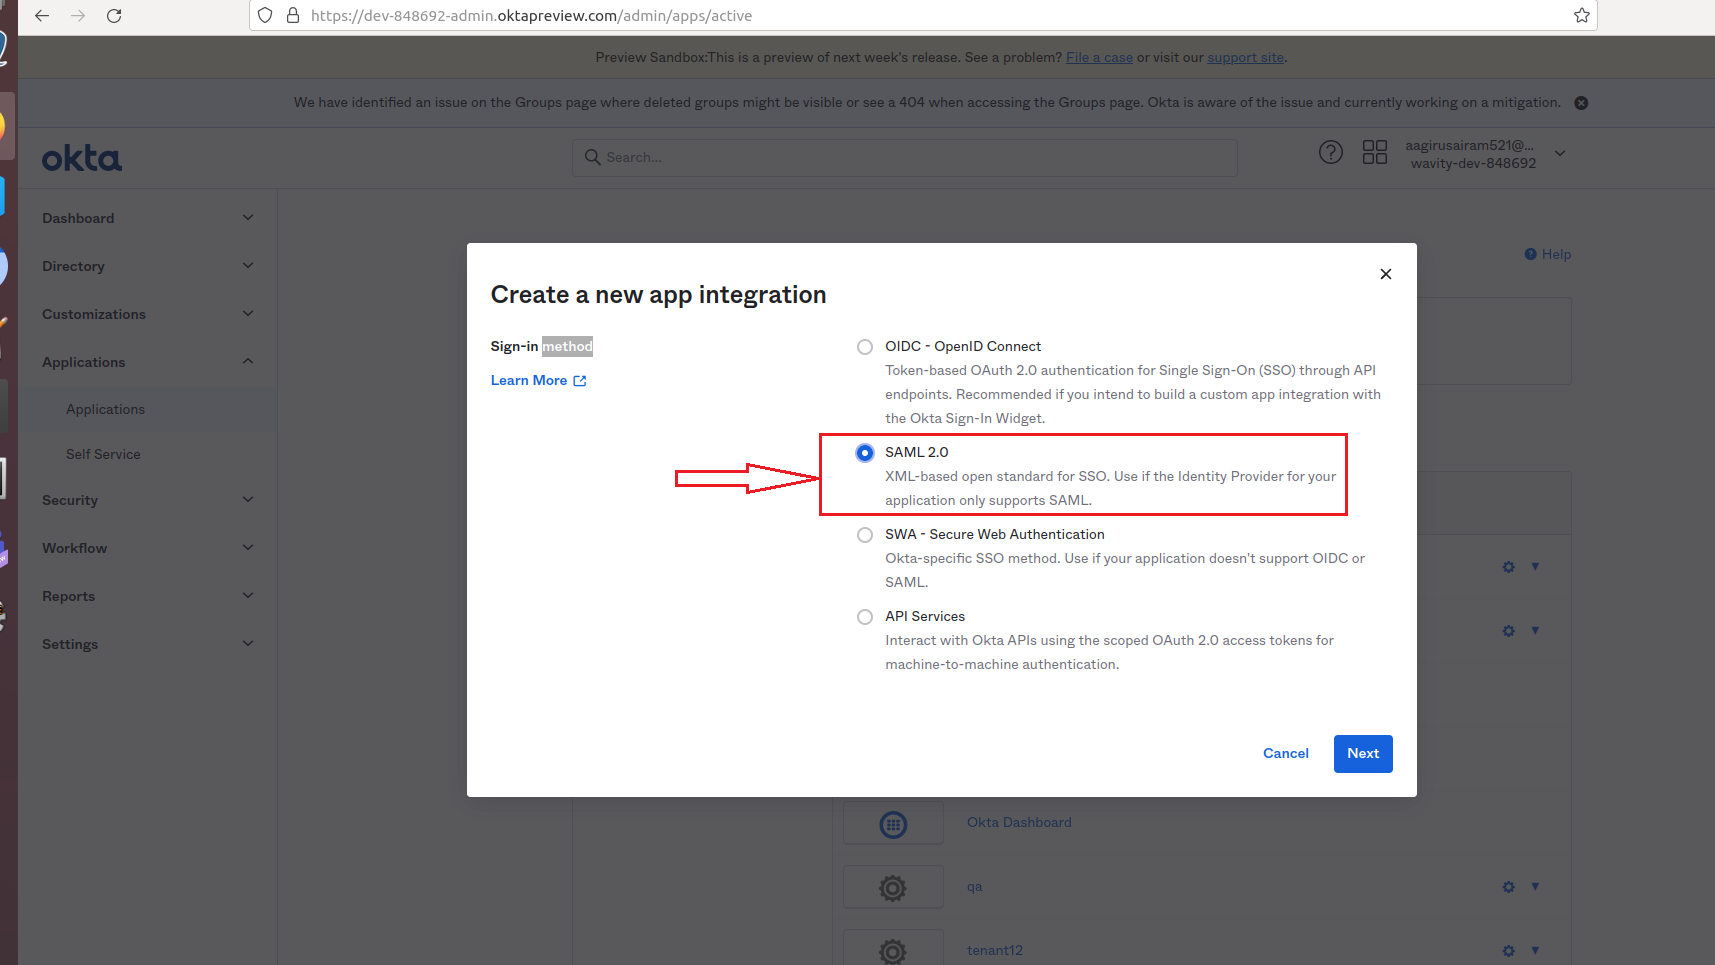
- Click on Create App Integration

- Click on SAML 2.0. Then, click Next
- You will be prompted to steps to create SAML Integration

- On the following page. Fill in the following tabs Single sign in URL, Audience URI (SP Entity ID), Delay Relay state using the links from Wavity Integration setting page.

- After filling all information, you will prompted to the following page. Edit the email, firstname & lastname with the value in Attribute statements tab of the following page. Please copy the source attribute ‘user.email’, ‘user.firstName’ and ‘user.lastName’ to Wavity SAML Integrations setting page under section Assertion attributes mapping

- After filling all information Name and Value tab of Attribute Statements page, Click on Next.

- In the following page, you can click on either toggle on the right side. Then, Click on Finish

- Set-up of Okta is complete. Copy the link below Identity Provider Single Sign-On URL and paste it on Identity provider Single-Sign-On section on Wavity SAML Integrations setting page. Also copy the link below IDP Metadata- Optional Tab and paste it on Identity provider Metadata section on Wavity SAML Integrations setting page.

- As the last step, you will use the Okta to fill the tabs below the Identity Provider Single-Sign-On URL, Identity Provider Metadata & Assertion Attributes Mapping in Wavity. Please ensure the values of Attributes in Okta matches with the values in Wavity SAML Integrations setting page. Enter the information in the appropriate fields as described using Okta and click on Save. Wavity SAML Integration using Okta is complete.

Please find below details which will be required during Set Up:
Entity Id: urn:mace:saml:wavity.com
Relay State: /wavity
Once it is done with app creation, need to assign users to the newly created and configured application.
User can now use okta SSO to sign into Wavity.