
How to enable SSO using Microsoft Azure
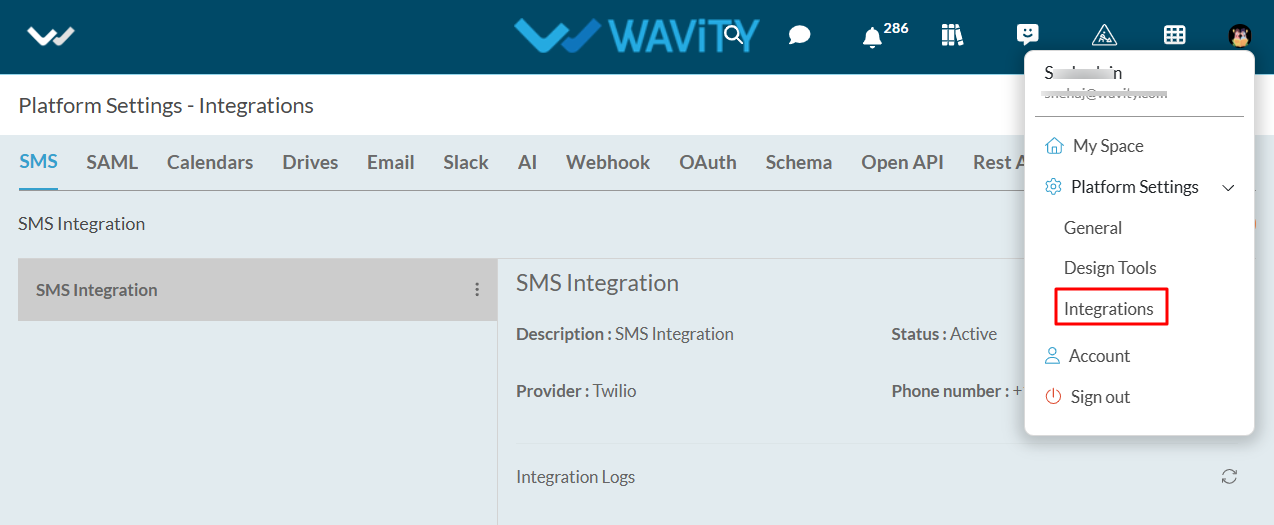
- Only Admin of your organization can enable Single Sign On (SSO) by entering the appropriate configuration details in 'Integrations’ settings.
- In 'Integrations’, select the SAML option to begin the setup process.
- Click on ‘Enable SAML’ with below options
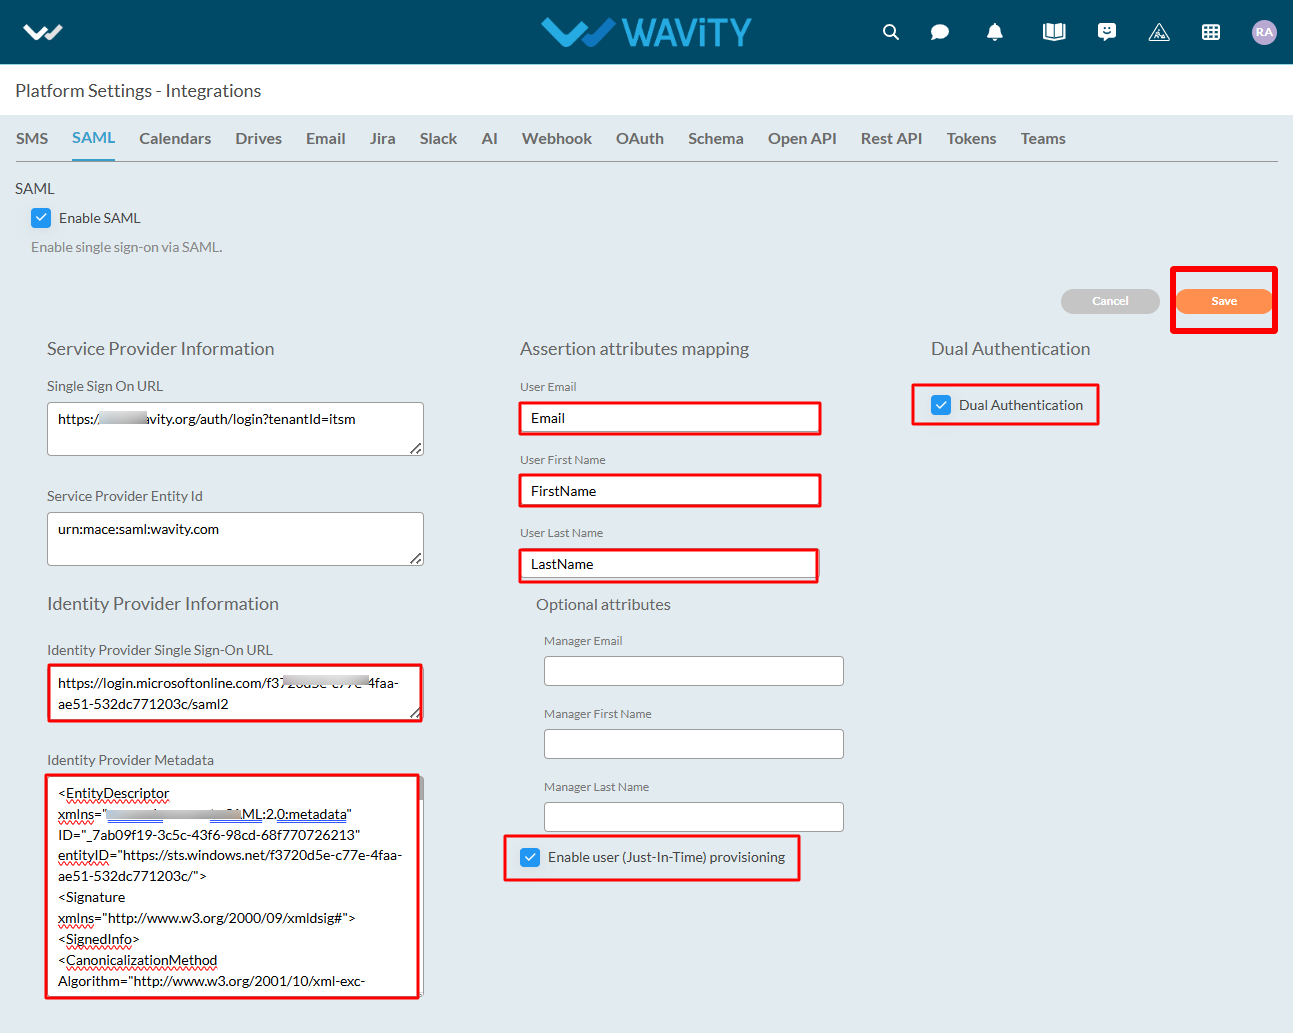
- You will require the Service Provider information with Single Sign On URL and Service Provider Entity ID while Integrating Wavity with Azure. Use Single Sign On URL link and Service Provider Entity ID link while setting up Azure.
- Next step is to fill Identity provider information and Assertion Attributes Mapping in Wavity Platform using Azure. (Refer next image)
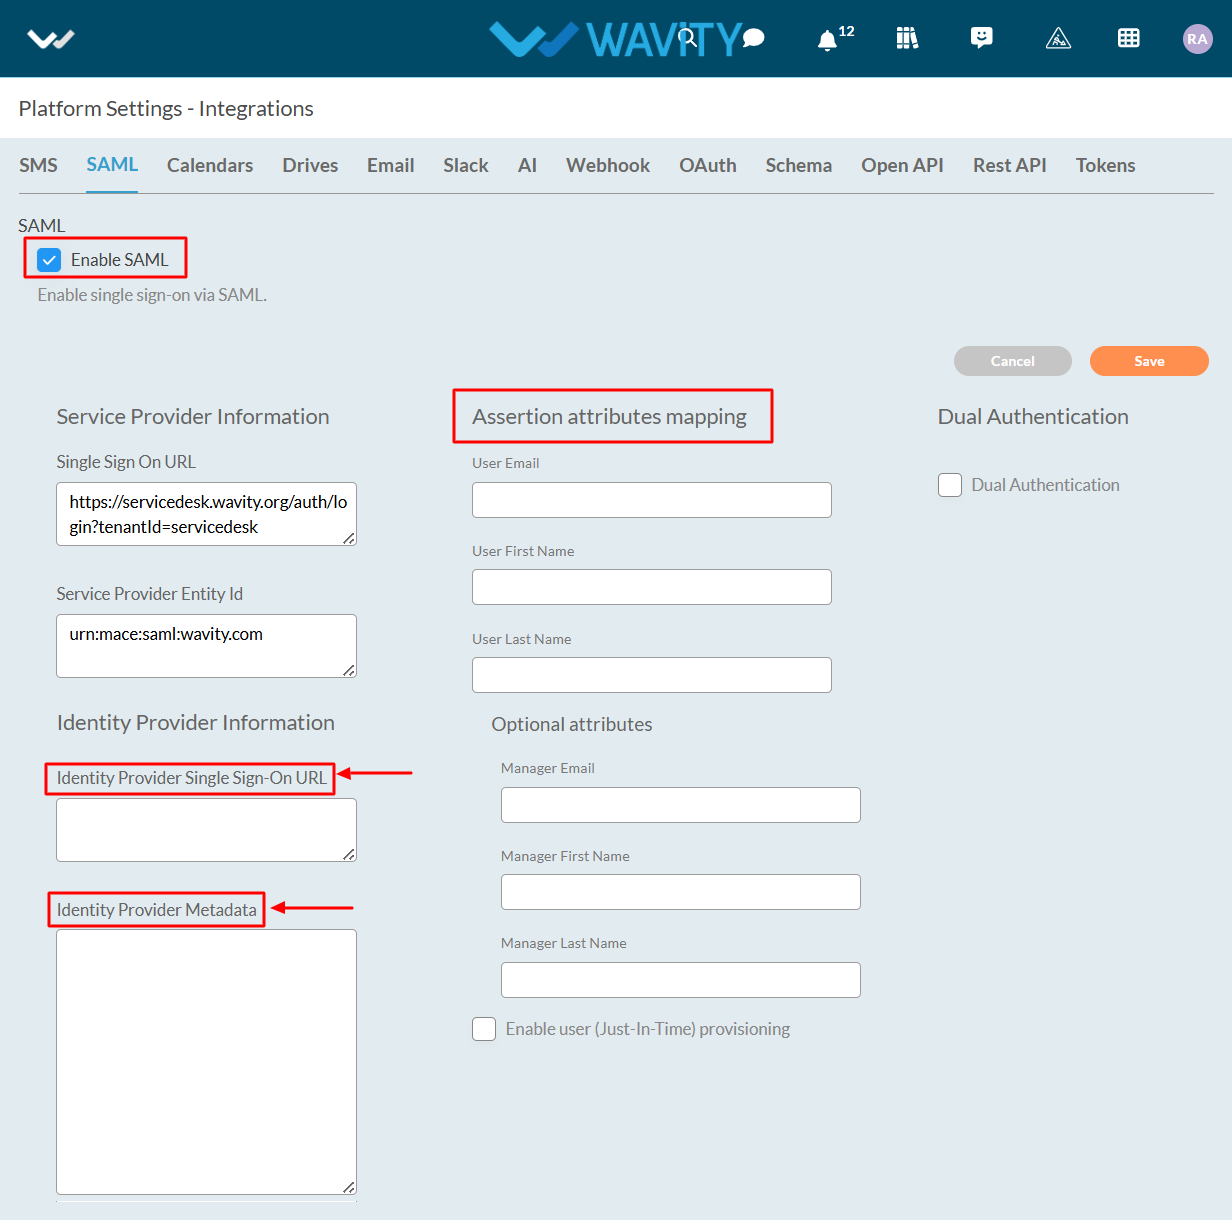
- Enter the information in the appropriate fields using Azure and click on Save.
Steps in Azure to set up SSO in Wavity
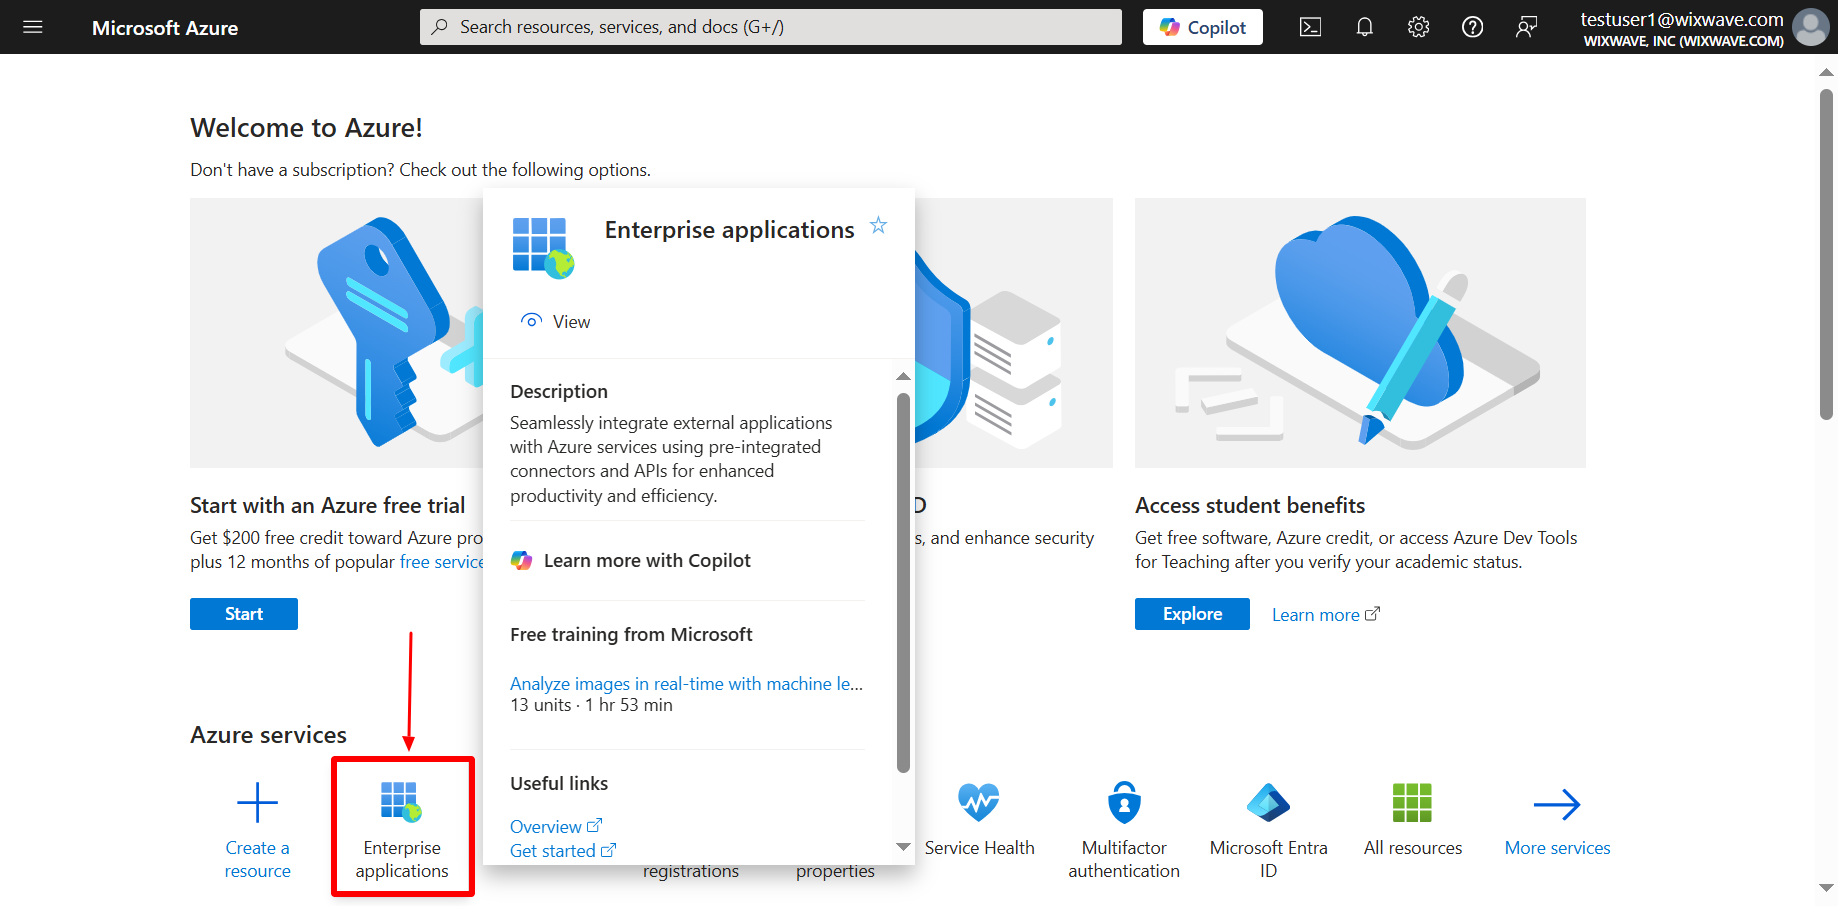
- Login to Azure portal using your admin credentials. Go to https://portal.azure.com/#, and click on ‘Azure Active Directory’ in the menu to your left, then on ‘Enterprise Applications’:
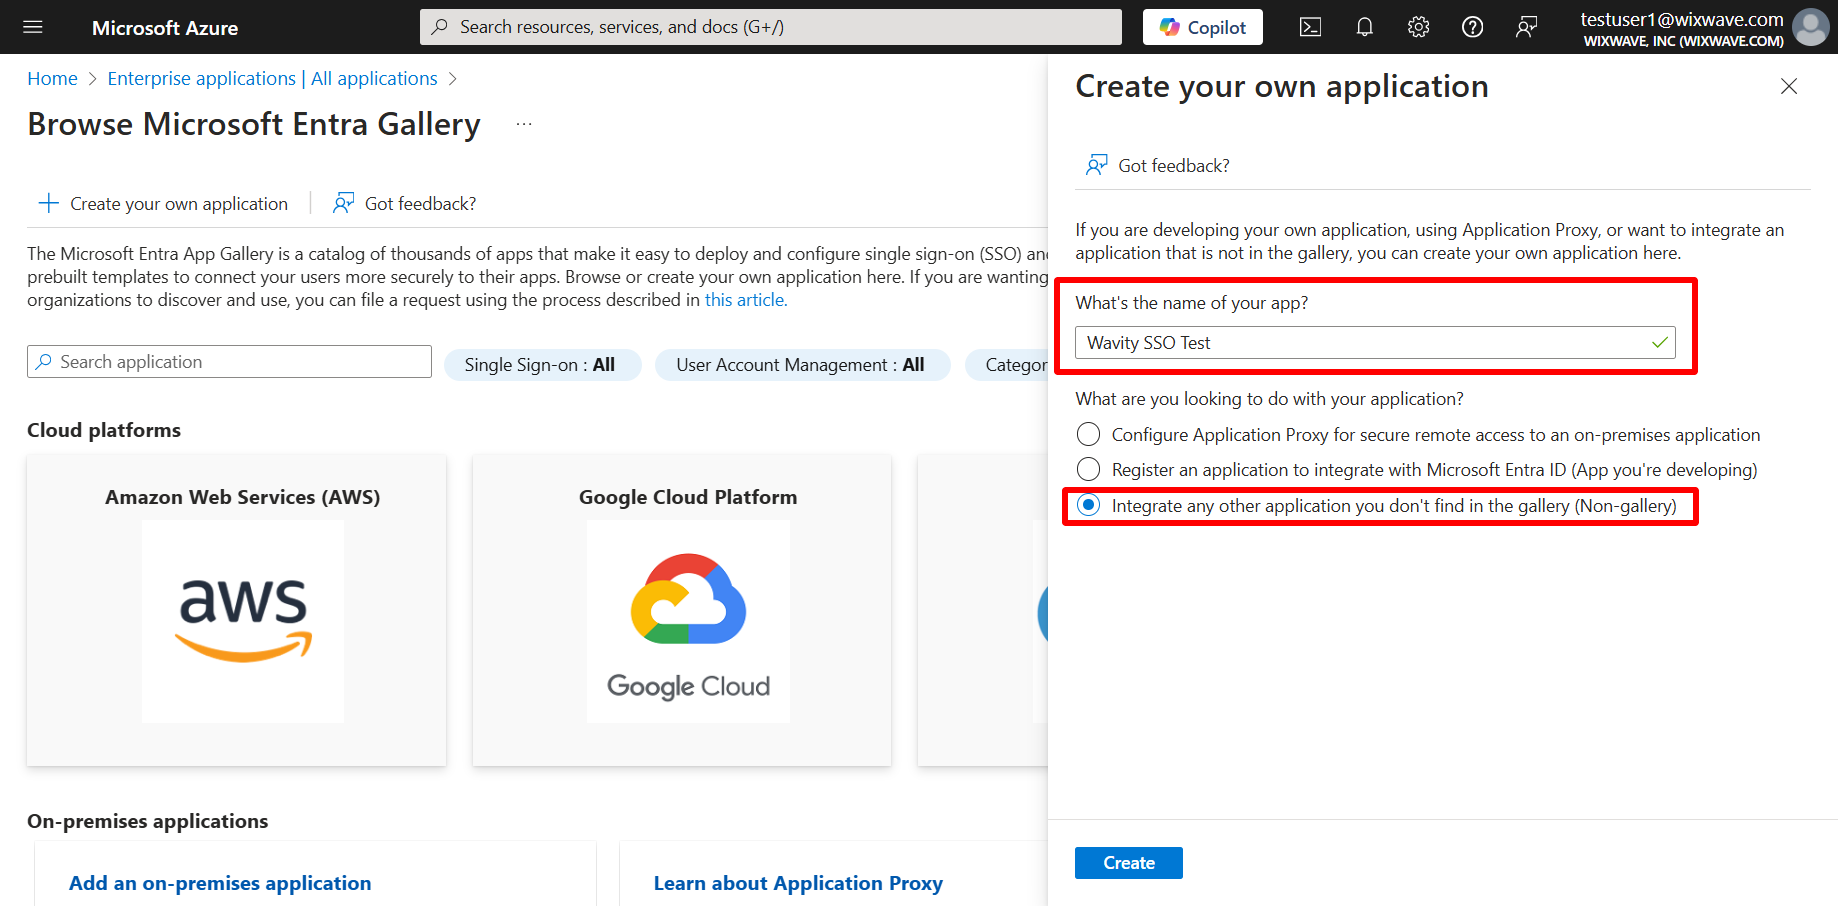
- Click on new application. Then click on create your own application.
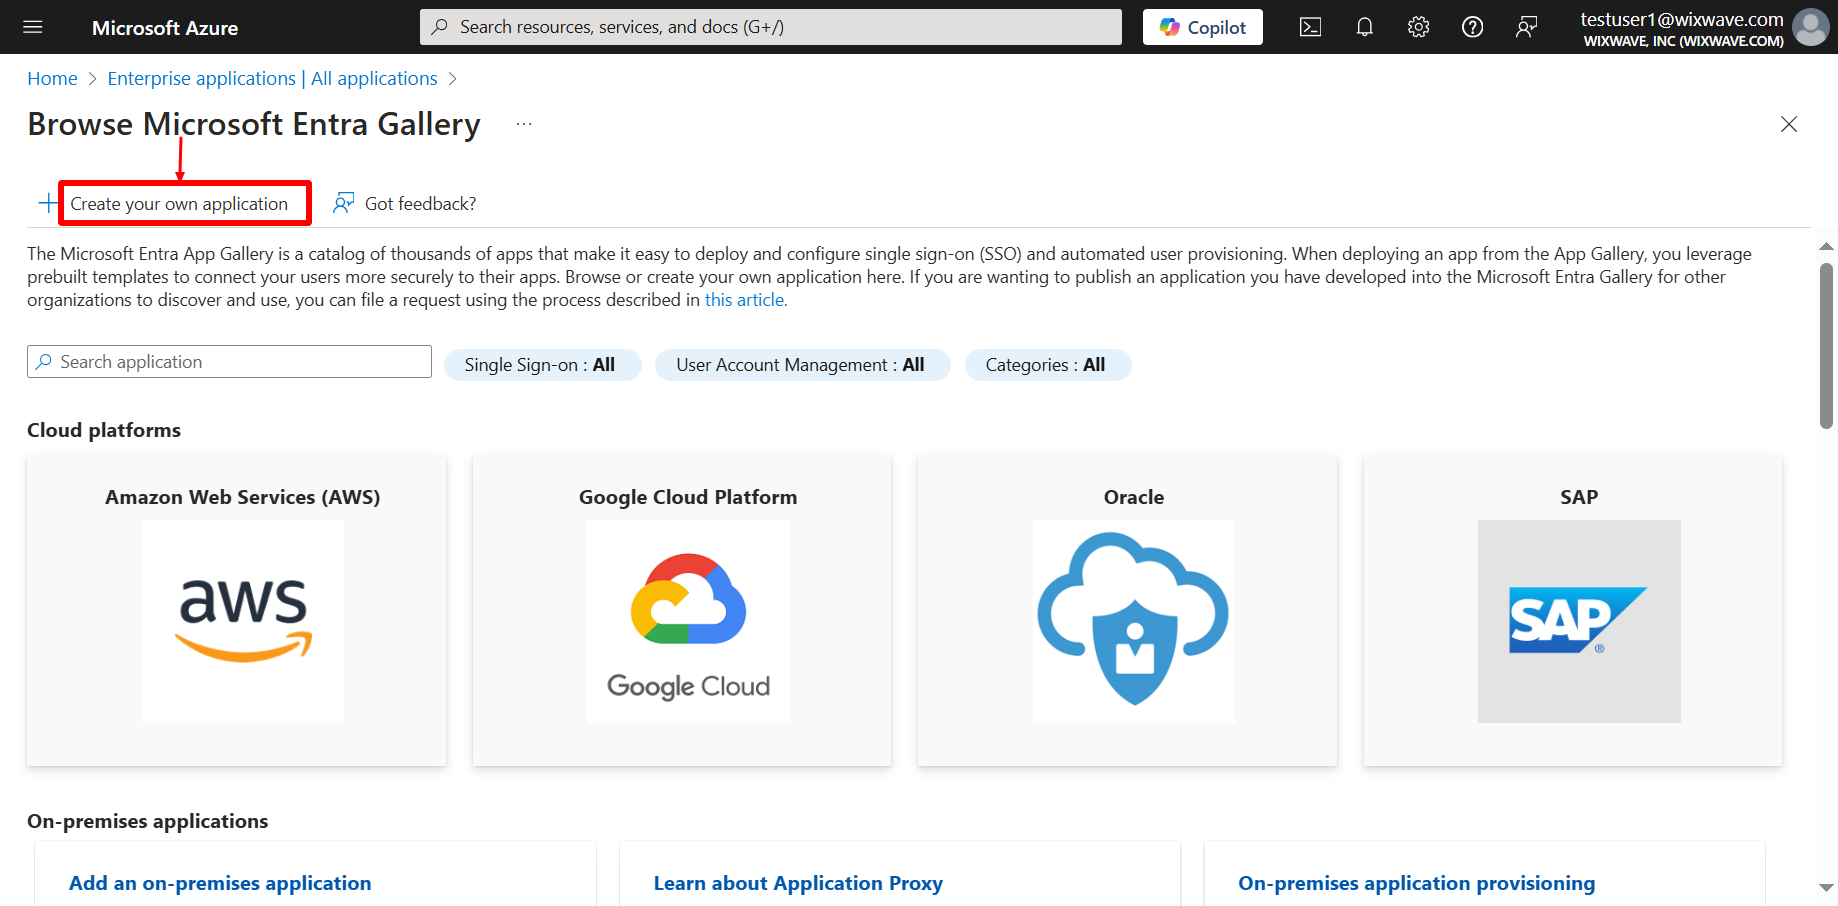
- Select the toggle which says “Integrate any other application you don’t find in the gallery.
- New app has been created. Incase if you want to access again, You can always get back to it by selecting its name from the enterprise applications list you’ve already visited above.
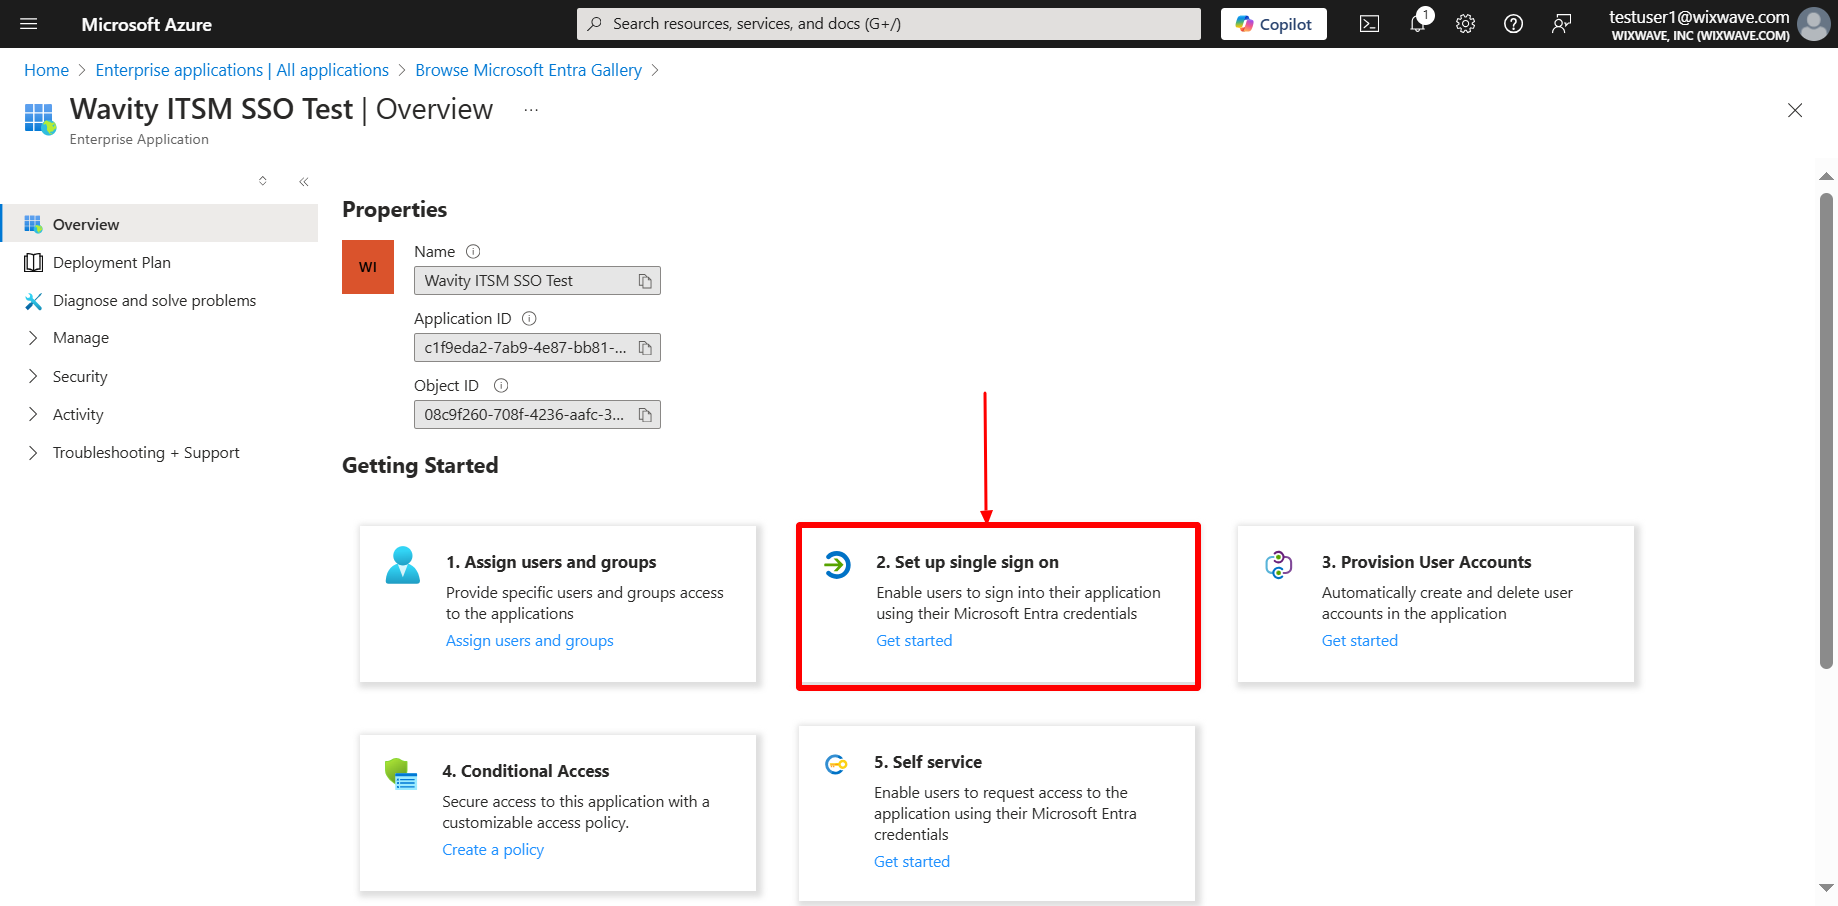
- Click on ‘Set UP single sign-on’.
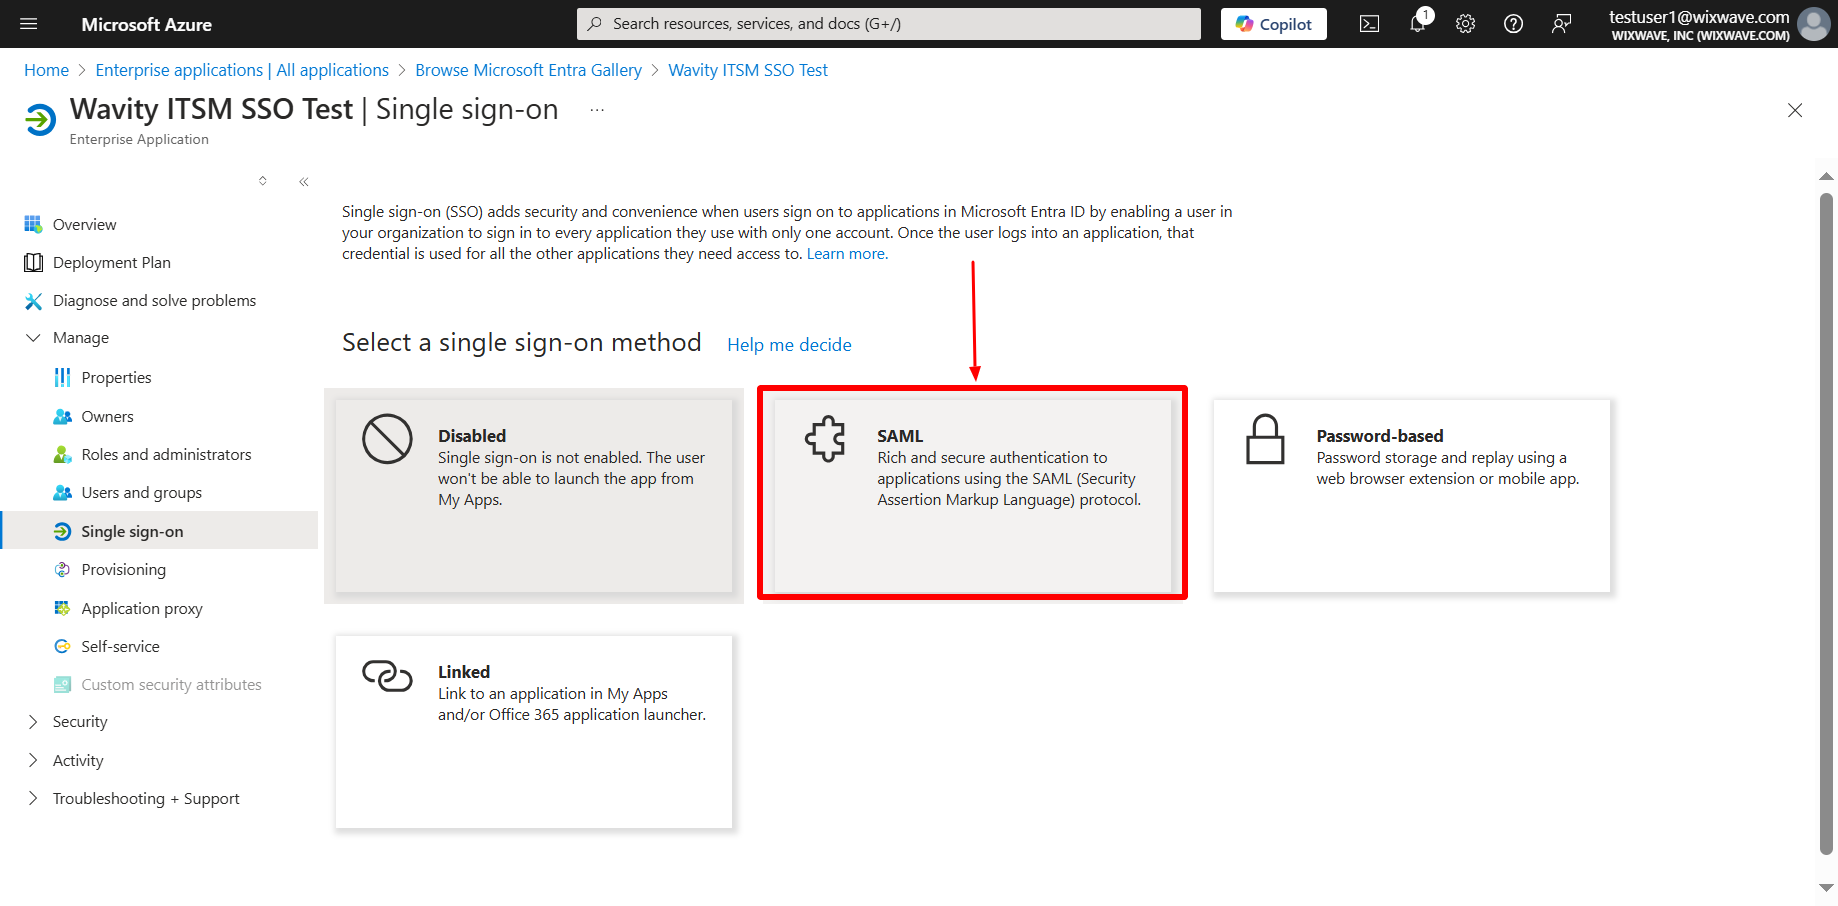
- Select single sign-on method as SAML.
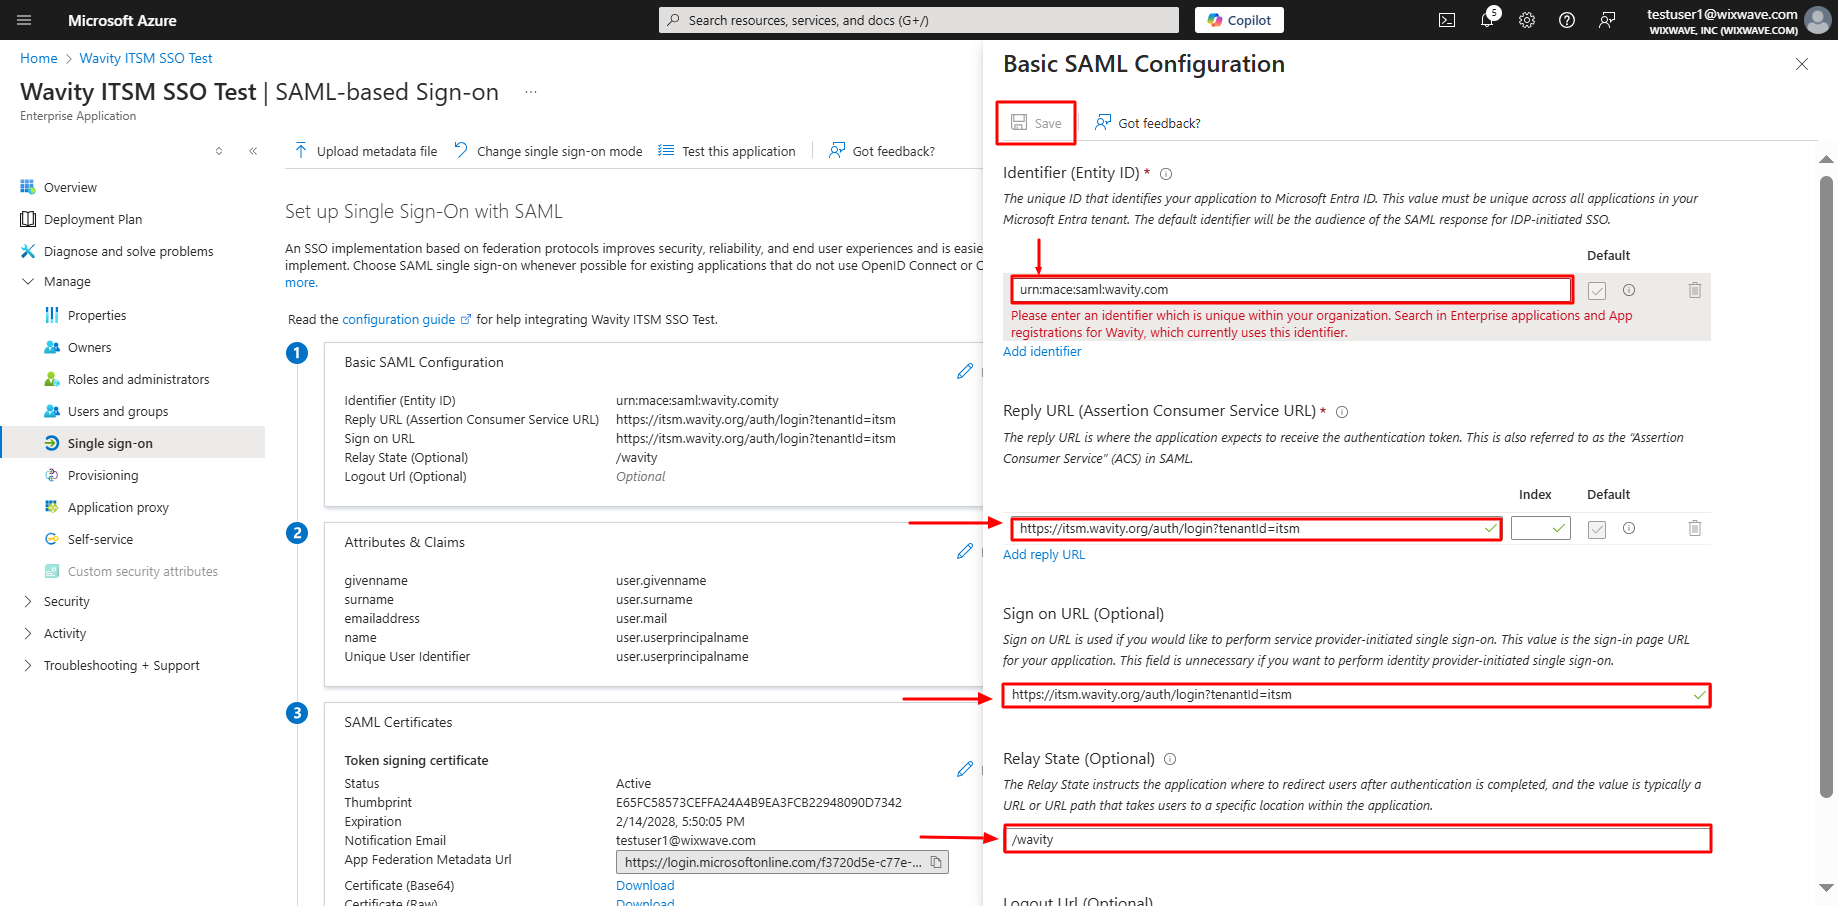
- On the next page, you find a link to a configuration guide which you can consult if you have any azure-specific questions. Or you can go straight to adding the two config parameters you need. Fill in the following tabs Identifier email ID, Reply URL, Sign on URL & Relay state using the links from Wavity Integration setting page as below.
- After filling out all information, you will prompt to the following page. Click on edit option on Attributes & Claims.

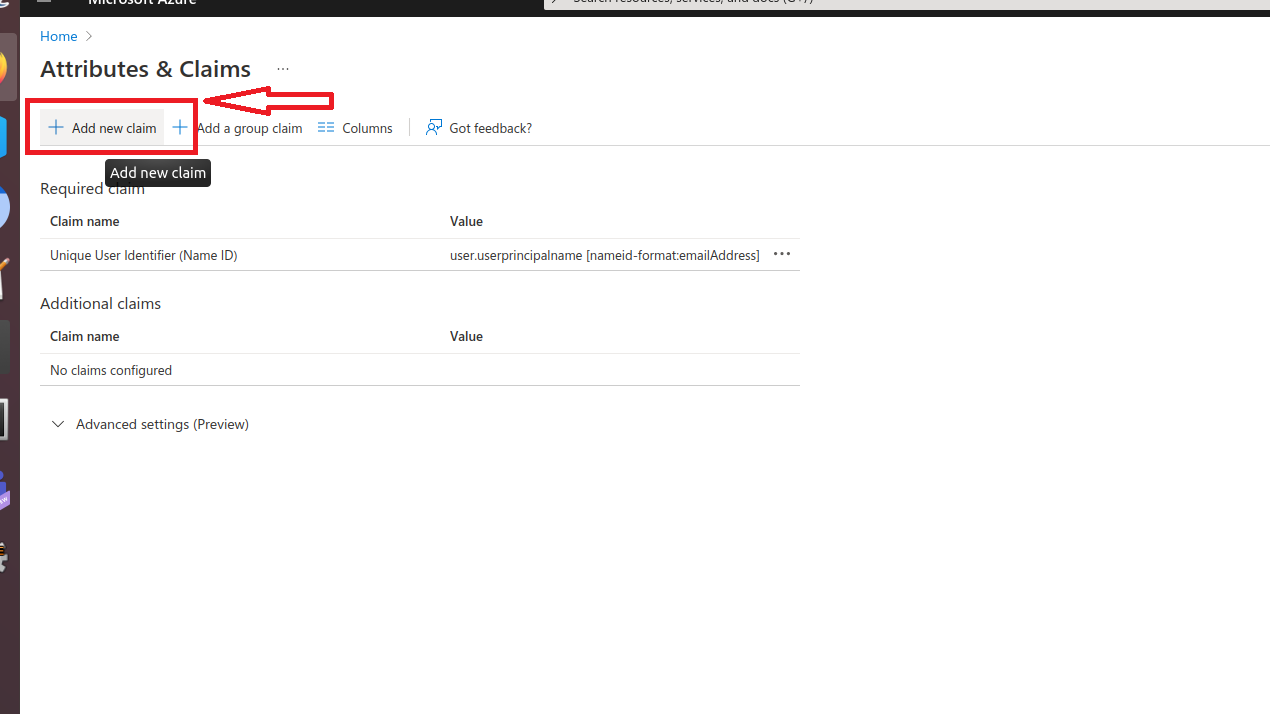
- After deleting all the existing claims, Click on Add new claim in Attributes & Claims section.
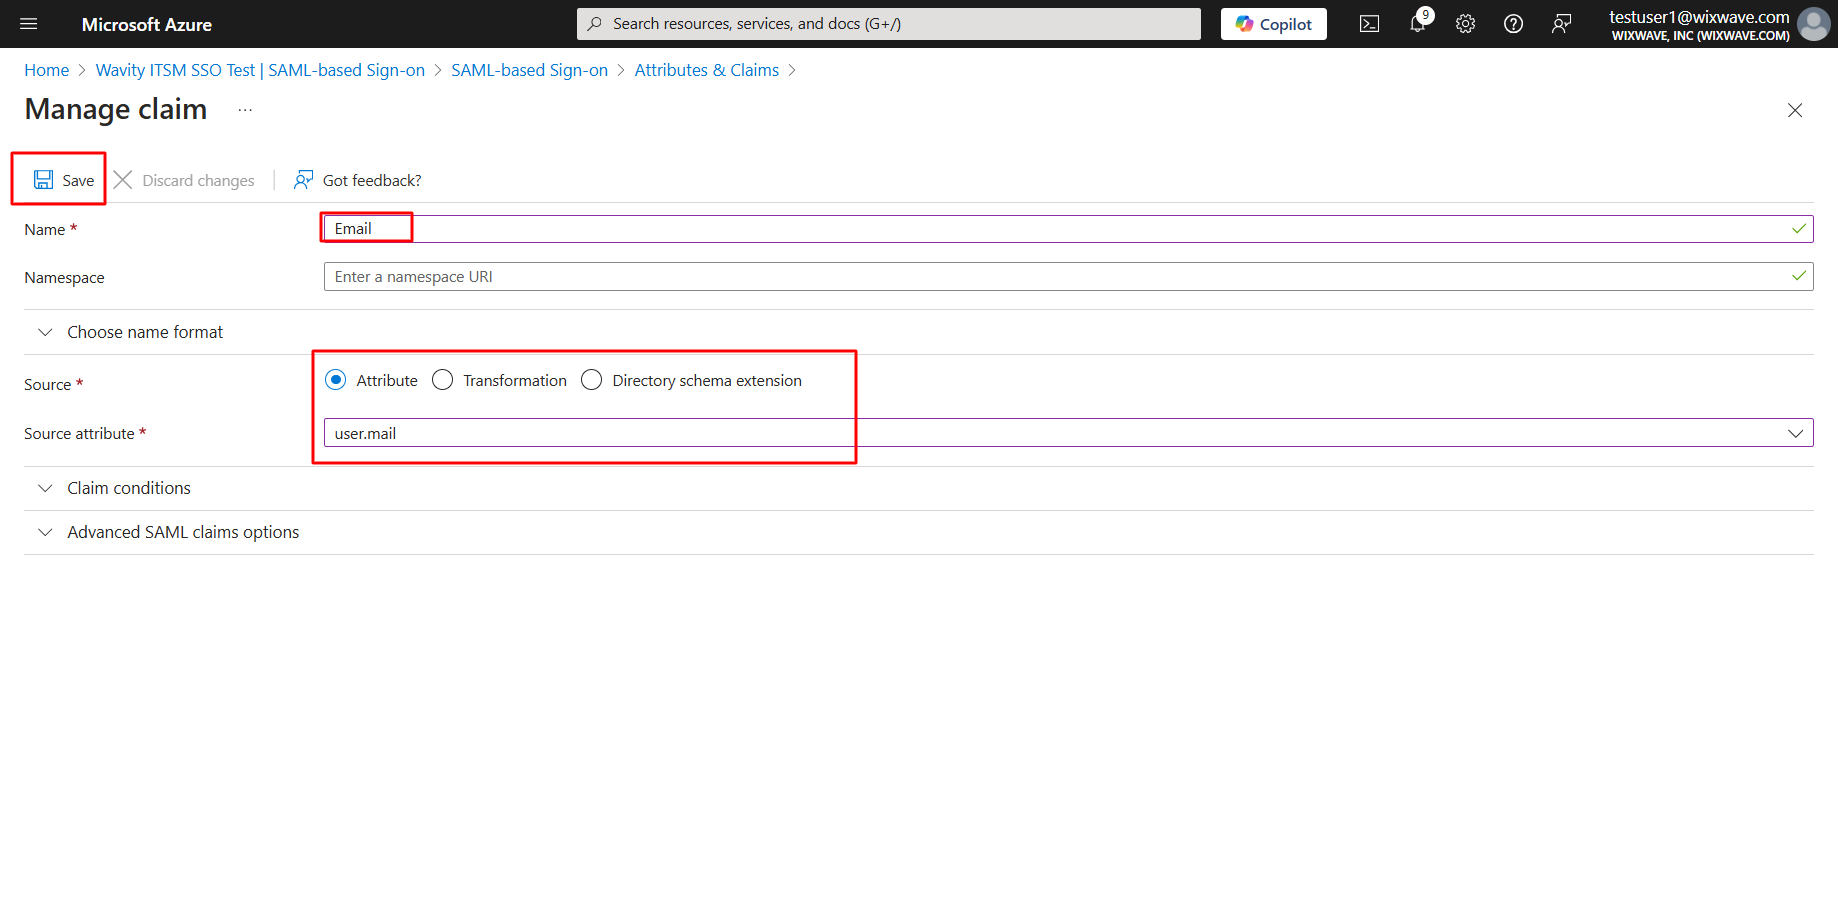
- Type Email in name tab and select source attribute as user.mail and click save. Please copy the source attribute ‘Email’ to Wavity SAML Integrations setting page under section Assertion attributes mapping. Ensure that you copy the value exactly as it appears, as it is case-sensitive.
- Similarly, Type FirstName in name tab and select source attribute as user.givenname and click save. Please copy the source attribute ‘FirstName’ to Wavity SAML Integrations setting page under section Assertion attributes mapping. Ensure that you copy the value exactly as it appears, as it is case-sensitive.

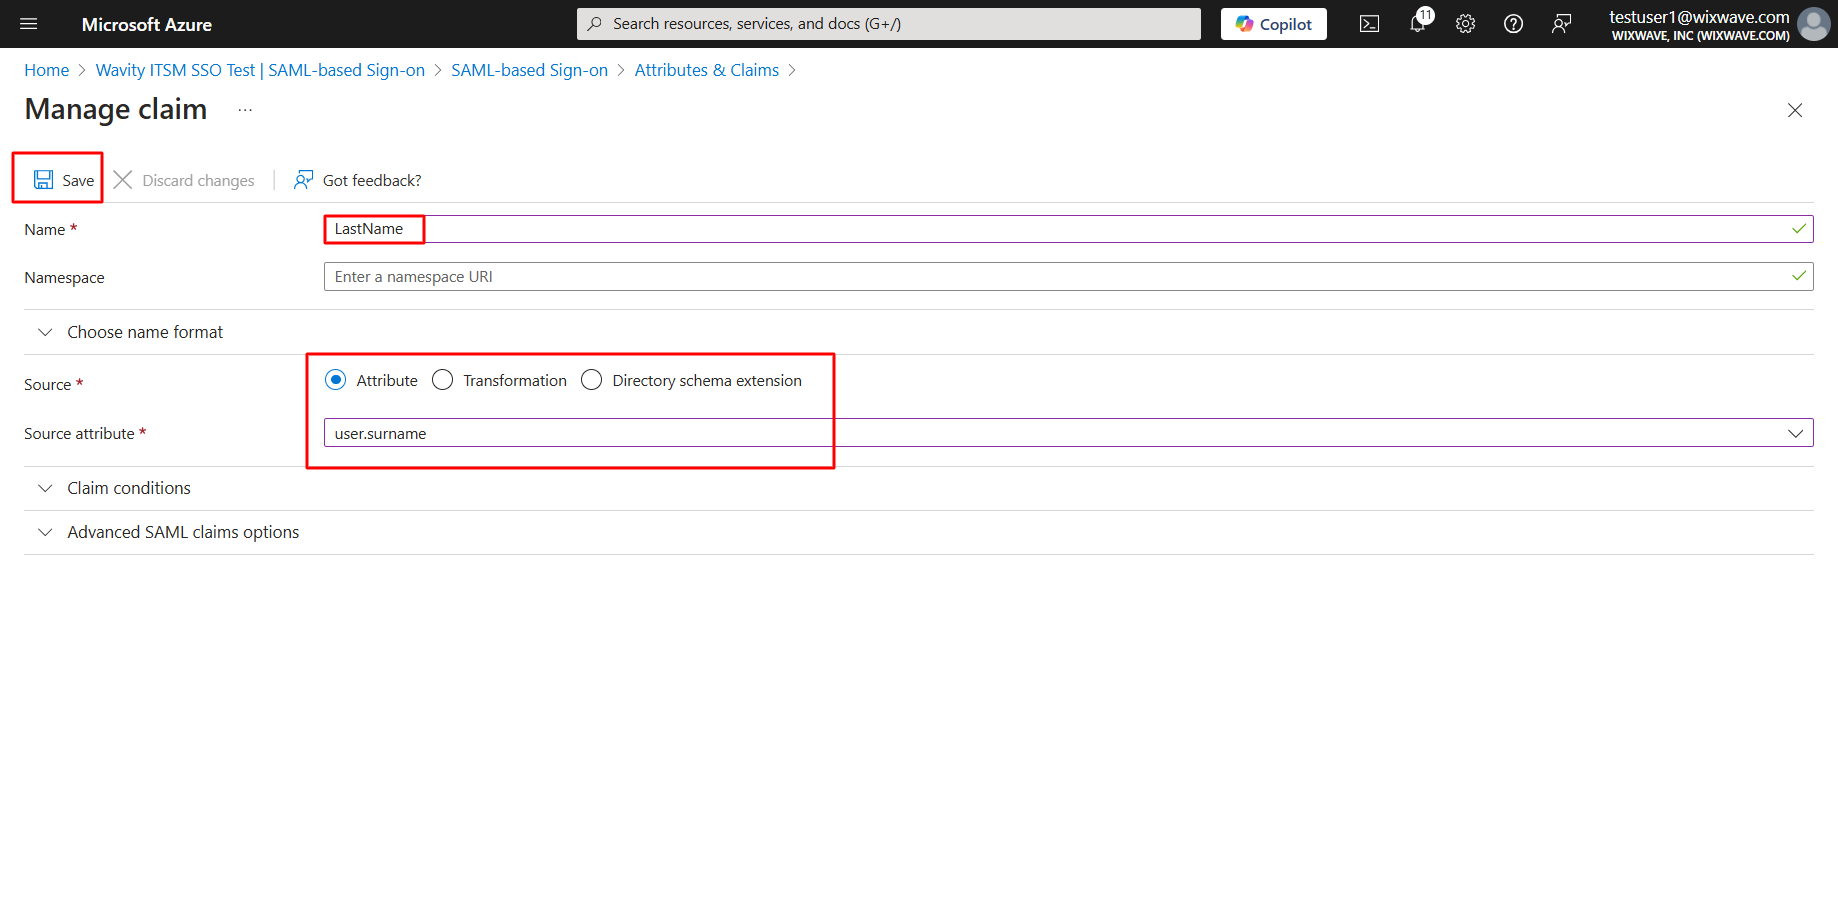
- Similarly, Type LastName in name tab and select source attribute as user.surname and click save. Please copy the source attribute ‘LastName’ to Wavity SAML Integrations setting page. Ensure that you copy the value exactly as it appears, as it is case-sensitive.
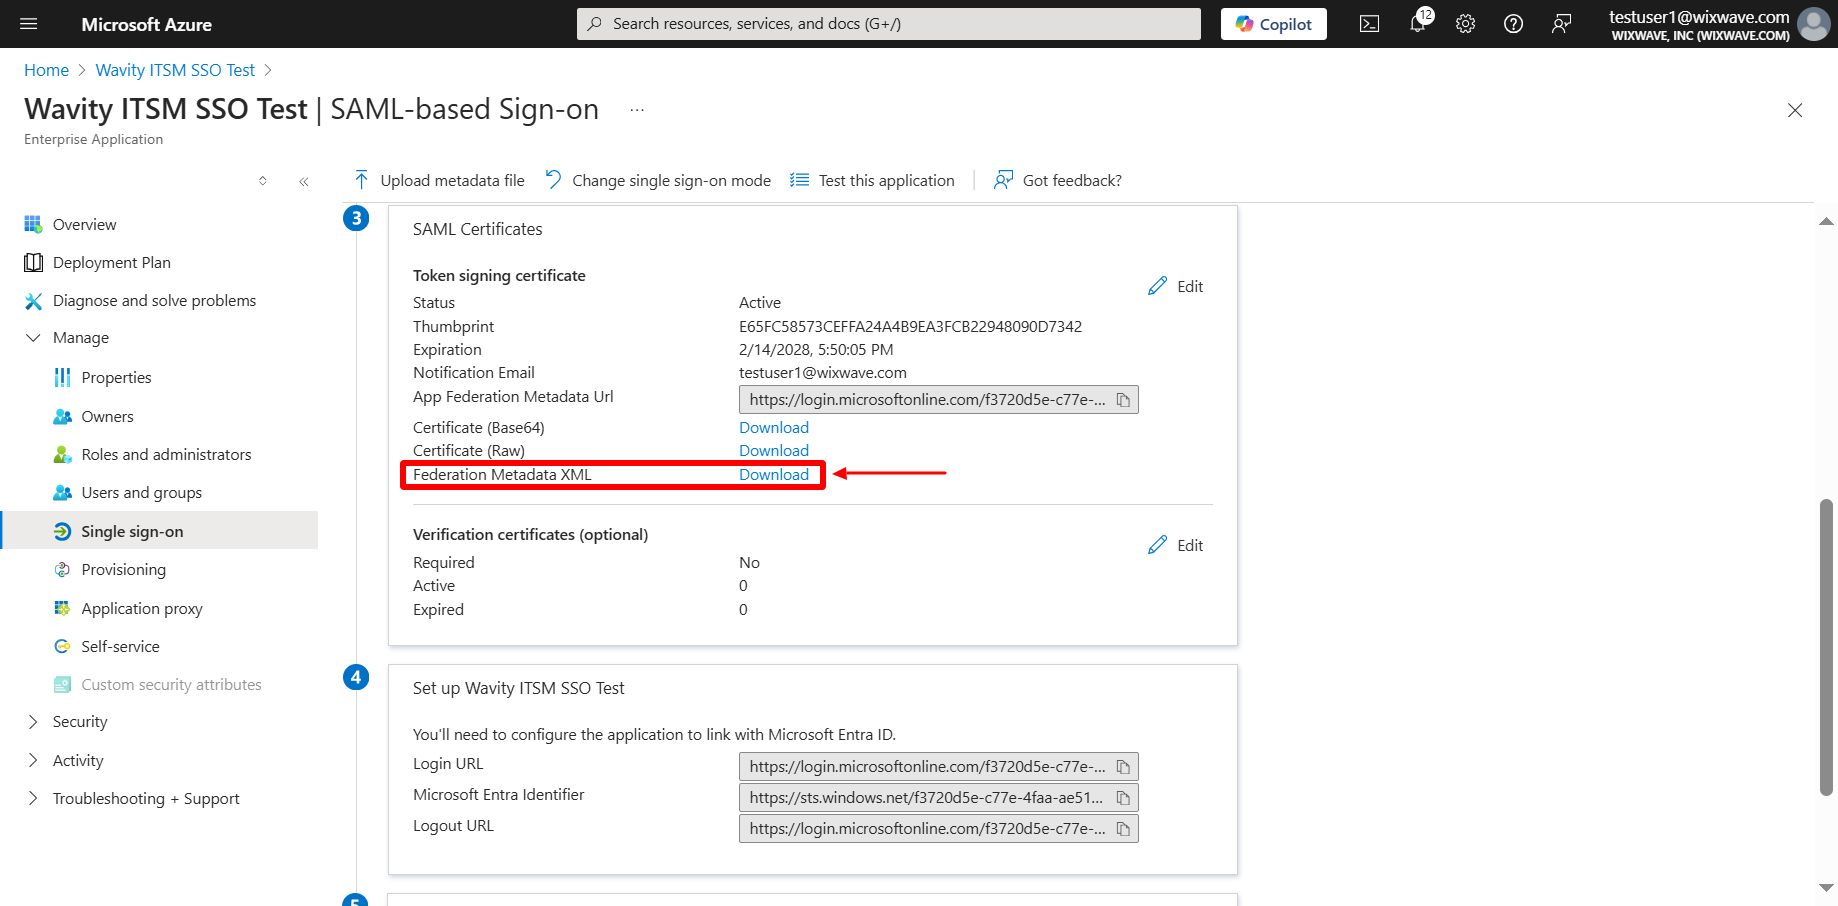
- Setup of Azure is complete. Now, click on download option of Federation Metadata XML. Copy all the details in the downloaded file and paste it on Identity provider Metadata section on Wavity SAML Integrations setting page.
- Click on copy the link beside login URL. Paste it on Identity provider Single-Sign-On section on Wavity SAML Integrations setting page.
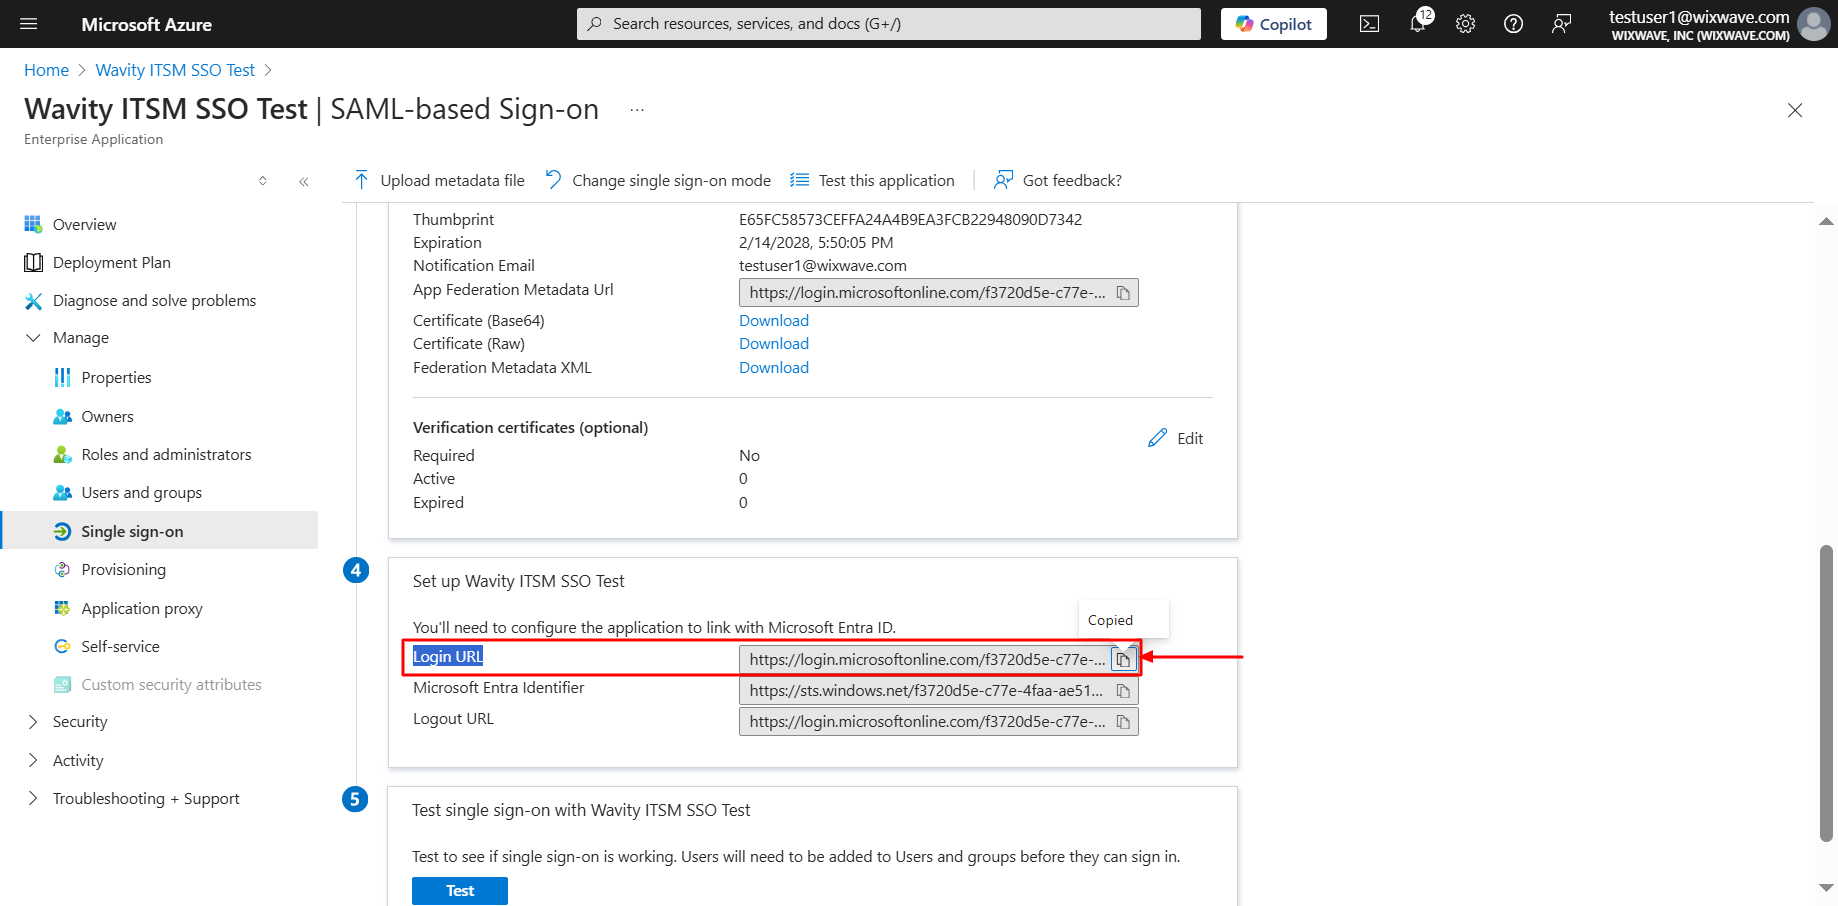
- As a final step, you will use the Azure to fill the tabs below the Identity Provider Single-Sign-On URL, Identity Provider Metadata & Assertion Attributes Mapping in Wavity. Please ensure the values of Attributes in Azure matches with the values in Wavity SAML Integrations setting page.
- Enter the information in the appropriate fields as described below using Azure and click on Save. You may also enable "Just in Time Provisioning" to add new users from your Active Directory for using Wavity as Single Sign-On (SSO). Wavity SAML Integration using Azure is complete.
Please find below details which will be required during Set Up:
- Entity Id: urn:mace:saml:wavity.com
- Relay State: /wavity
User can now use SSO to sign into Wavity.