
Live Chat Configuration Guide for Admins
- On the Wavity Platform, end users can directly communicate with agents to resolve their issues.
- The Messaging feature enables live chat between end users and agents for real-time support.
- Enabling Messaging feature is a simple process
- Only Admin will have access to enable the messaging feature.
- Click on the Profile Icon.
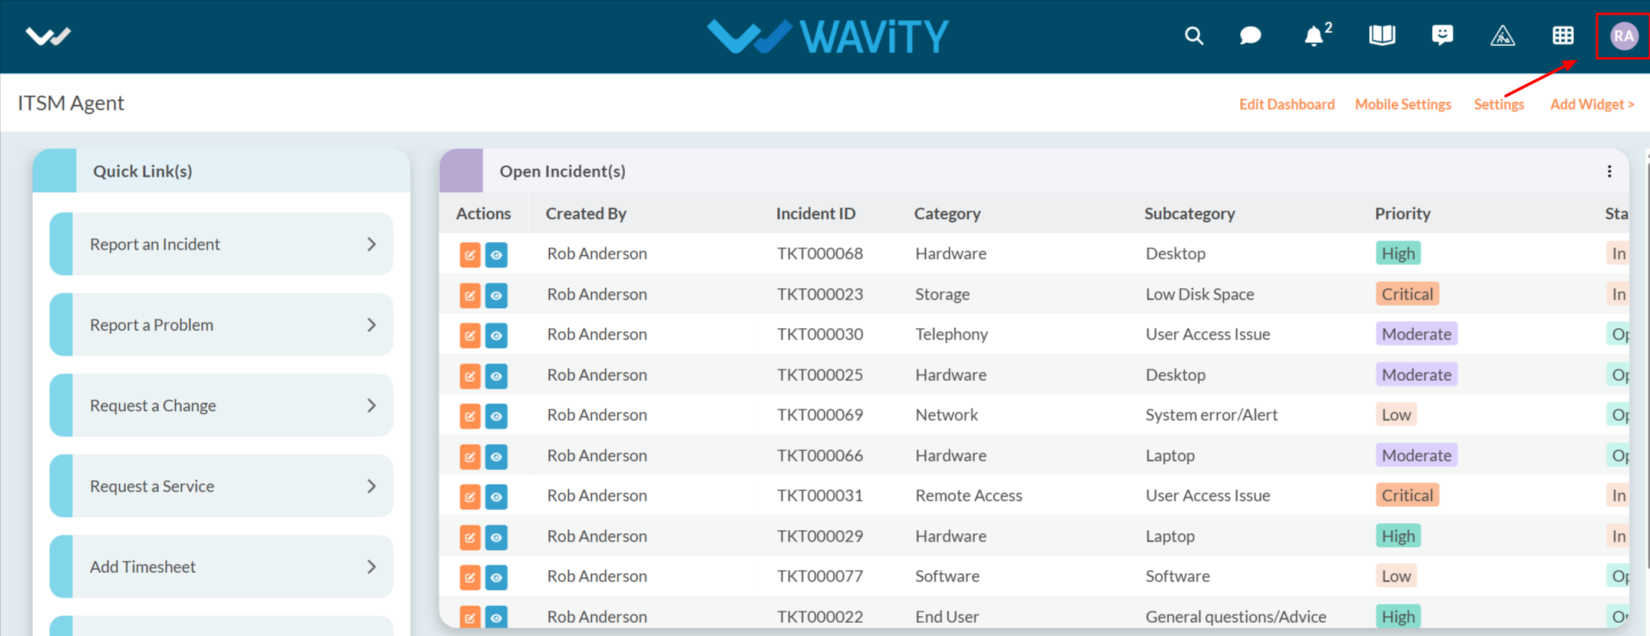
- Select General.
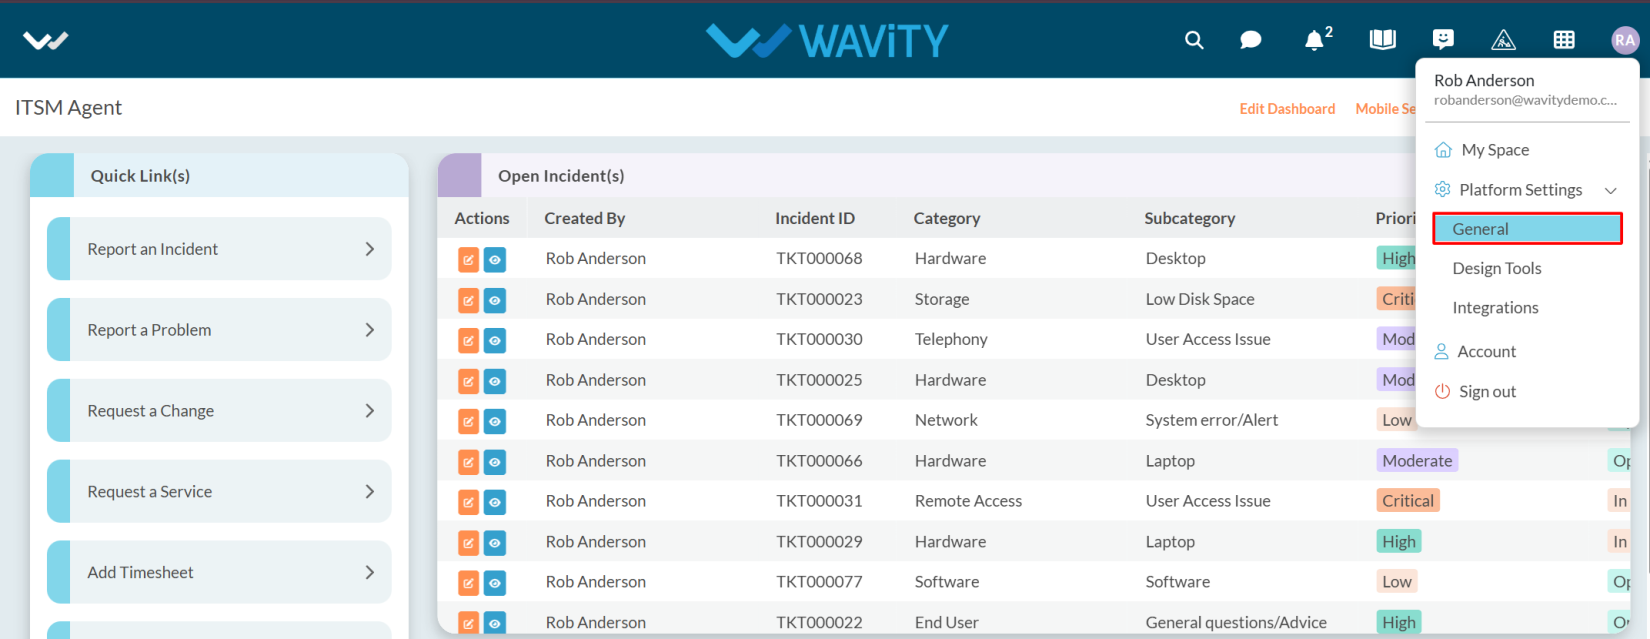
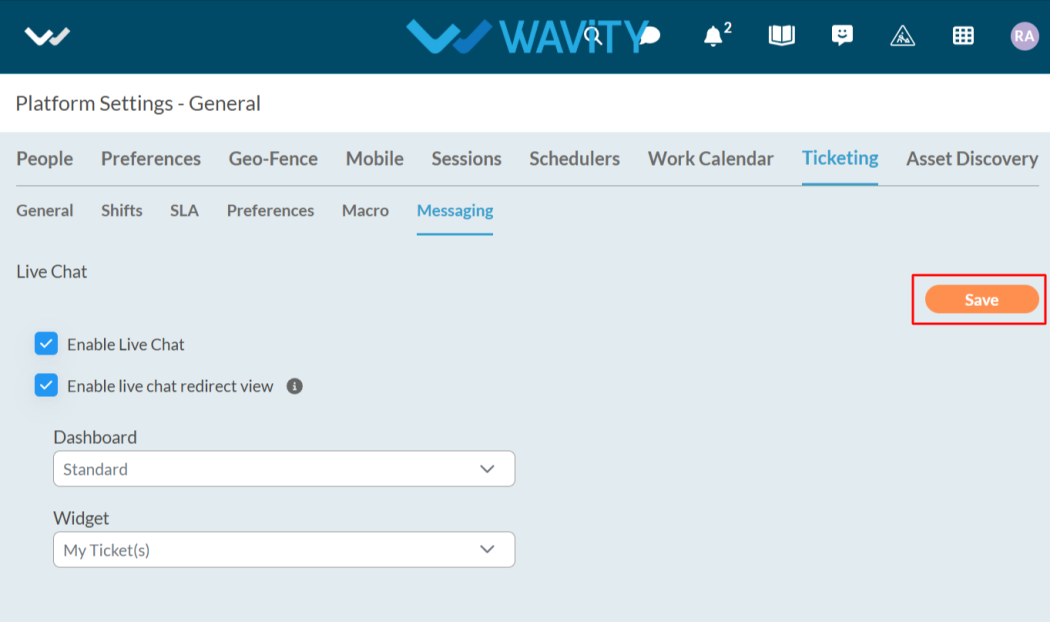
- After selecting General from the options, you will be directed to the Platform Settings – General page.
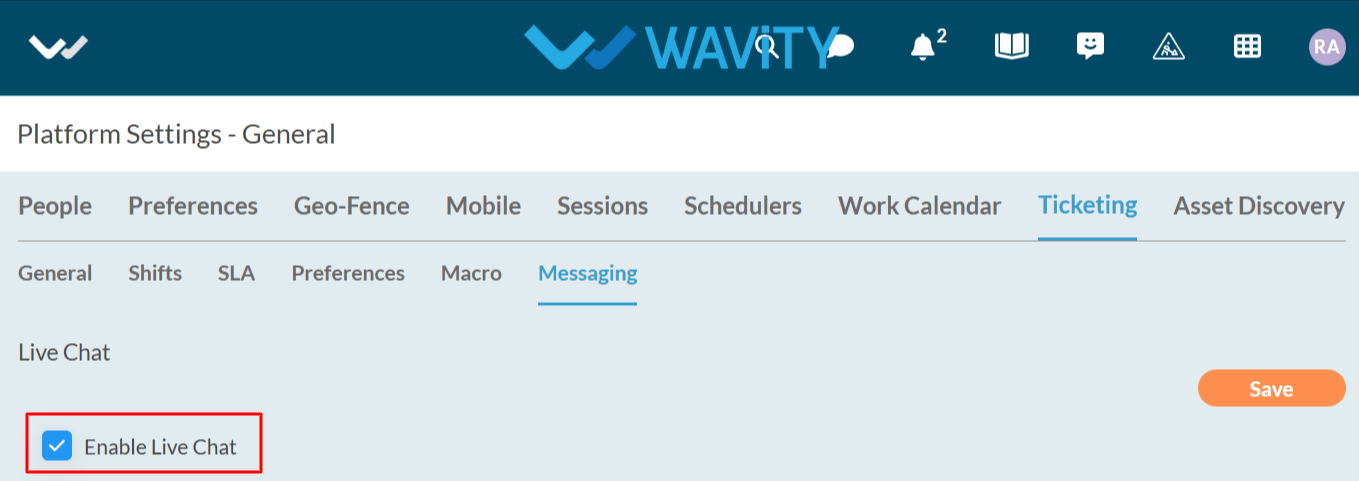
- Navigate to the Ticketing tab and select Messaging.

- After selecting the Messaging, you can view the Live Chat.
- Enable Live Chat.
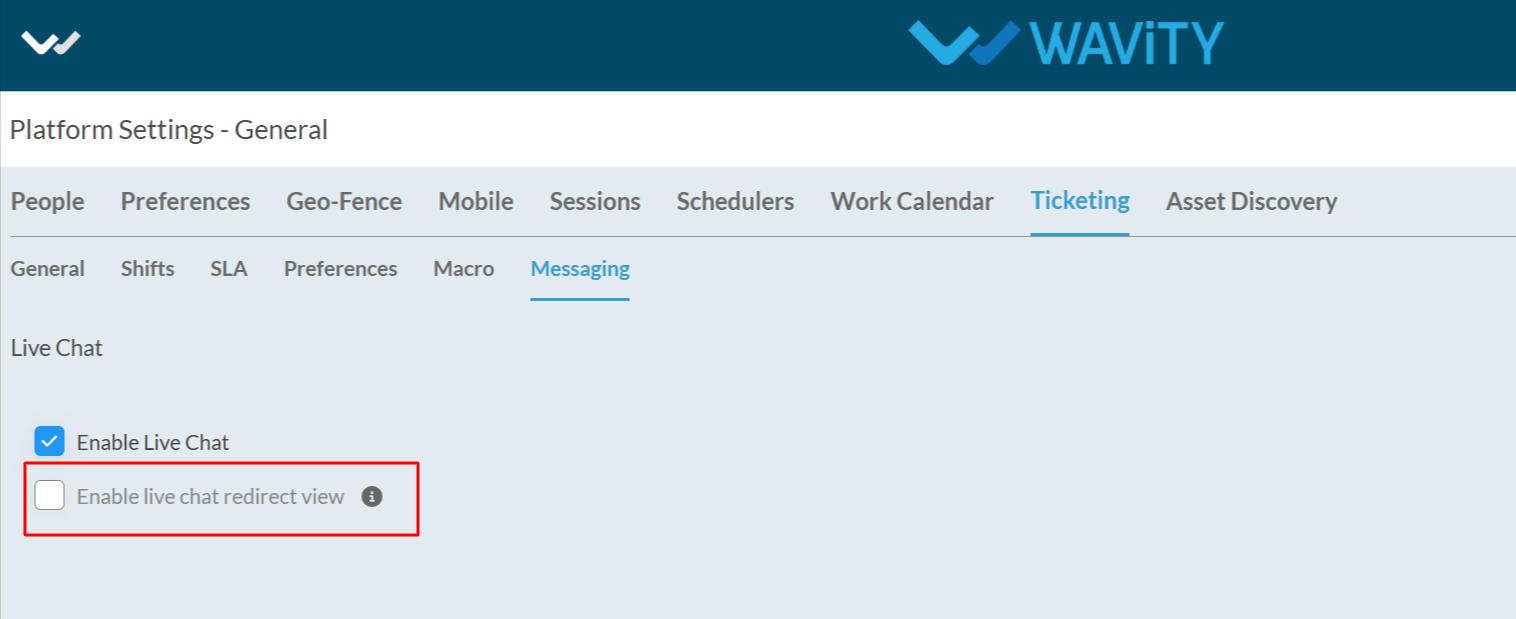
- After enabling the live chat , you can Enable live chat redirect view
- Enable Live Chat Redirect View: If enabled, you can specify which widget the agent will be redirected to after accepting a live chat request.
- When you enable the Live Chat Redirect View, you must select both the dashboard and the widget to complete the configuration.
- Select the appropriate dashboard and widget from the options to complete the setup.

- After selecting the dashboard and widget, click the Save button to apply the changes.
- The Chatbot is now enabled. Now the end user can use the Live Chat feature where they can select 'Talk to an agent'; the Chatbot will then connect them with an agent, allowing the user to describe their issue.
