
How to enable Email Integration with Microsoft Office 365
- The Wavity platform provides email integration functionality, allowing for the automatic generation of requests within the platform through email. This occurs subsequent to the sending of an integrated email, based on configured conditions.
Email Integration with Microsoft Office 365:
- Wavity supports direct email integration with Microsoft Office365.
- To enable email integration with Microsoft Office 365, You need to allow for consent and permissions to avoid hassle-free email integration with Wavity.
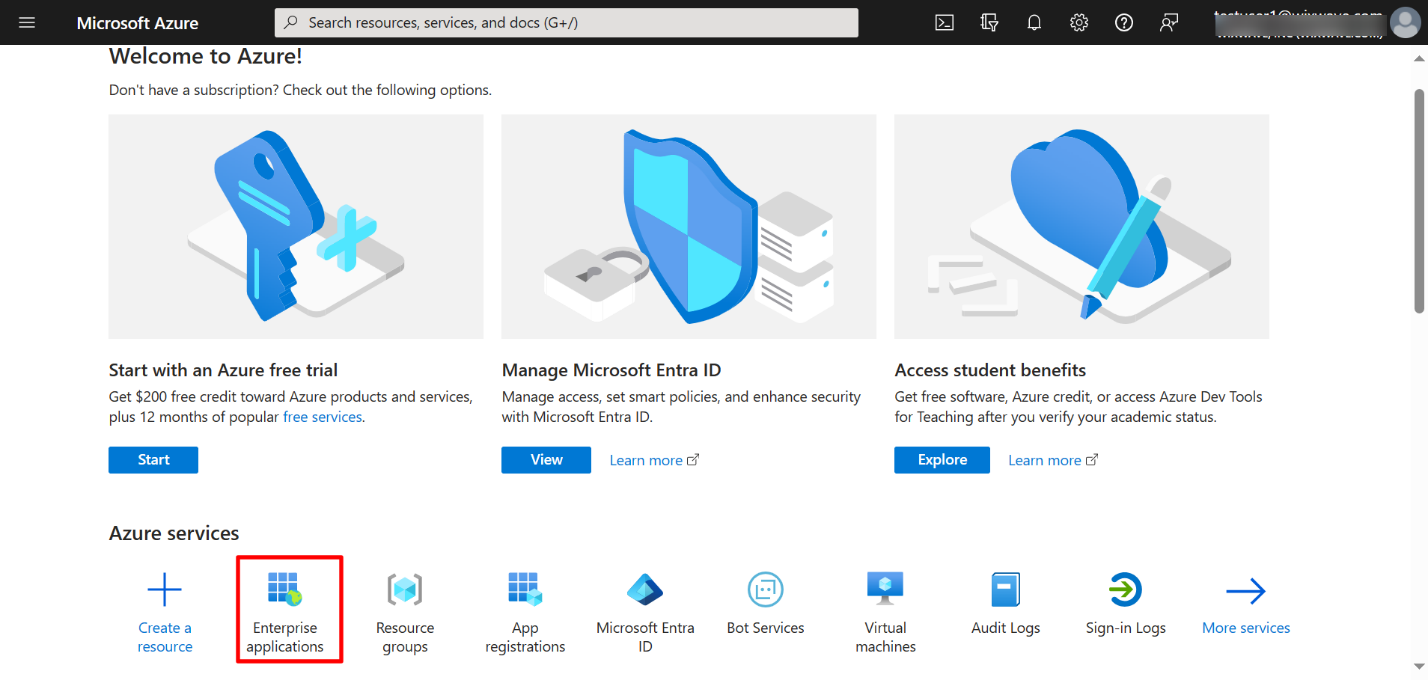
- Please log in to your Microsoft azure account using your admin credentials.
- Click on “Enterprise Applications” as shown in below image.
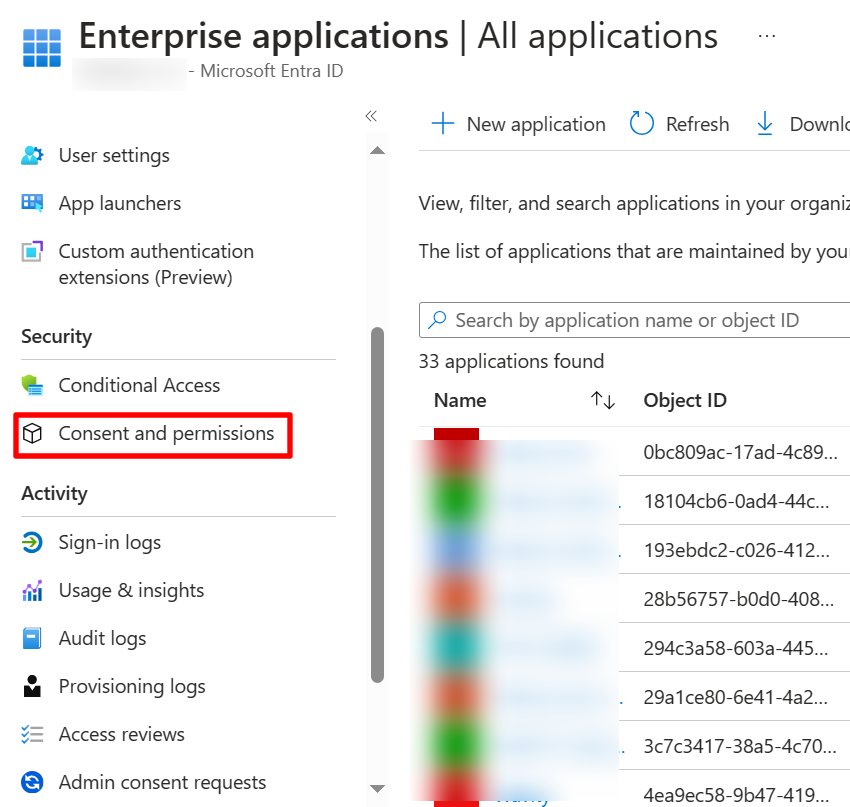
- Click on “Consent & Permissions” as shown in below image.
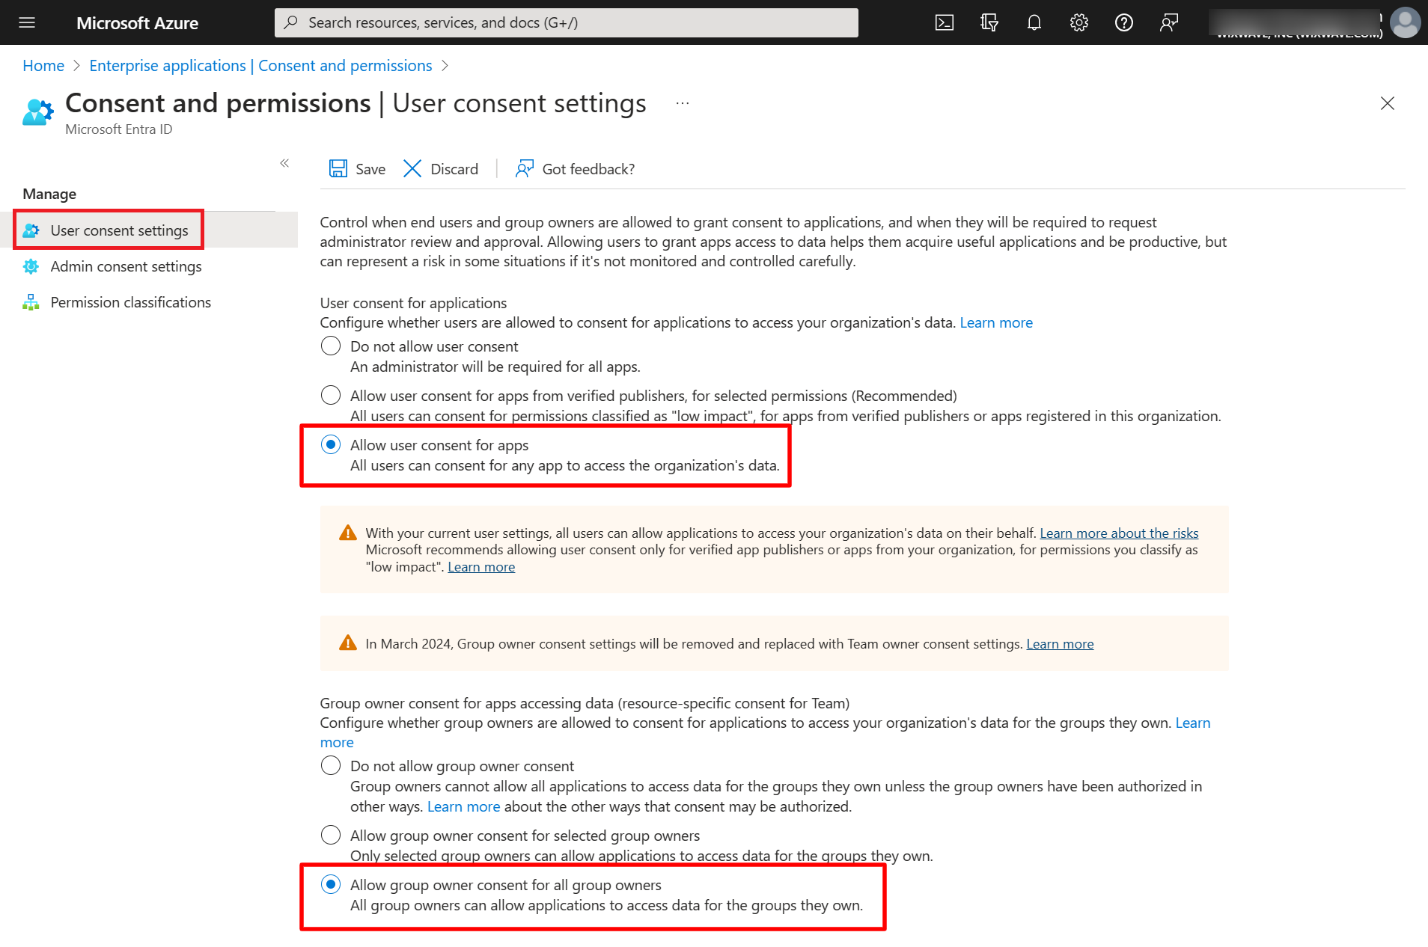
- Select “User Consent Settings” on the left as shown in below image.
- Select “Allow user consent for Apps” & “Allow group owner consent for all group owners” as shown in below image. Click on Save to update the settings.
- You can change the settings later back to your default settings after email integration with Wavity is complete.
Enable Email Integration in Wavity
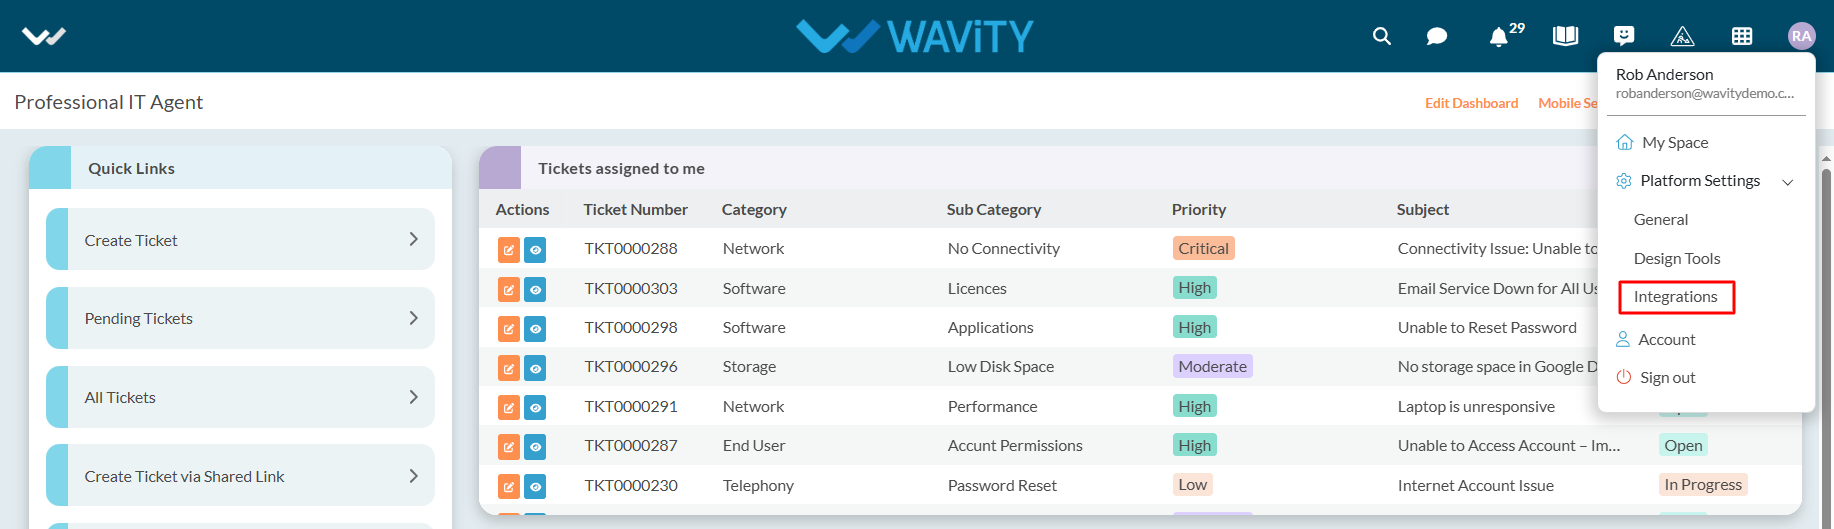
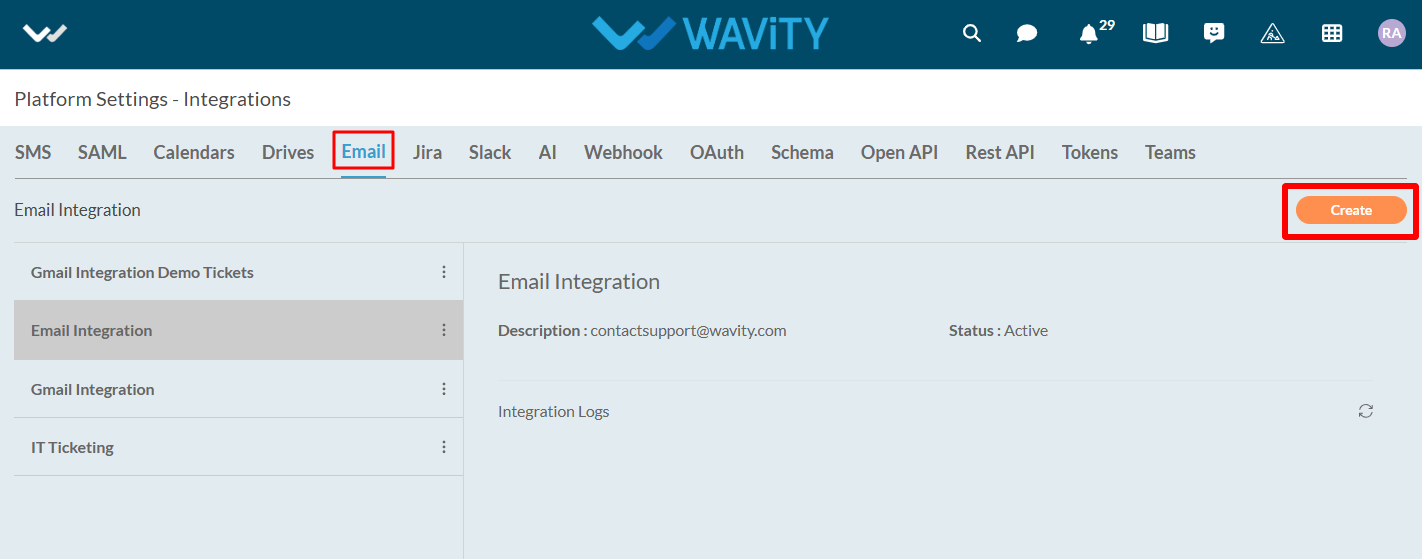
- To enable the email integration in Wavity, click on click on Profile >Integrations.
- Now, Click on “Create” button under Email section of the Integrations page as shown in below image.
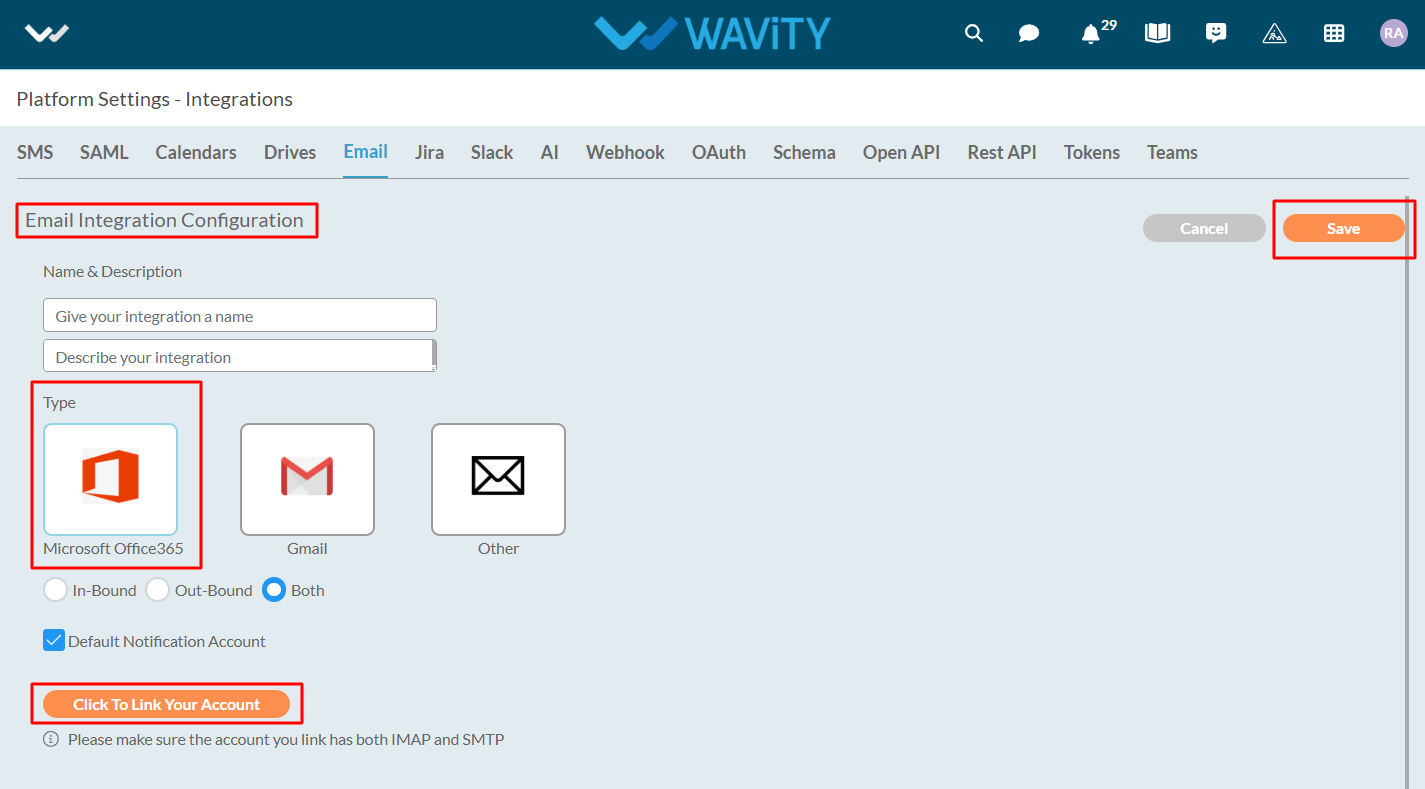
- Under name & description, you can mention the email integration name and any further details under description for reference.
- Select “Microsoft Office365” as type of integration.
- You can also enable the type of integration required such as inbound or outbound or both.
- Click on “Click to link your account” button as shown in below image.
- You will receive a pop up message as shown below. Click on “Accept” to complete the process of linking your Microsoft account with Wavity.

Please follow the above steps to complete the process of linking your Microsoft Office email account with Wavity.