Wavity supports Export & Import functions in its platform.
- In Export, you can export all the fields from any applications with template and data to excel sheets & pdf documents.
- In Import, you can import any excel sheet to an existing application or an empty application with all the data.
- Please find below steps to carry out both Export/Import Functions in Wavity Platform.
Steps for Export Functions:
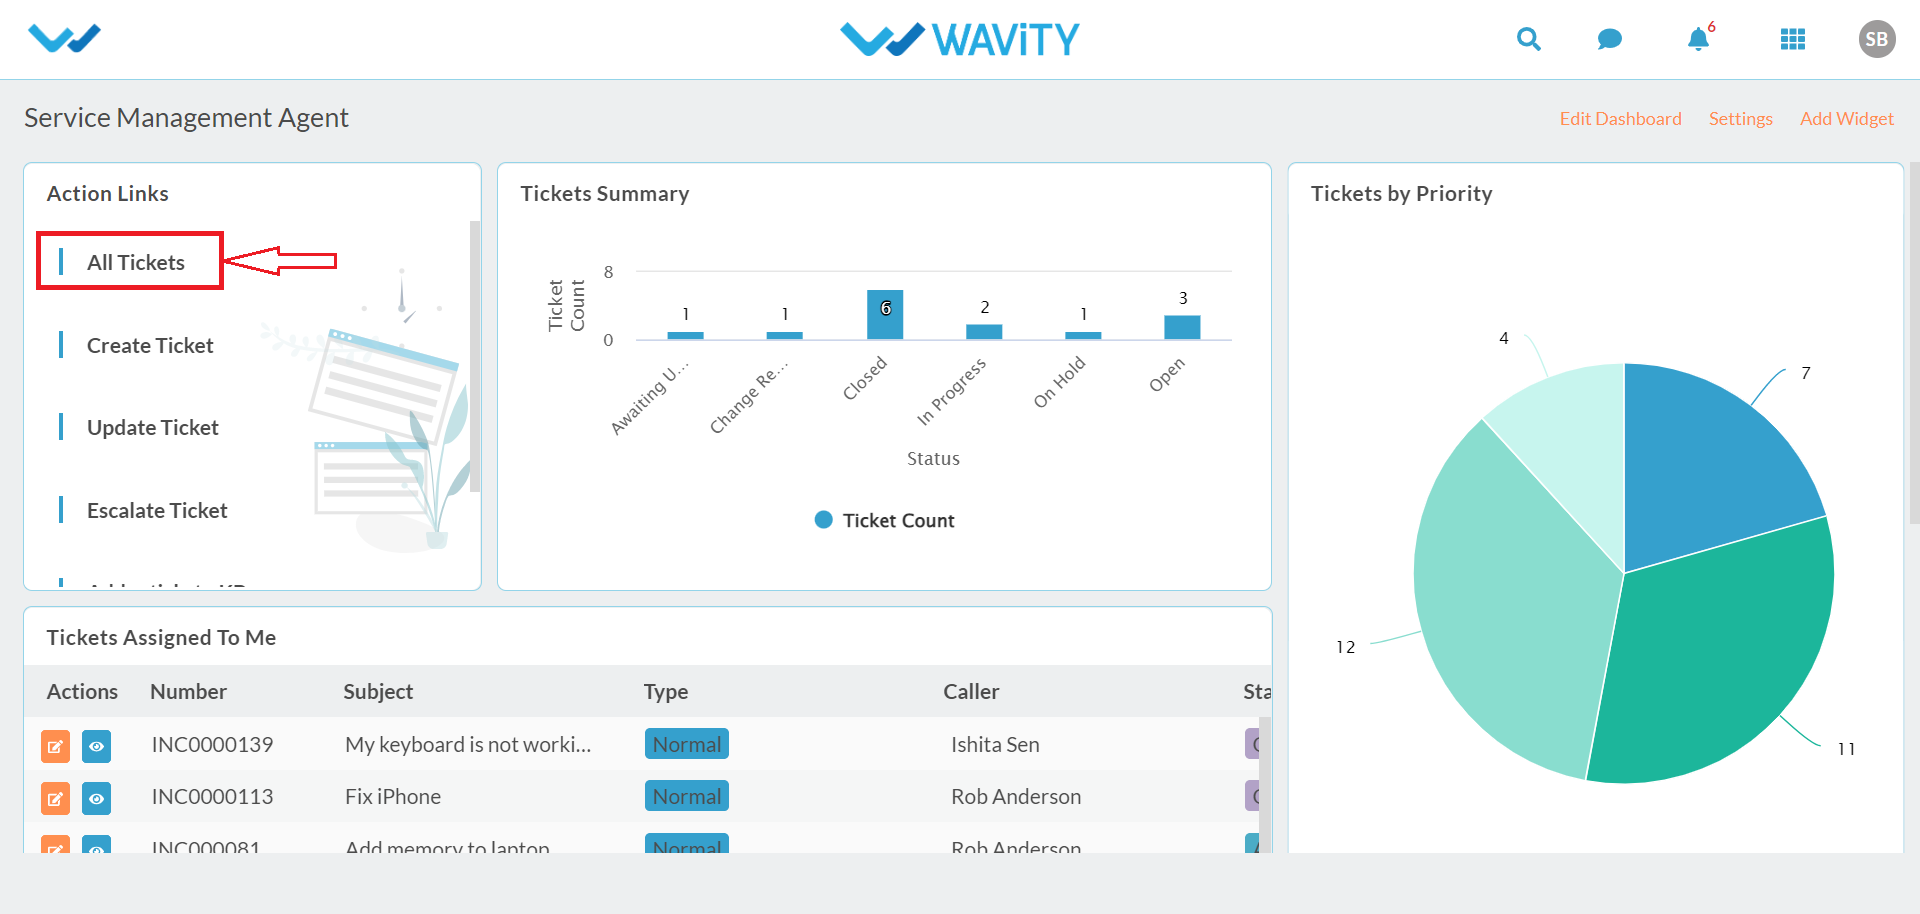
- Login to Wavity platform. Based on your role you will have access to your dashboard. In the Action links, Click on application (Eg. All Tickets) which has all data. Please refer below image.
- You will be prompted to Tickets application with all data related to Tickets. On the right-side corner, Click on 3 vertical dots. 3 options will be shown; Export Template to Excel, Export data to Excel, Edit columns.

- Click on Export template to Excel. Then, select ‘Ignore reference applications’ and click on Export.
Export template to Excel: With this function, you can export the template of the application in Excel format.
Ignore Reference applications: By checking this tab, It will Ignore any reference application to export template sheet. However, by unchecking this tab, It will also add reference applications along with the exported application.

- After clicking on export, Excel sheet with template will be downloaded in your system. Refer below image of excel sheet after download.

- Click on Export data to Excel as below:
Export data to Excel: With this function, you can export the all the data of the application in Excel format.

- If export data is successfully completed, you will receive a message in the platform as below ‘Export Data request has been submitted successfully’

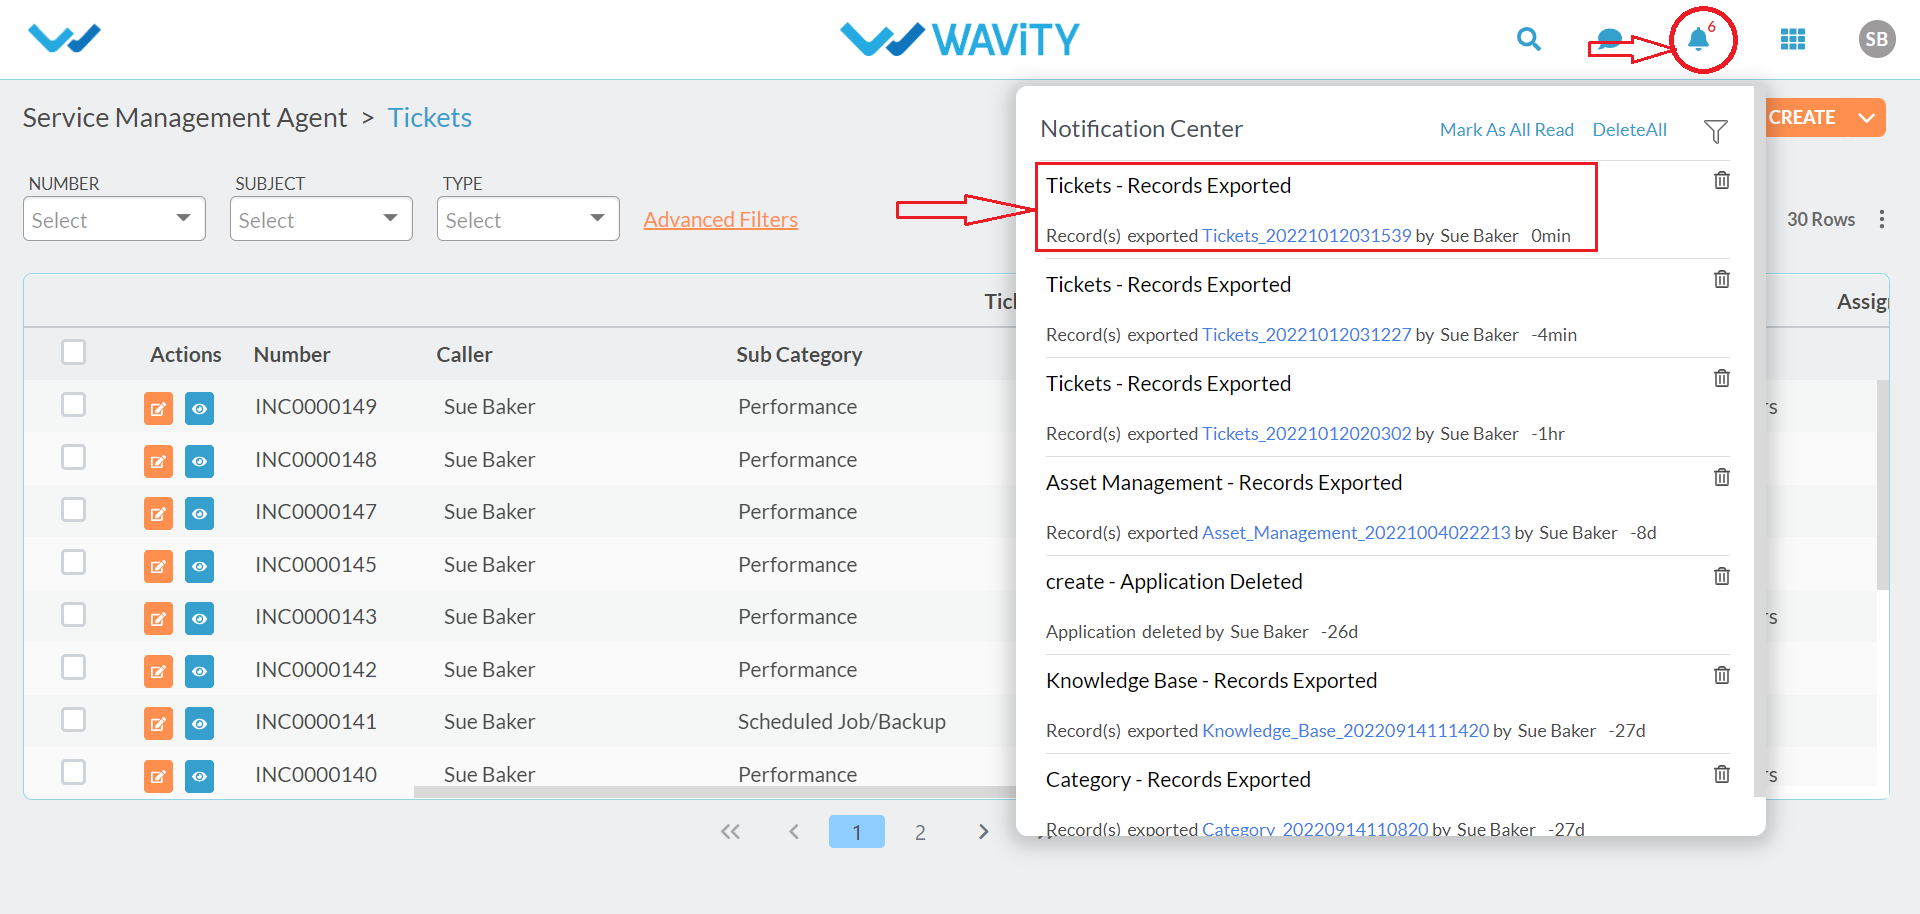
- Now, Click on the bell icon on the top right corner. All notifications are displayed here. Click on the blue link as shown below to download the excel sheet
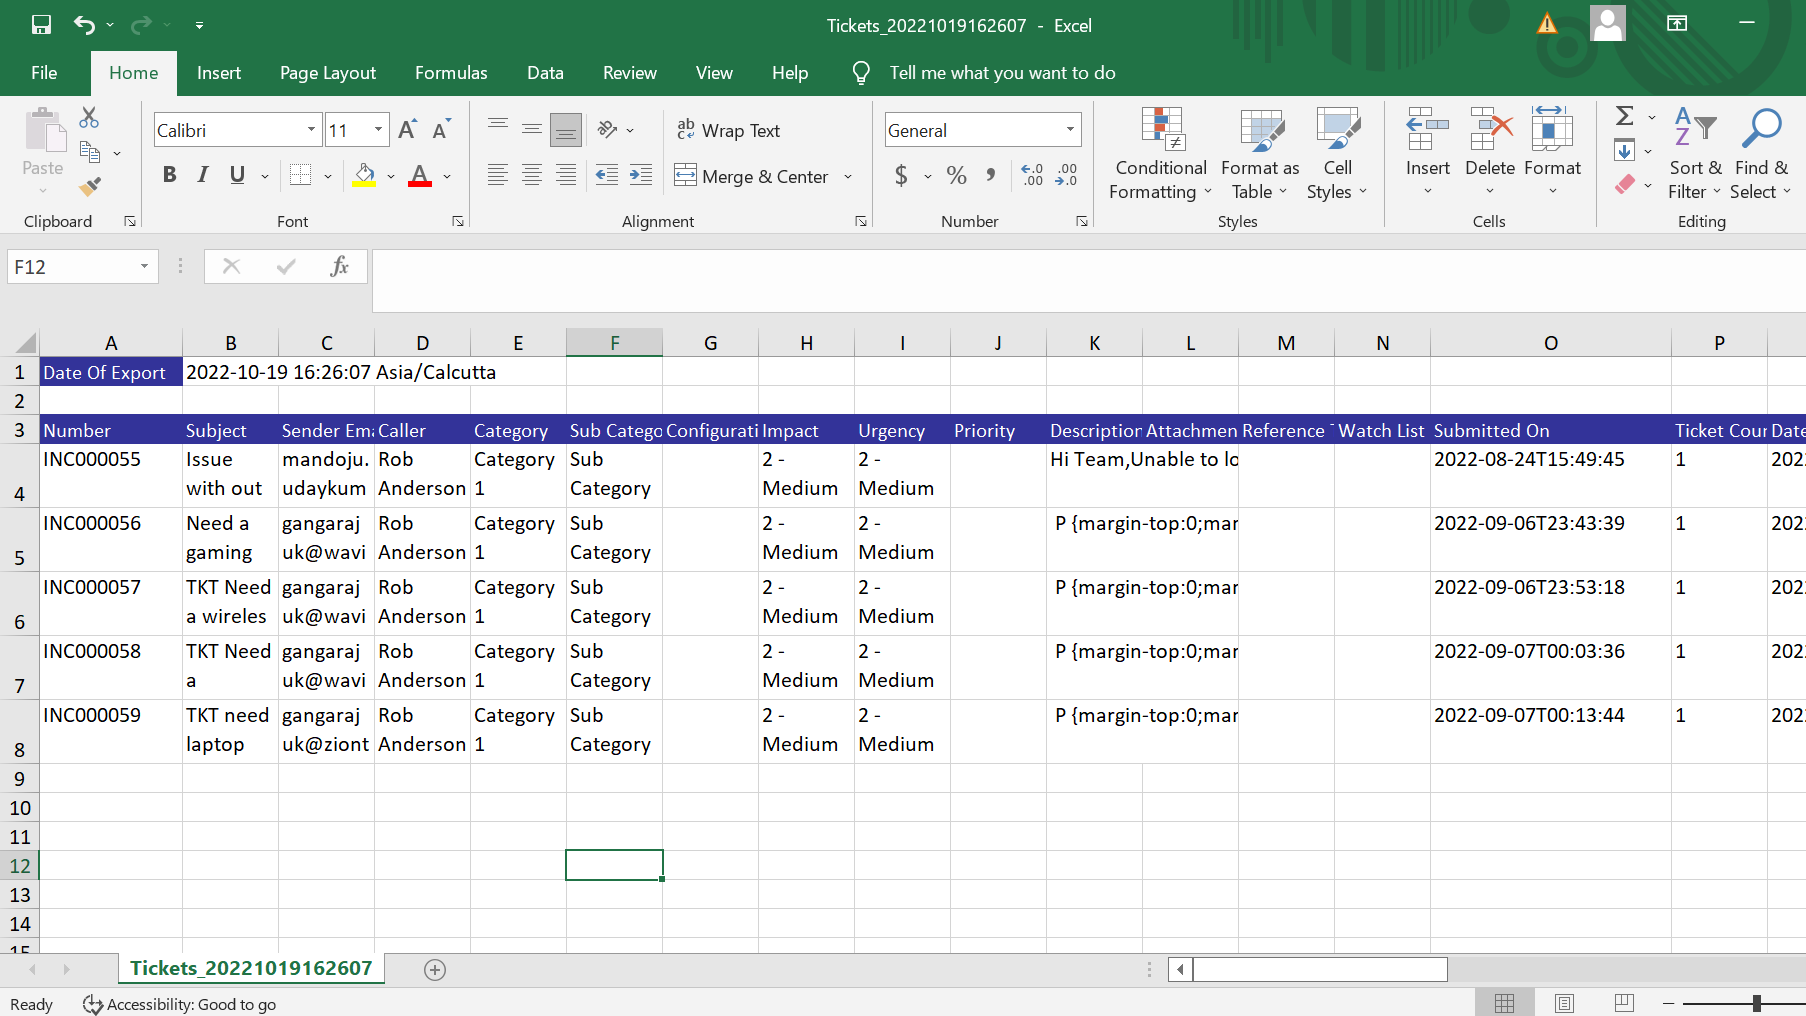
- After clicking on the link, Excel sheet with data and template will be downloaded in your system. Refer below image of excel sheet after download.

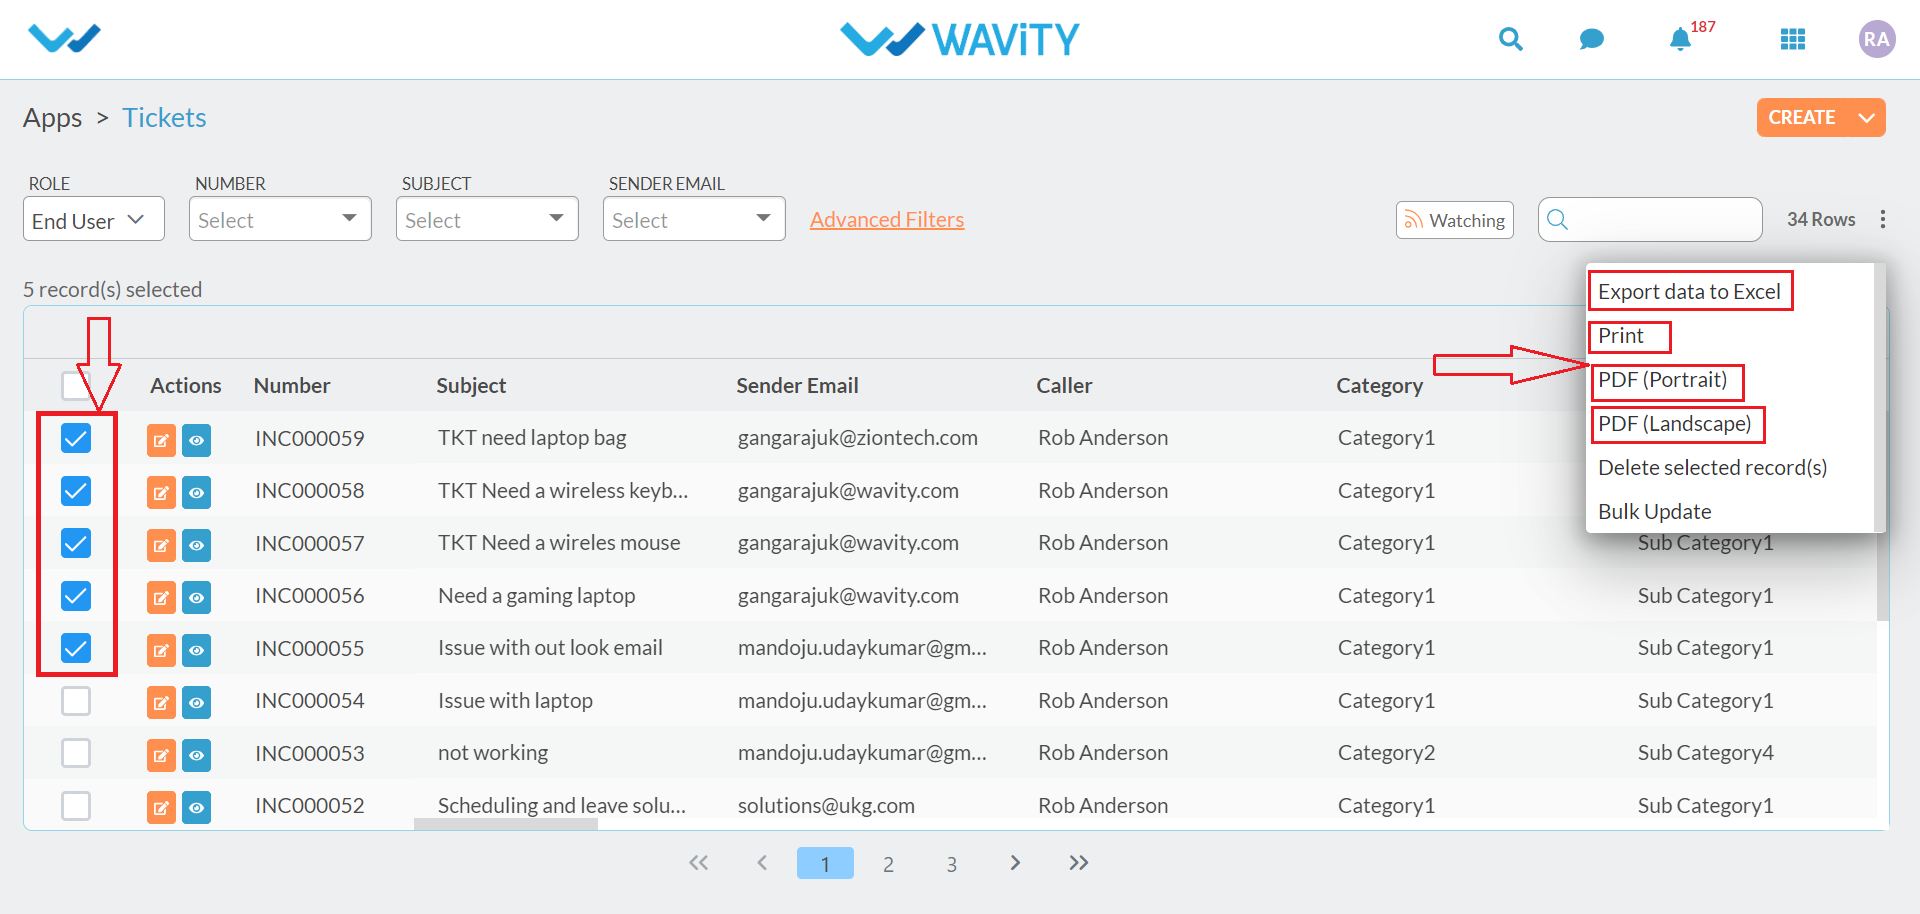
- Export of Selected data to Excel & PDF formats is also available in the platform. Click and check all the data (Left corner) which is selected to be exported and click export data to excel. Only the selected file with data will be downloaded.
Export of Selected data to Excel: With this function, you can export only the selected data (as shown below) of the application in a new Excel sheet.
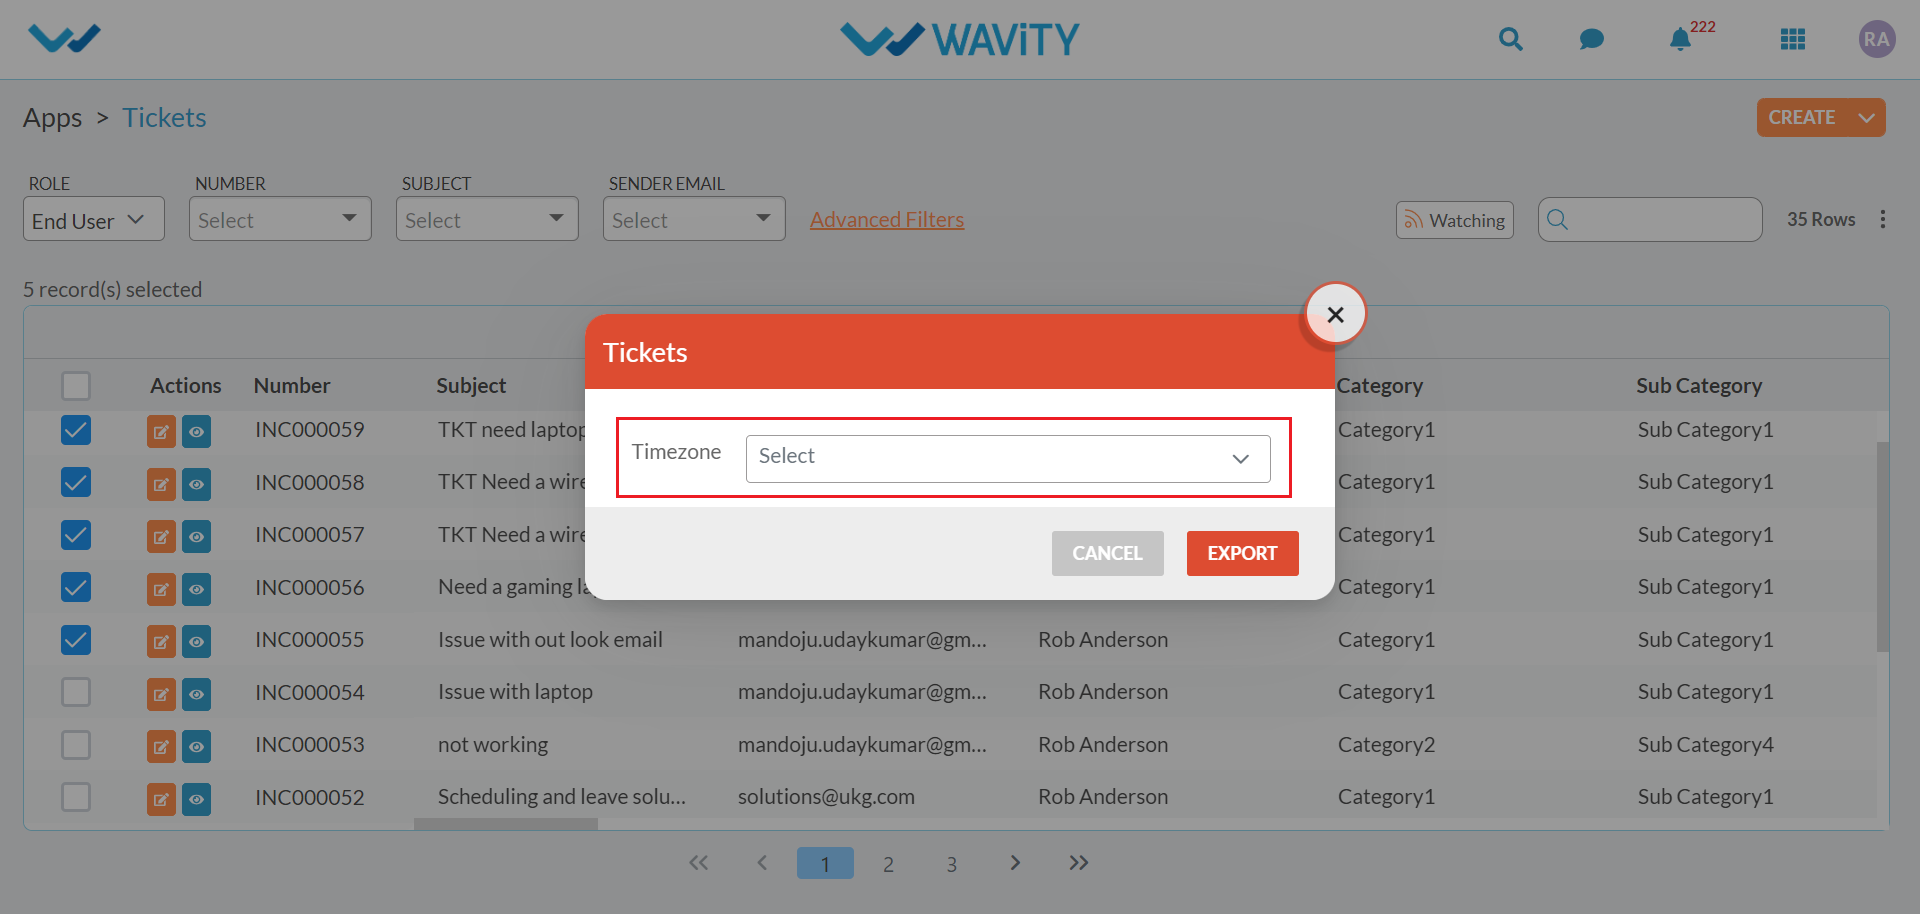
- After clicking on Export data to excel, Select the timezone of your organisation using the dropdown as shown below
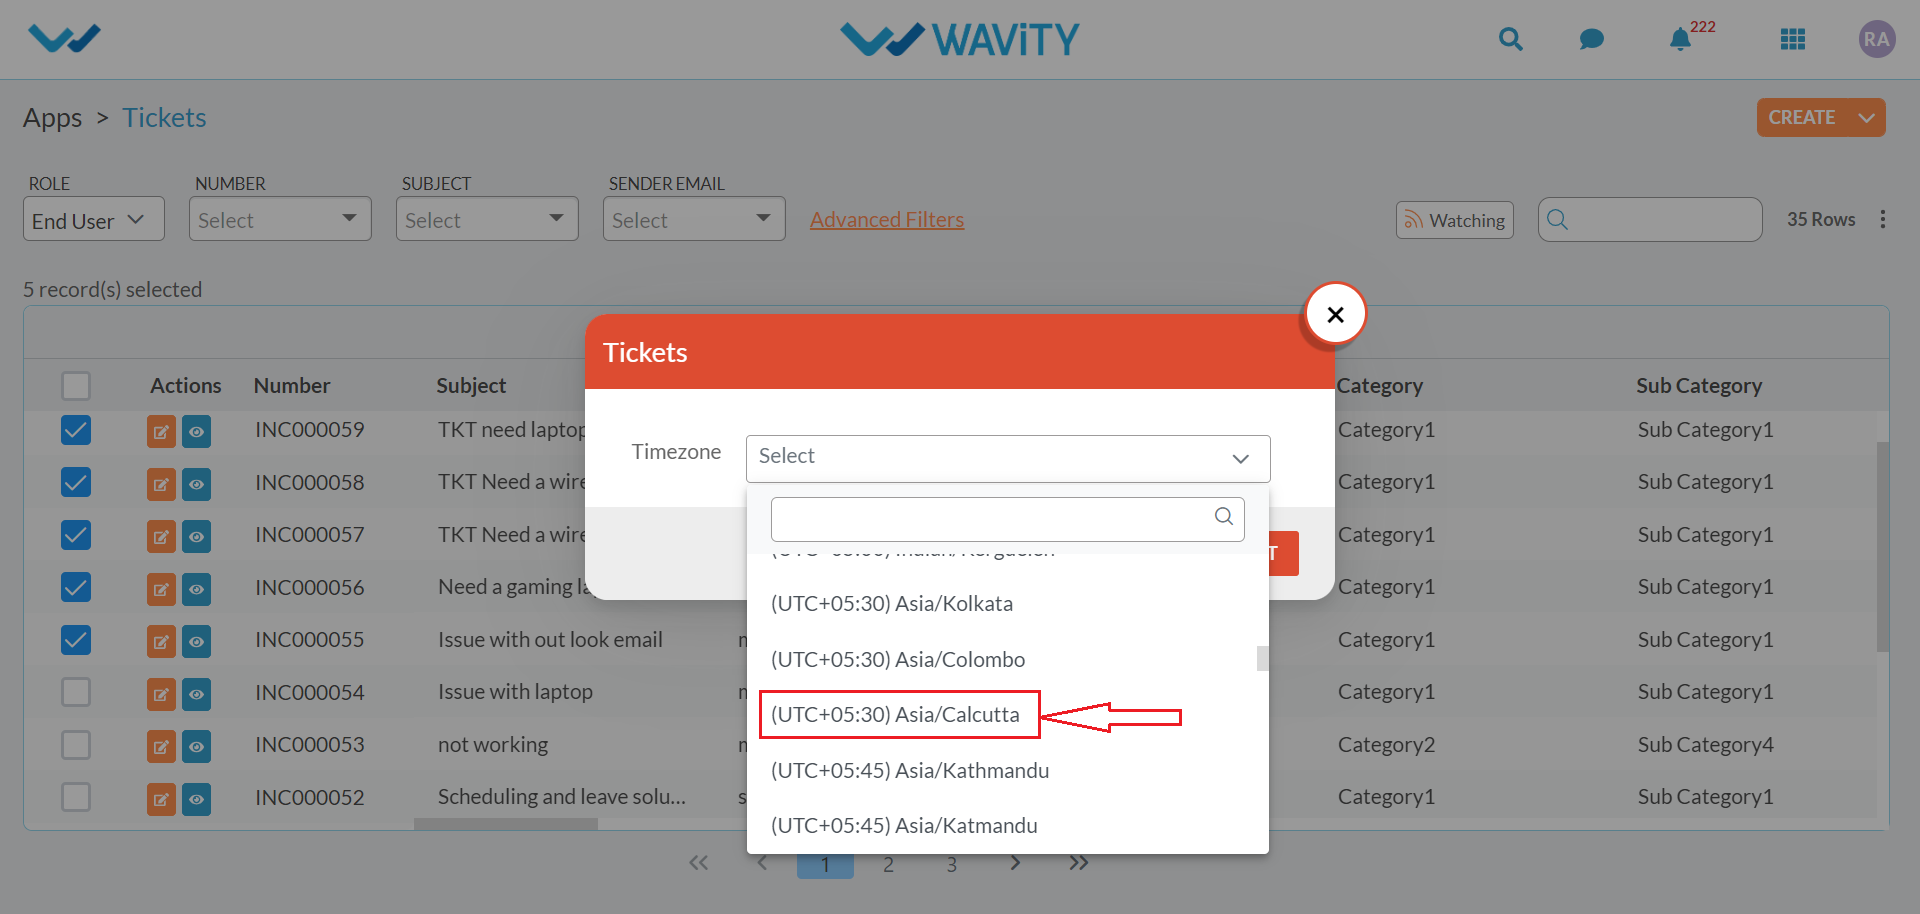
- If your organisation is using Calcutta timezone. Select the Asia/Calcutta timezone as shown below
- After selecting your organisation timezone, Click on Export

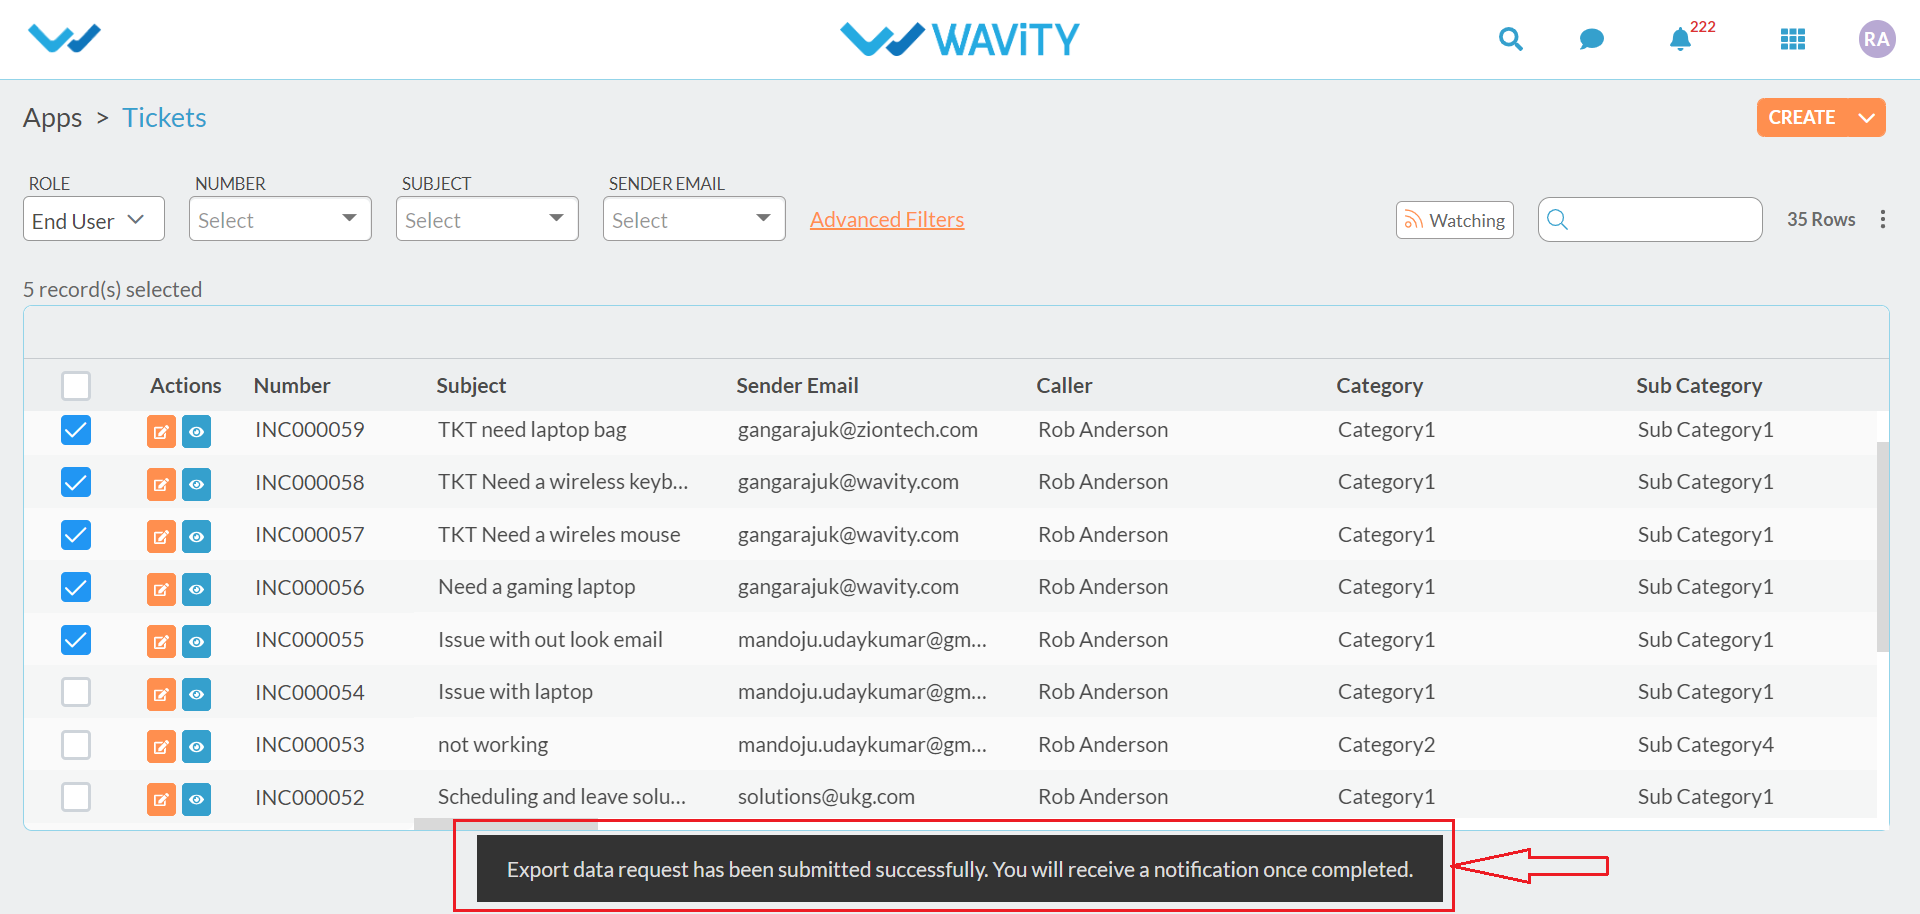
- If export data is successfully completed, you will receive a message in the platform as below ‘Export Data request has been submitted successfully’
- Now, Click on the bell icon on the top right corner. All notifications are displayed here. Click on the blue link as shown below to download the excel sheet with selected data.
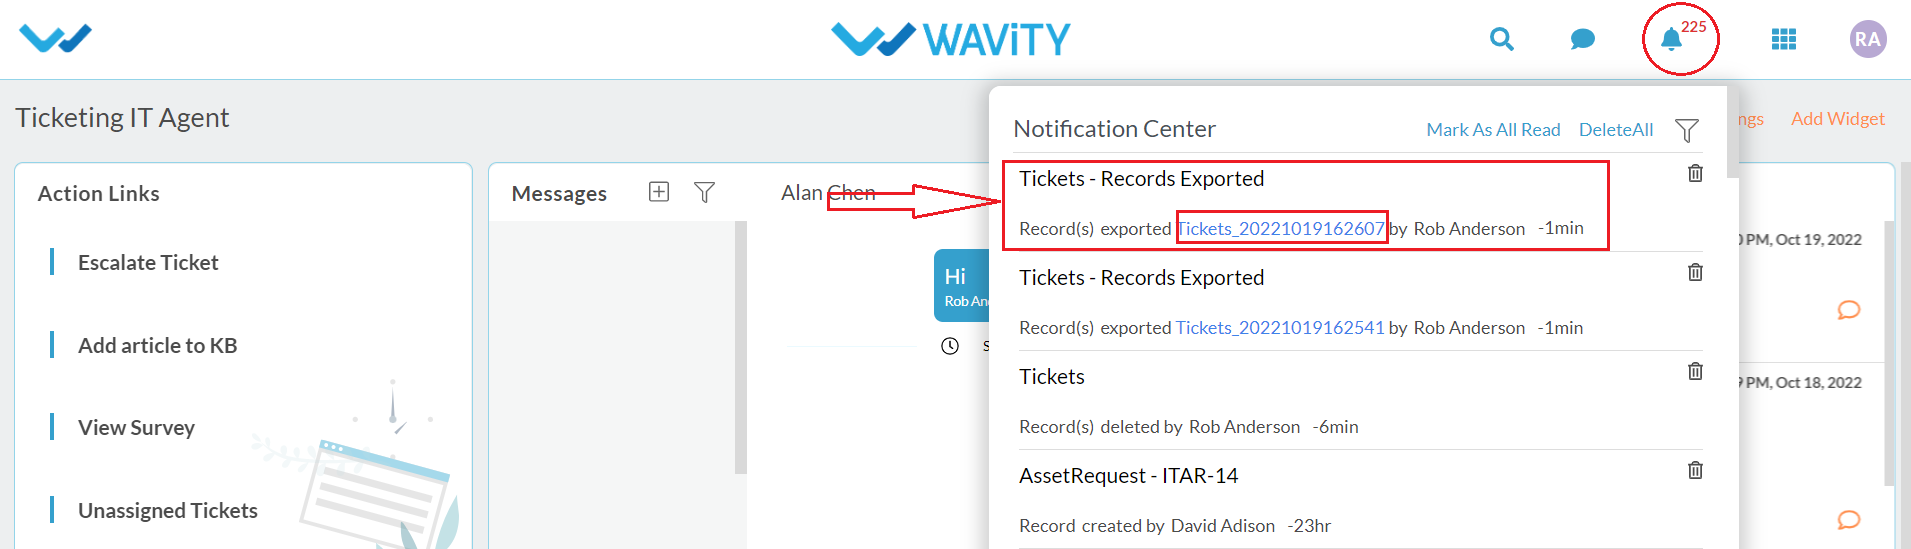
- After clicking on the link, Excel sheet with selected data will be downloaded in your system. Refer below image of excel sheet after download.
Steps for Import Functions:
- Login to Wavity platform. Based on your role you will have access to your dashboard. In the Action links, Click on any application (eg. Procurement). Click on Create tab on right corner. Select ‘from excel’ to import data from Excel sheets. Please refer below image.

- Click on the file from your platform to be uploaded (Imported) into the application. If data is successfully completed, You will receive a message in the platform as below.

- If the file imported is incorrect. Then, you will receive a notification ‘Records import failed’ as shown in the below image. Ensure the following conditions to avoid failure of imported file; 1) Ensure all the data and templates is matching with the application selected, 2) Ensure all the required fields are filled in correct formats, 3) Ensure the all the column data matches with the template column, 4) Ensure that the first row data matches with the first row of Template sheet.

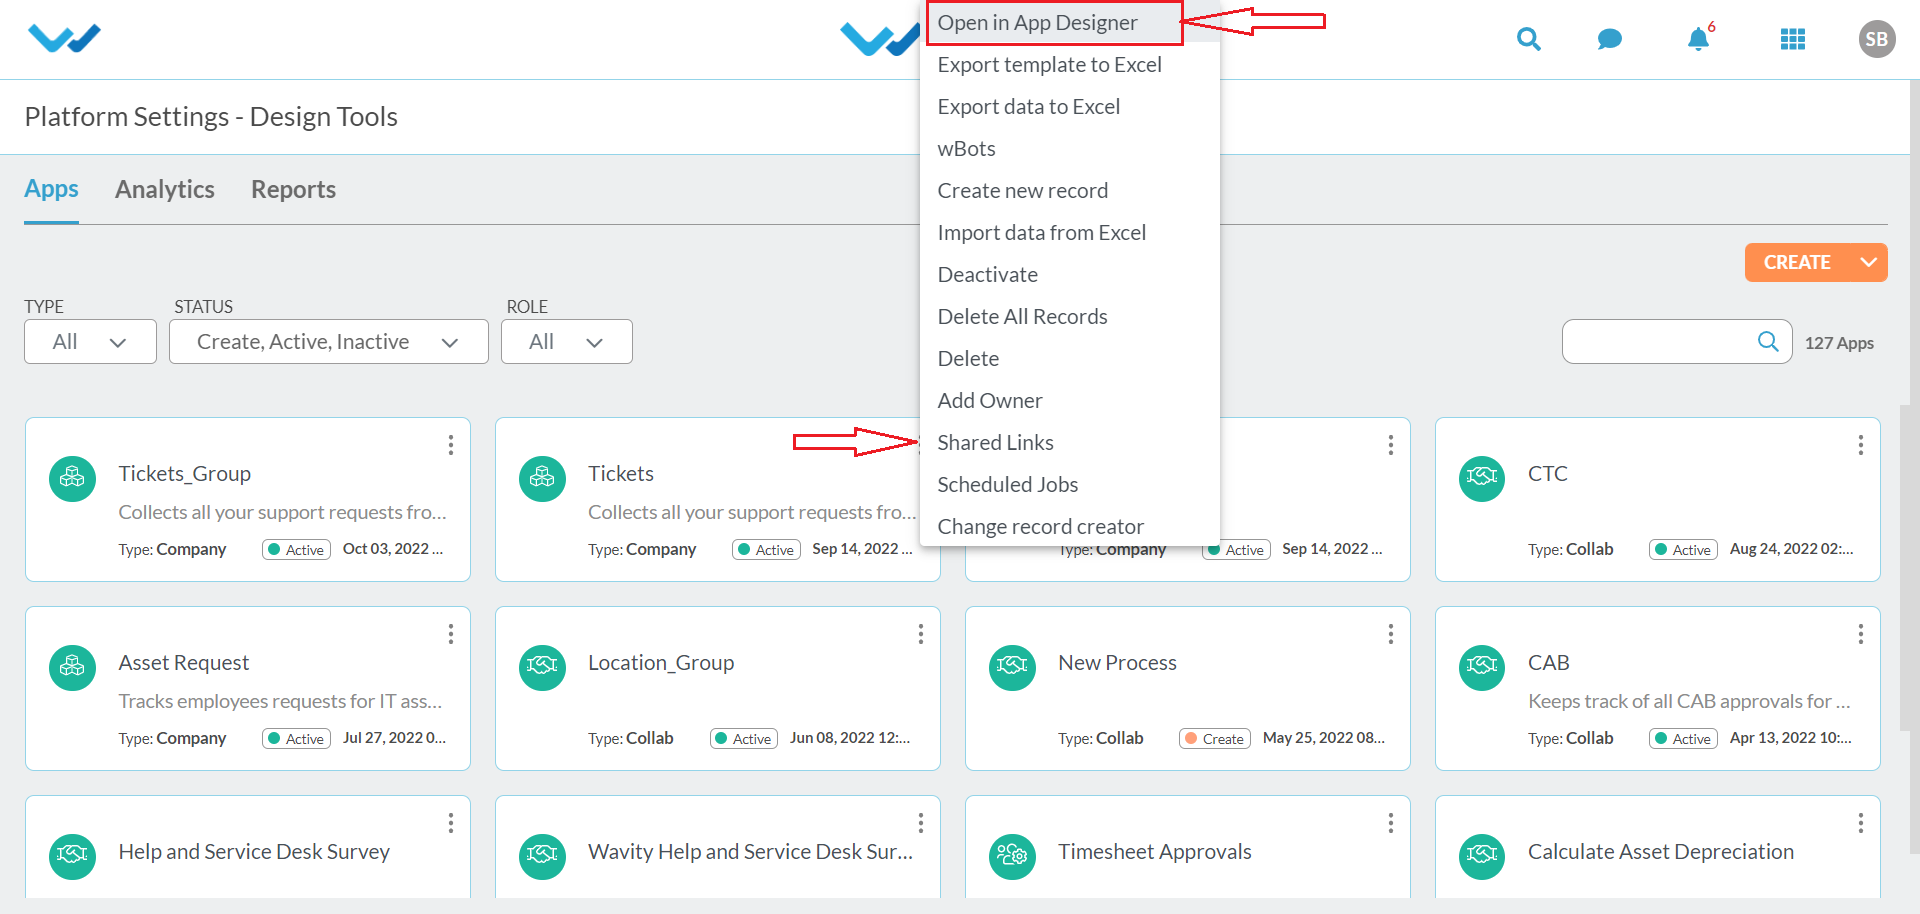
- Advanced settings for import function. Only Admin (if authorised) can execute advanced settings for Import function. Click on the 3 vertical dots on right side corner of Tickets application. Select ‘Open in APP Designer’.
- Click on the icon as shown below.
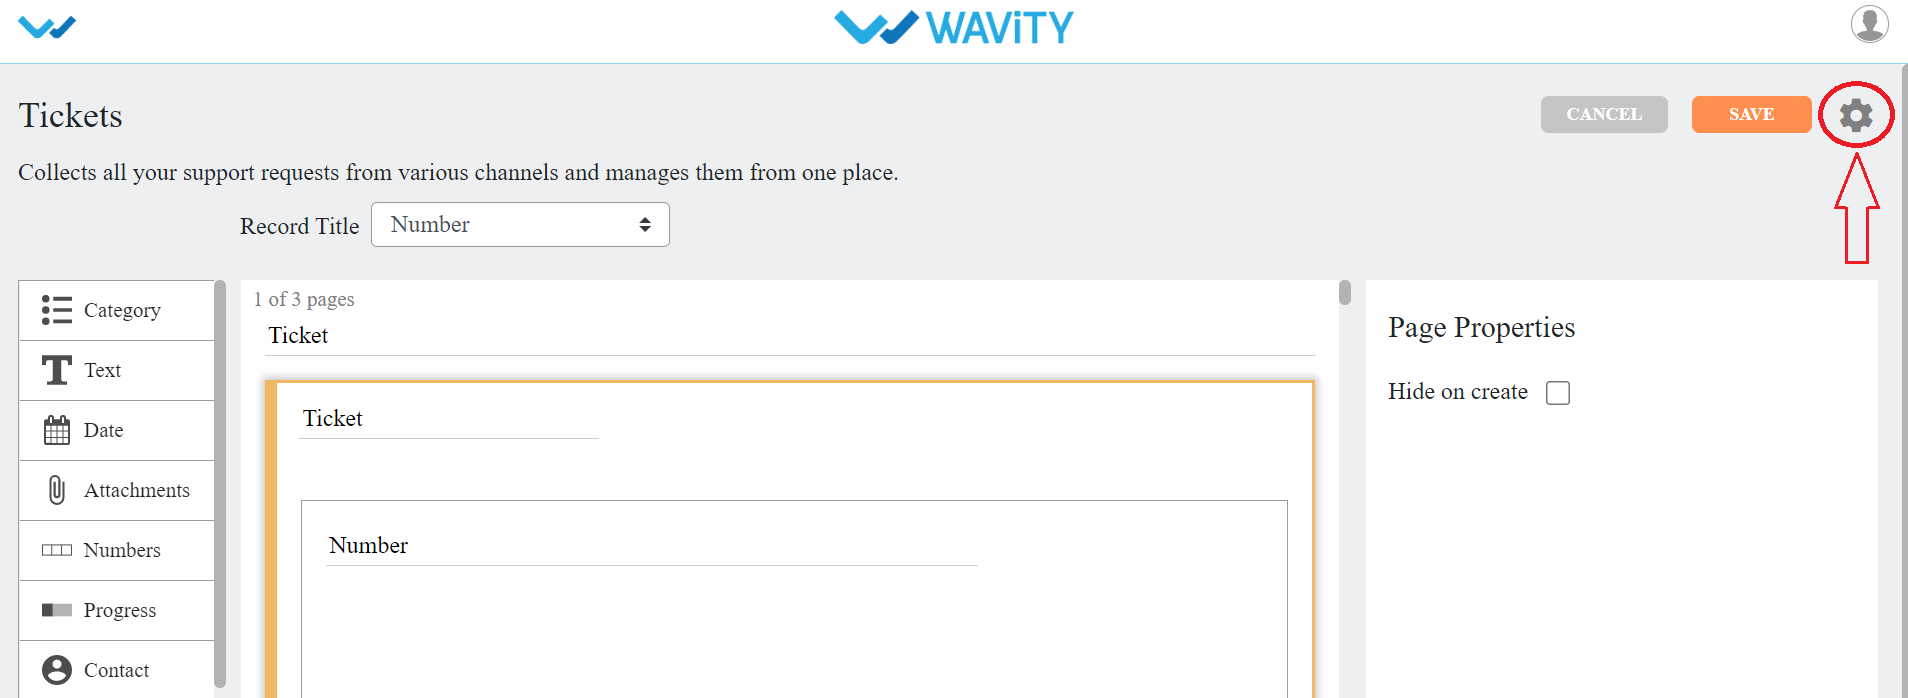
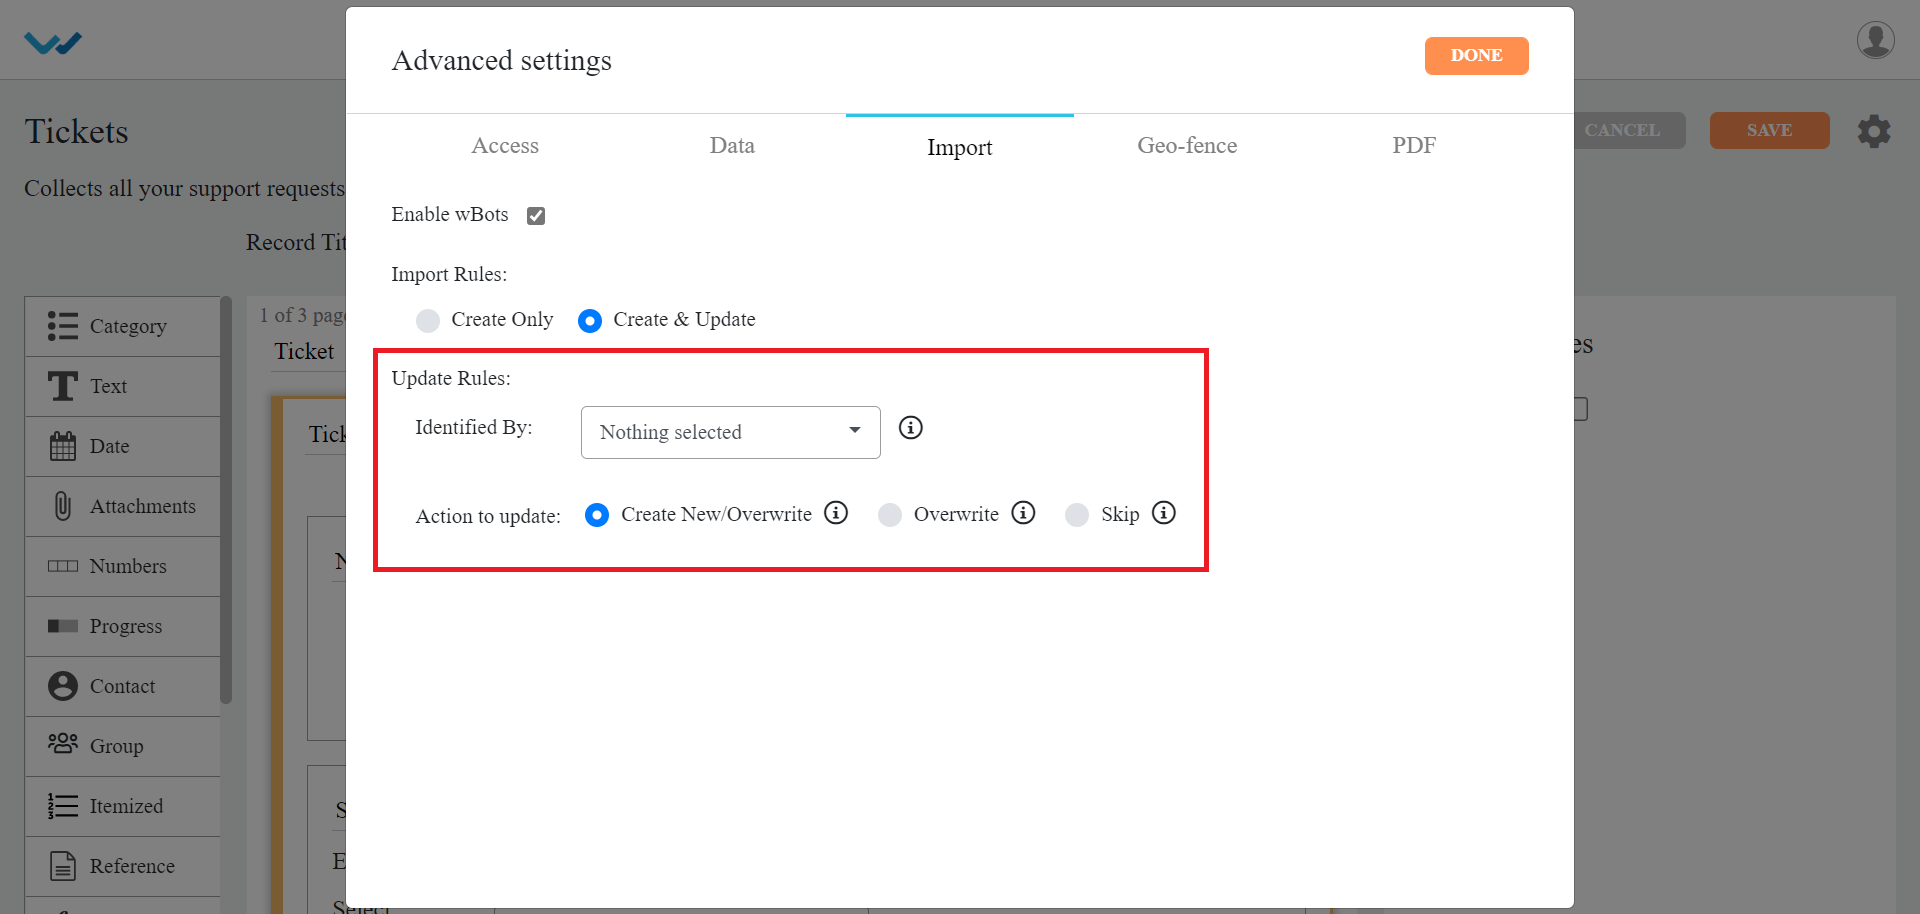
- Click on advanced settings as shown below.

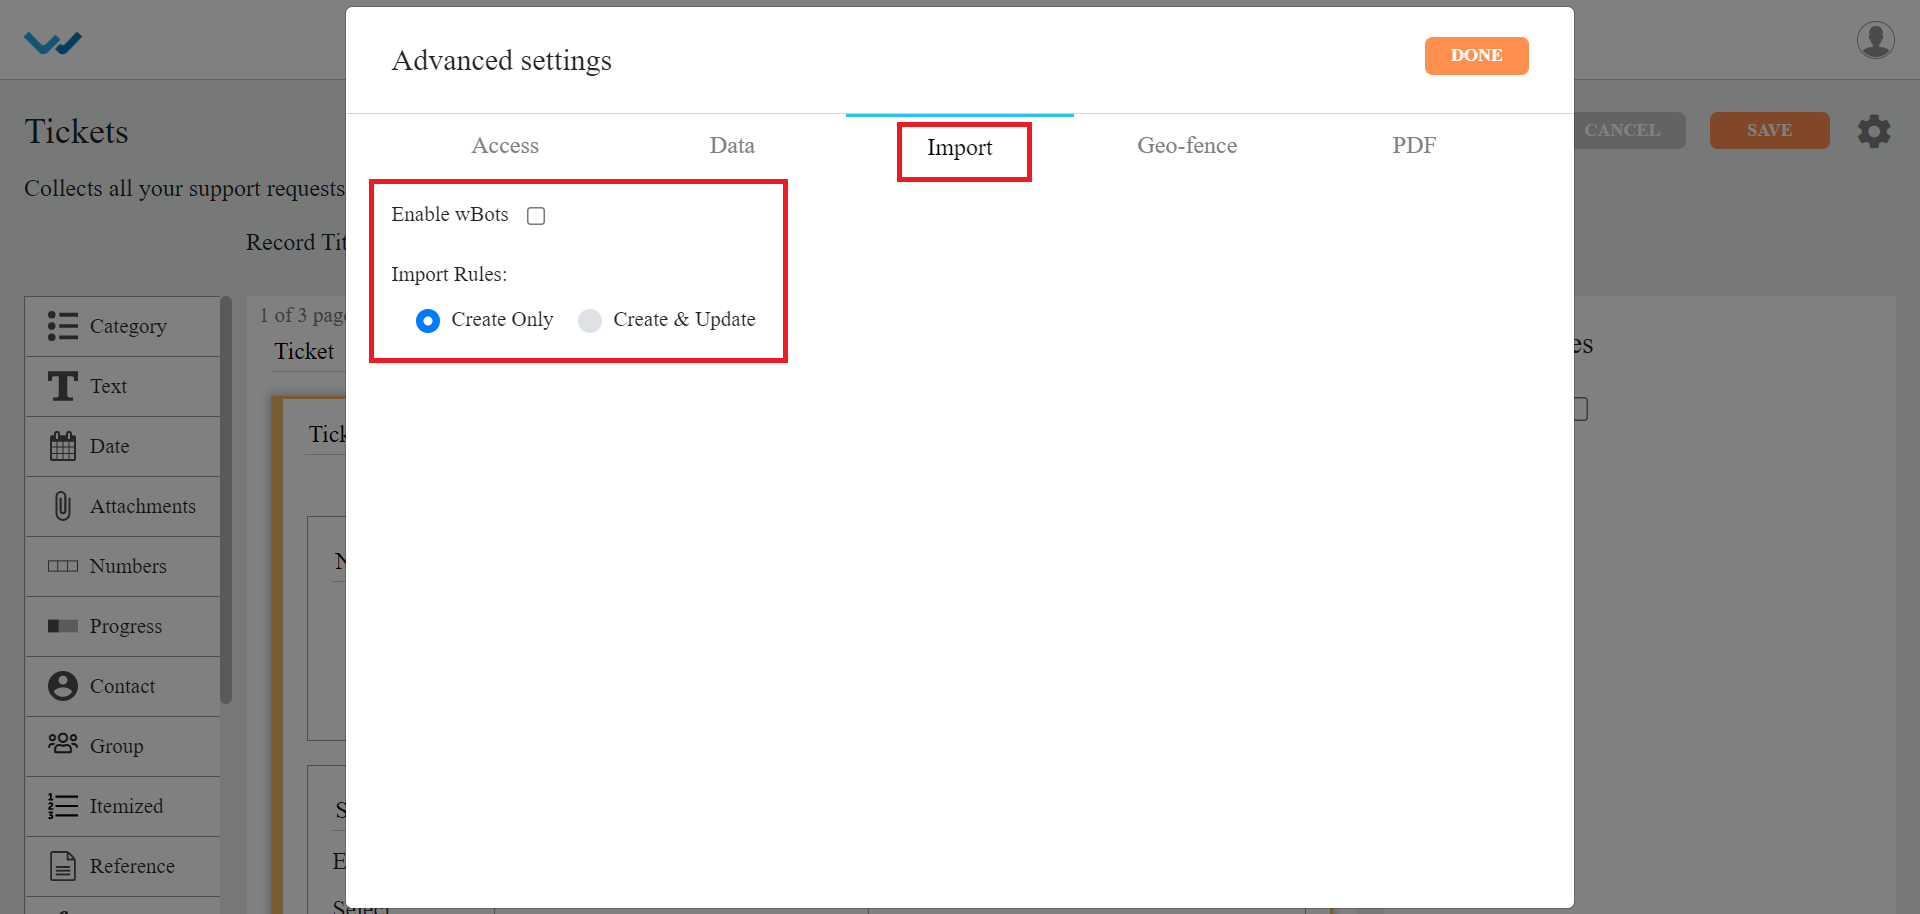
- Select Import tab. Here, Advanced setting for Imports on any applications can be executed. Click on Enable Wbots (IF REQUIRED) to enable bots of the applications for import function. In the Import rules, You can select ‘Create Only’ tab or ‘Create & Update’ tab.
Create Only: This function will only create new records
Create & Update: This function will create new records and update or overwrite existing records
- On selecting ‘Create & Update’ tab. You can define the update rules as defined below:
Identified by: To check whether the record exist or not, based on selected control
Create New/Overwrite: If records exists, overwrite the values otherwise create new record
Overwrite: If record exists, overwrite the record values
Skip: If record exists, skip to create otherwise create new record.