Creating a Request Form in the Customer Self-Service Portal
- A customer self-service portal allows users to manage their support requests, track ticket statuses, and submit new issues all in one place. It also integrates with the knowledge base, offering relevant articles, FAQs, and troubleshooting tips based on the customer’s queries.
- Only an Admin in your organization can create or configure a request form in the portal.
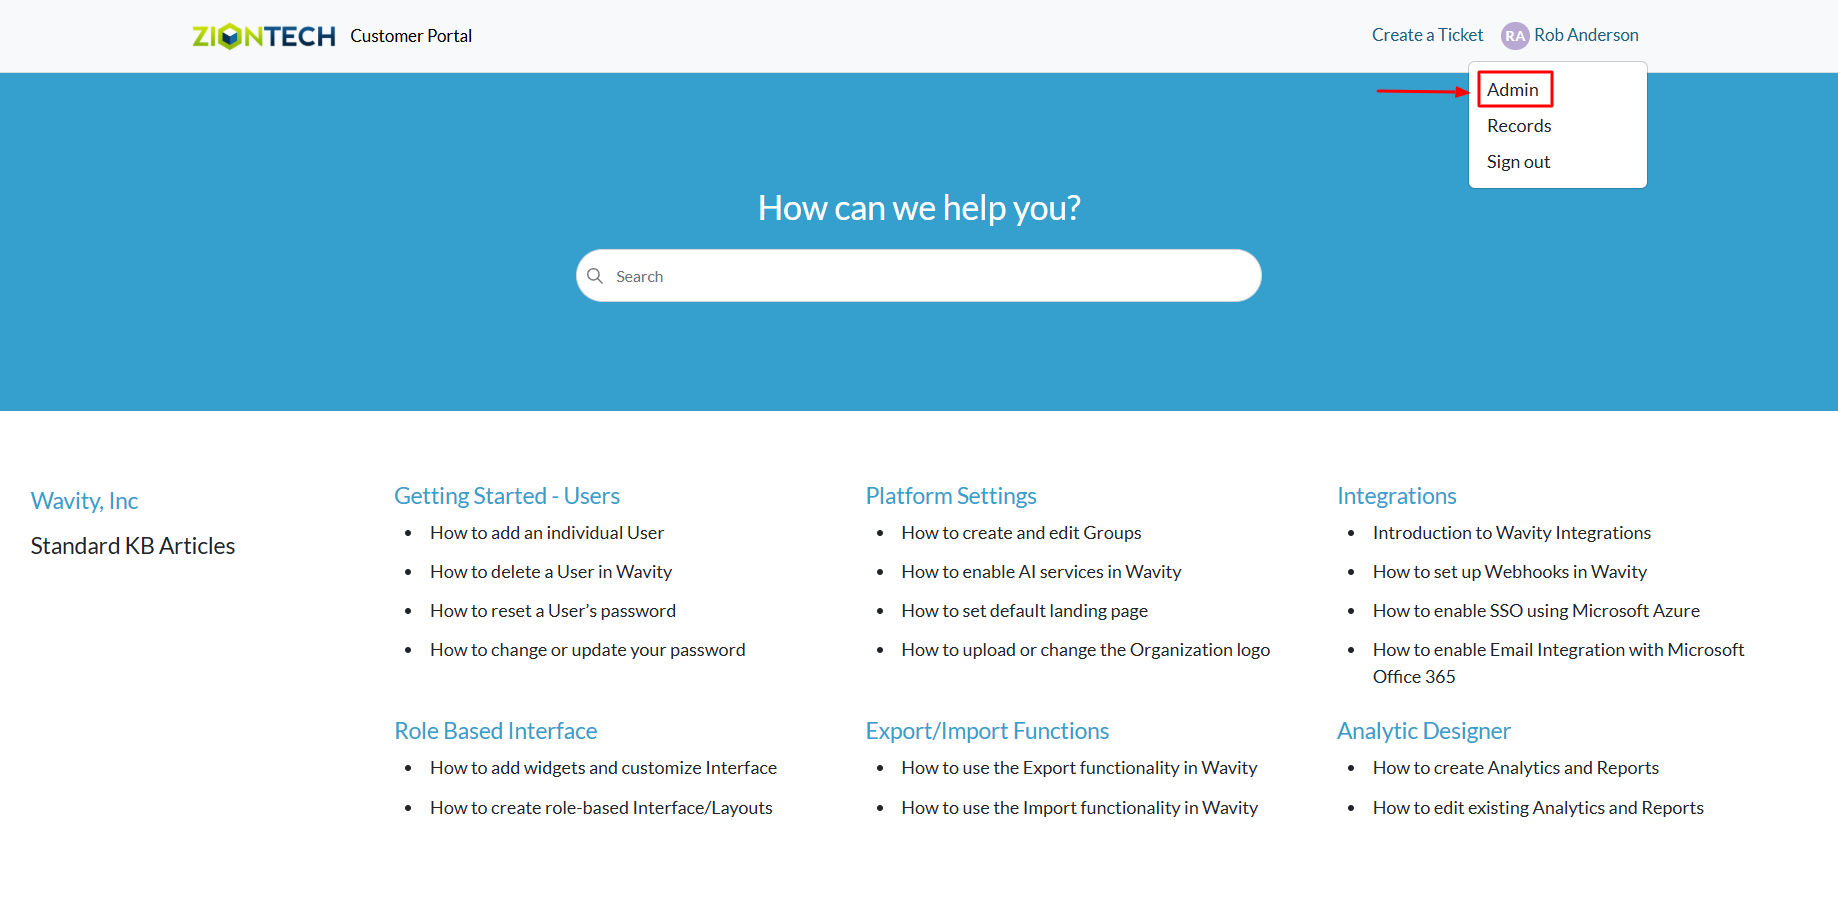
- To begin, click on the Portal icon as shown in the image below.

- Select Admin since you’ll be setting up the request form.
- The Customer Portal Admin Page will open, showing any existing request forms. You can edit these or create a new one.
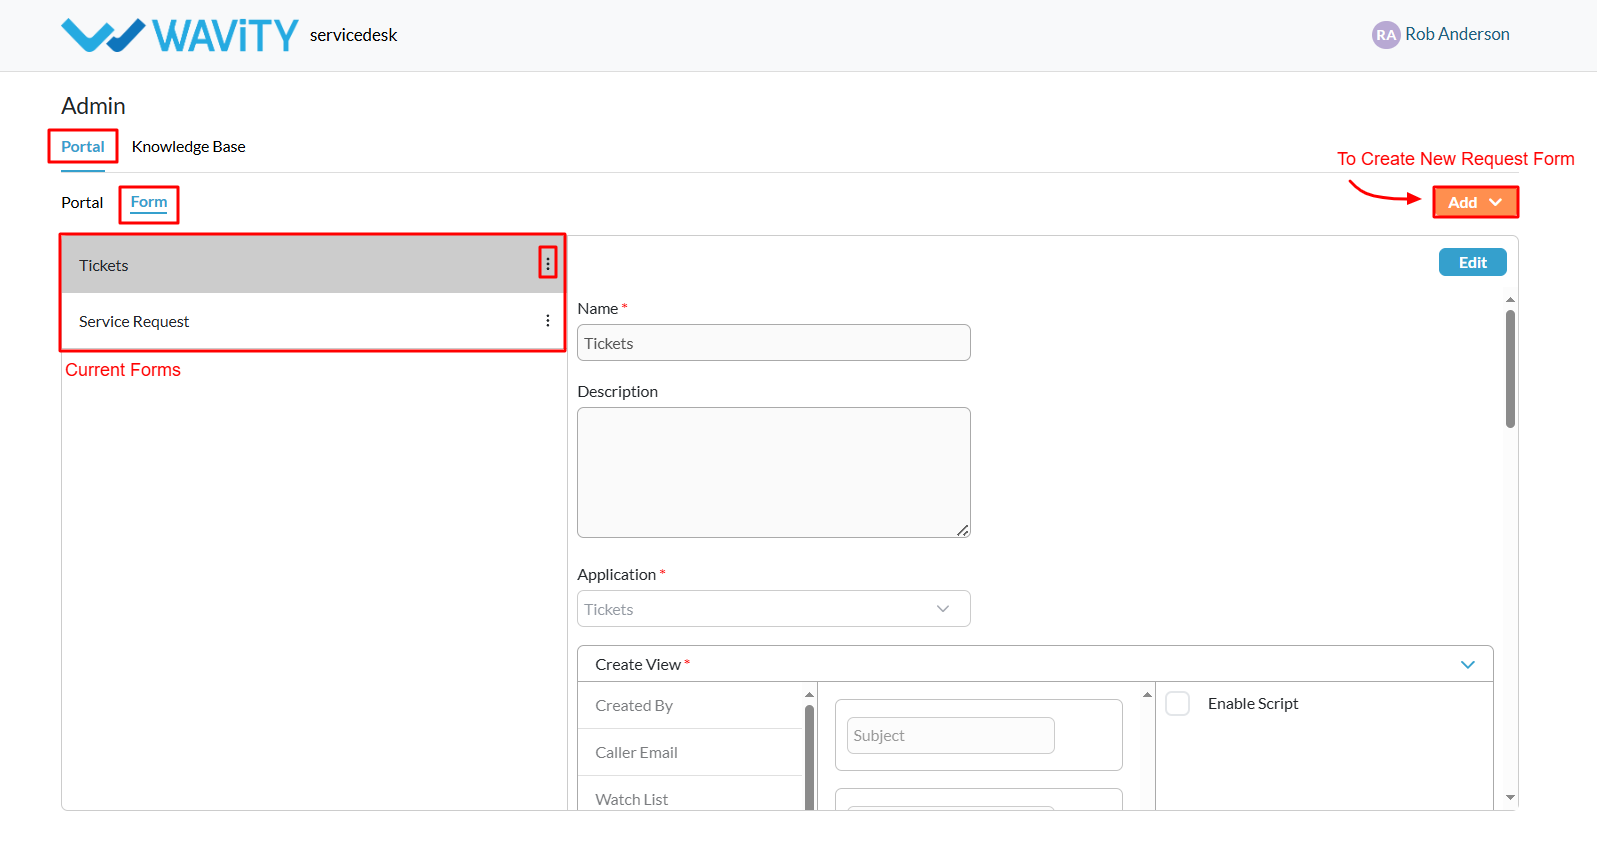
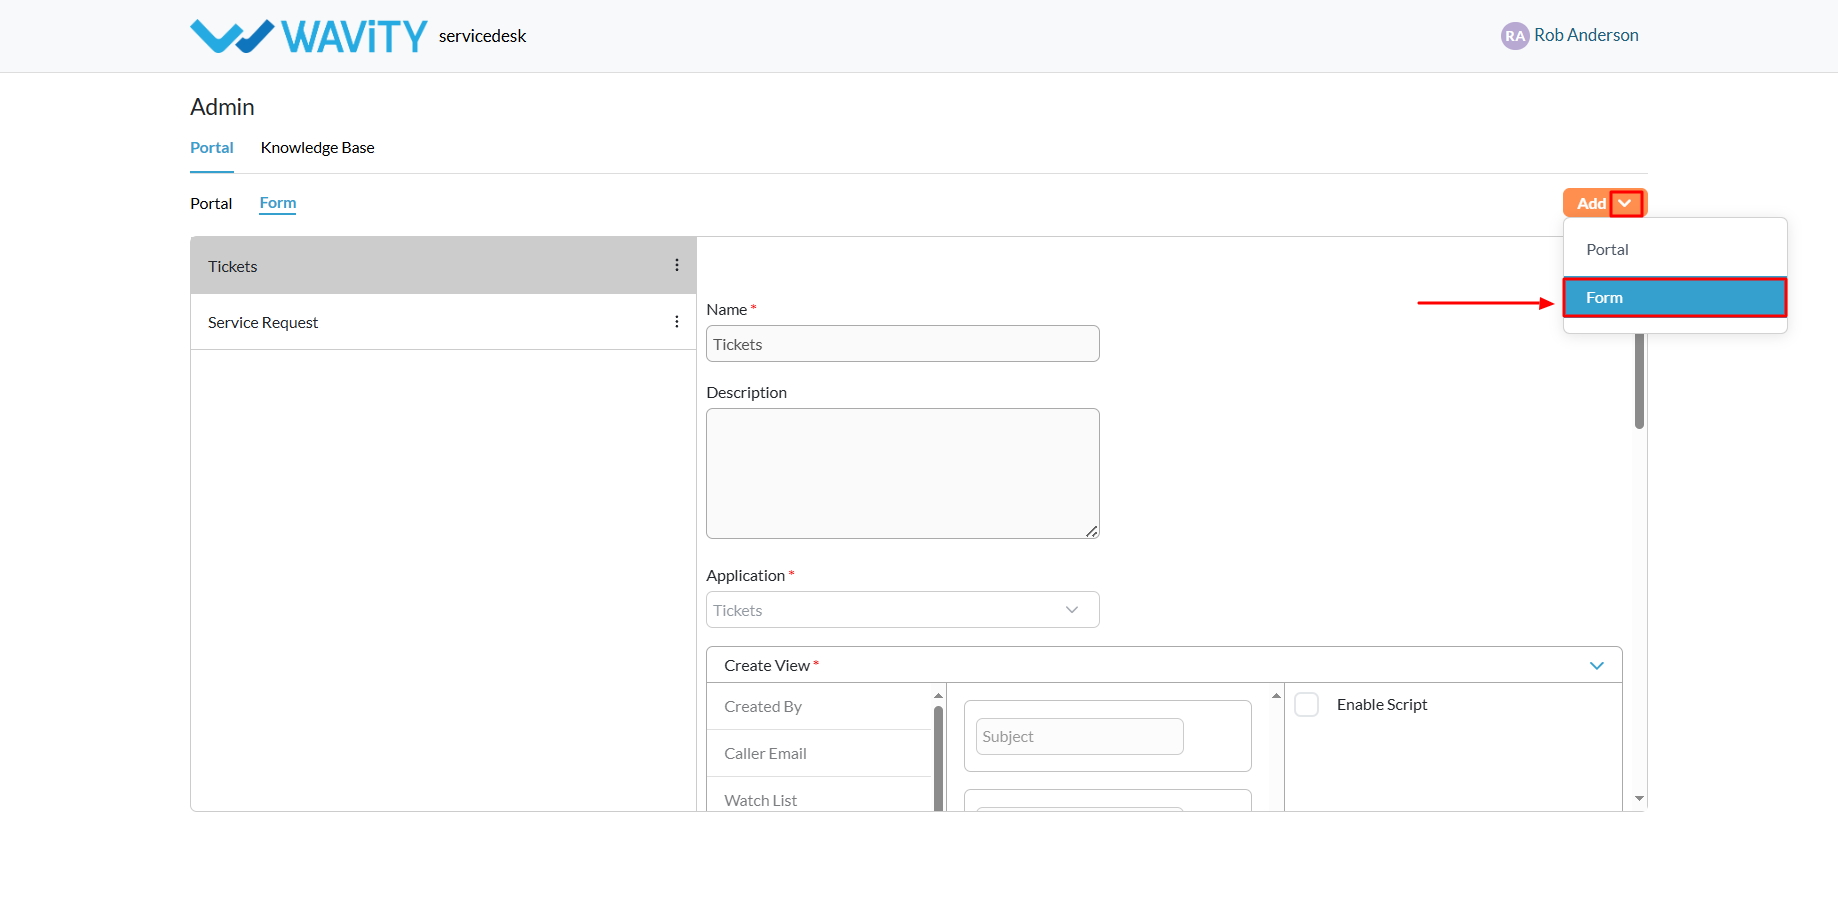
- Click on the Add button and choose Form to begin creating a new request form.
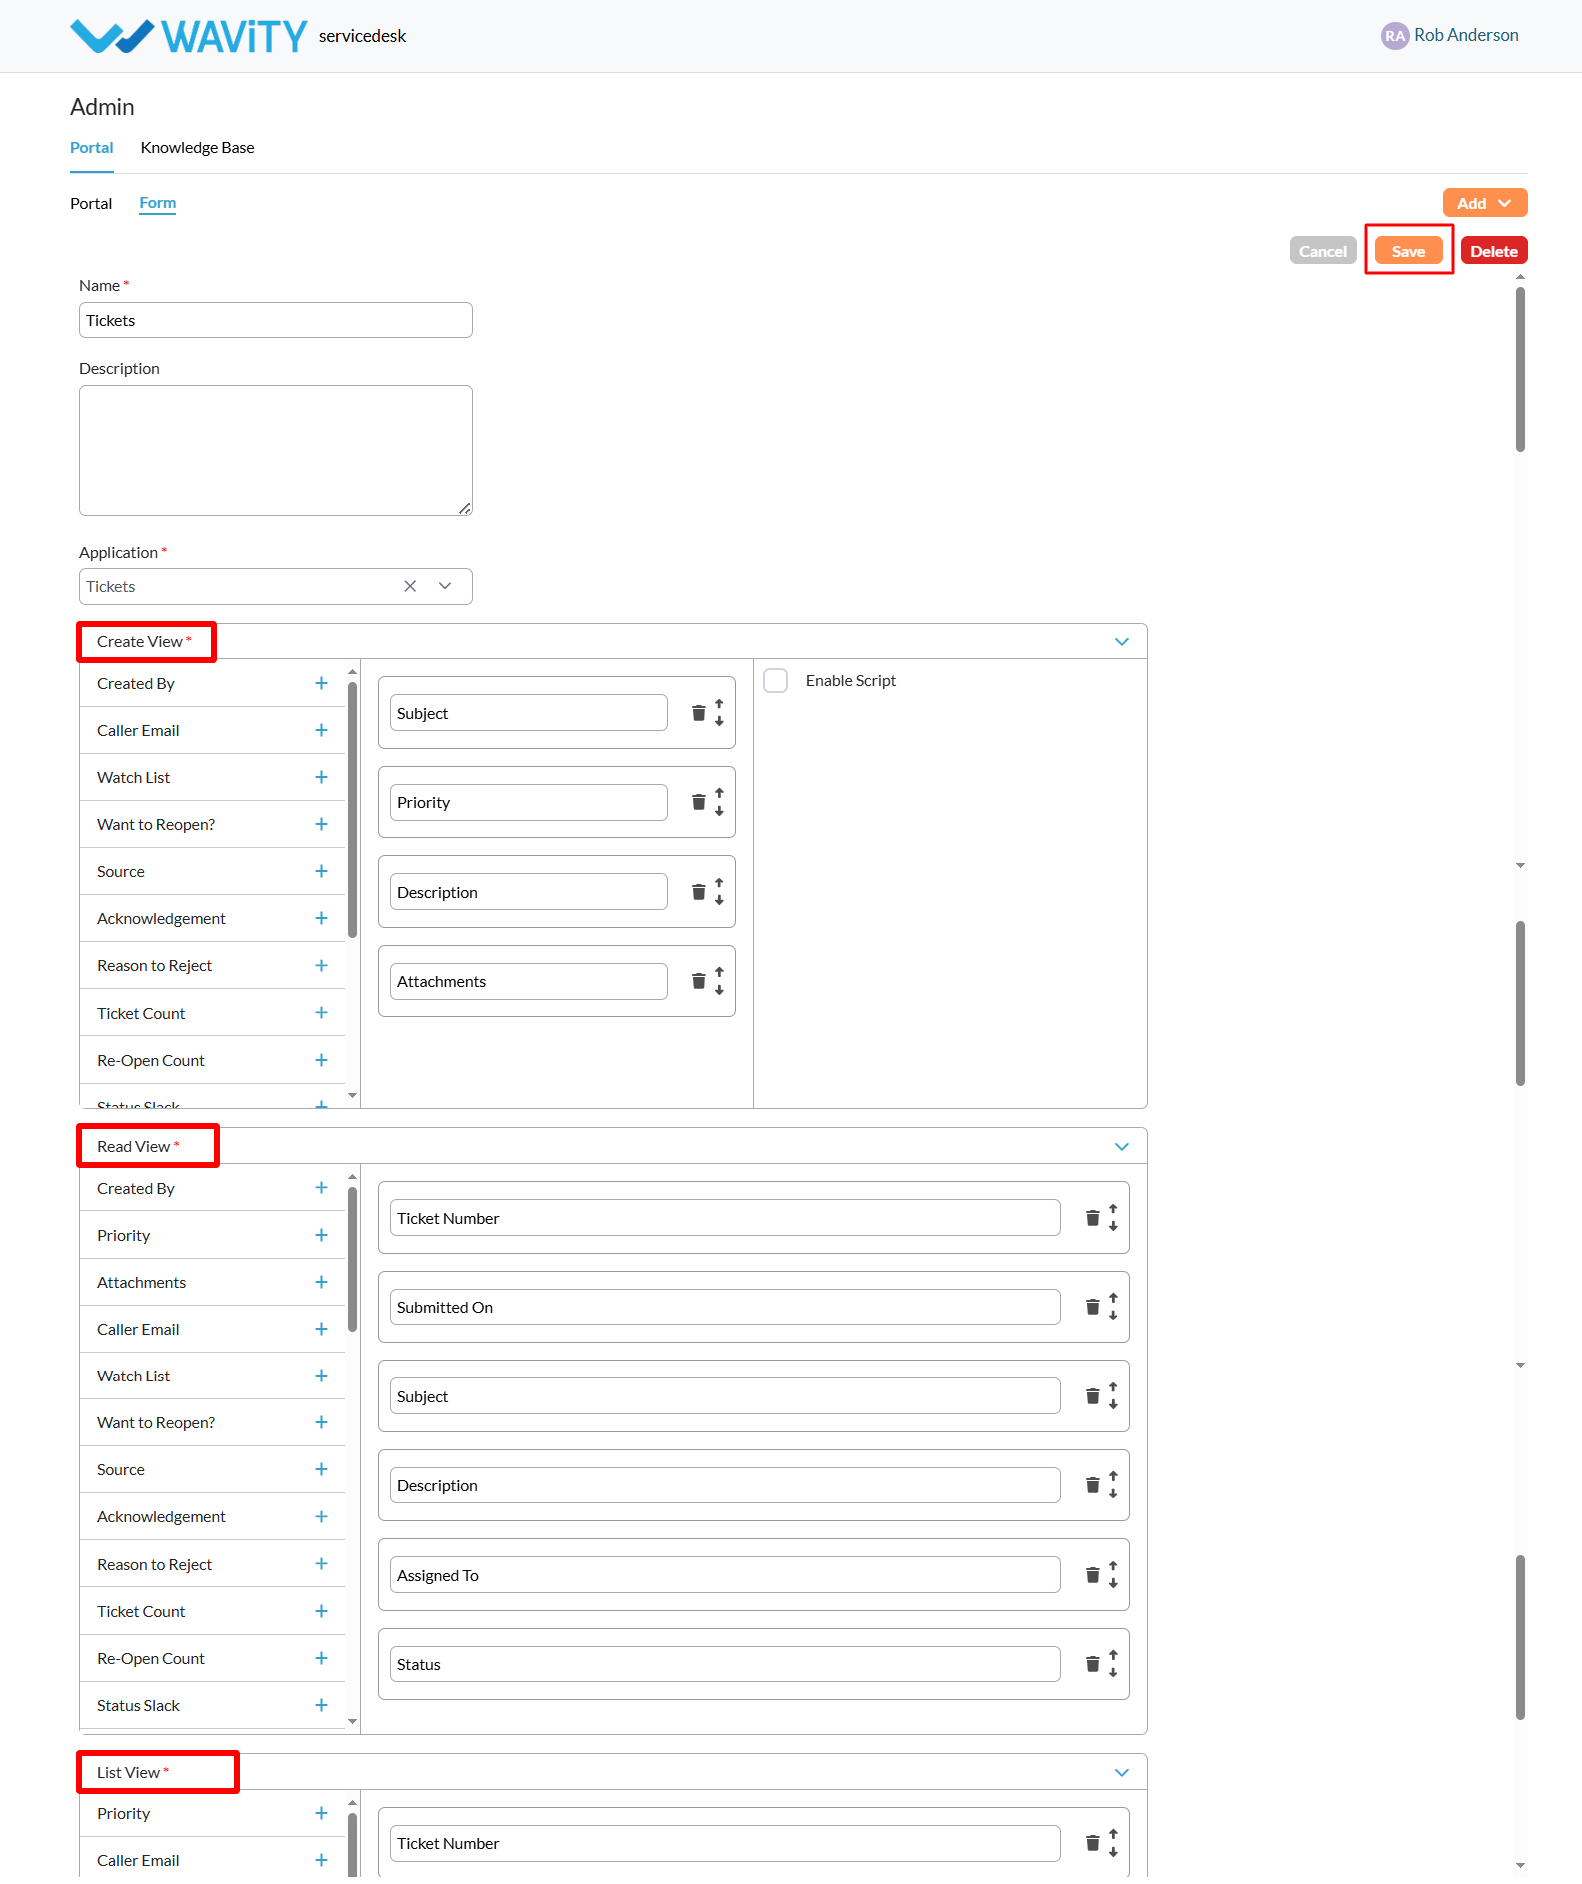
- Provide a name and description for the form.
- Select the appropriate application from the Wavity tenant.

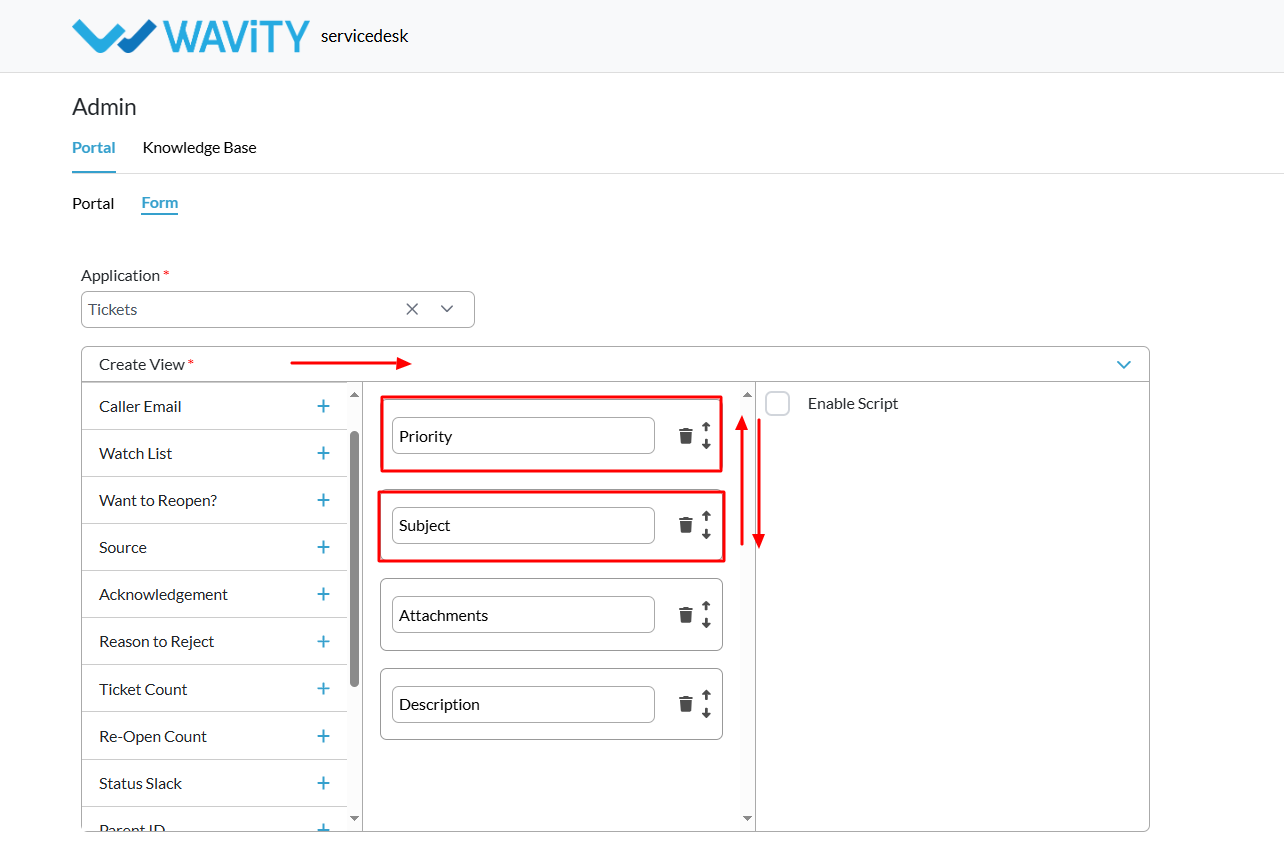
- Once an application is selected, the Create View will appear. This is where you configure the fields that users must complete when submitting the form.
- All available fields from the chosen application will be listed on the left. Click the “+” icon to add the desired fields to your request form.

- Added fields will appear in the center section. You can rearrange them as needed by dragging and dropping.
- You can also configure how the fields appear in Read View and List View, ensuring consistency across the portal
- Once everything is set up, click the “Save” button to finalize and publish your request form.